Create a Learning Experience
Create from scratch
Clone Learning Experience
To create your own Learning Experiences you will have two options: cloning or duplicating ready-made experiences, already designed by experts to launch and work with participants, or creating one completely from scratch. Both options give you the opportunity to customize and modify them as you wish.
Create from scratch
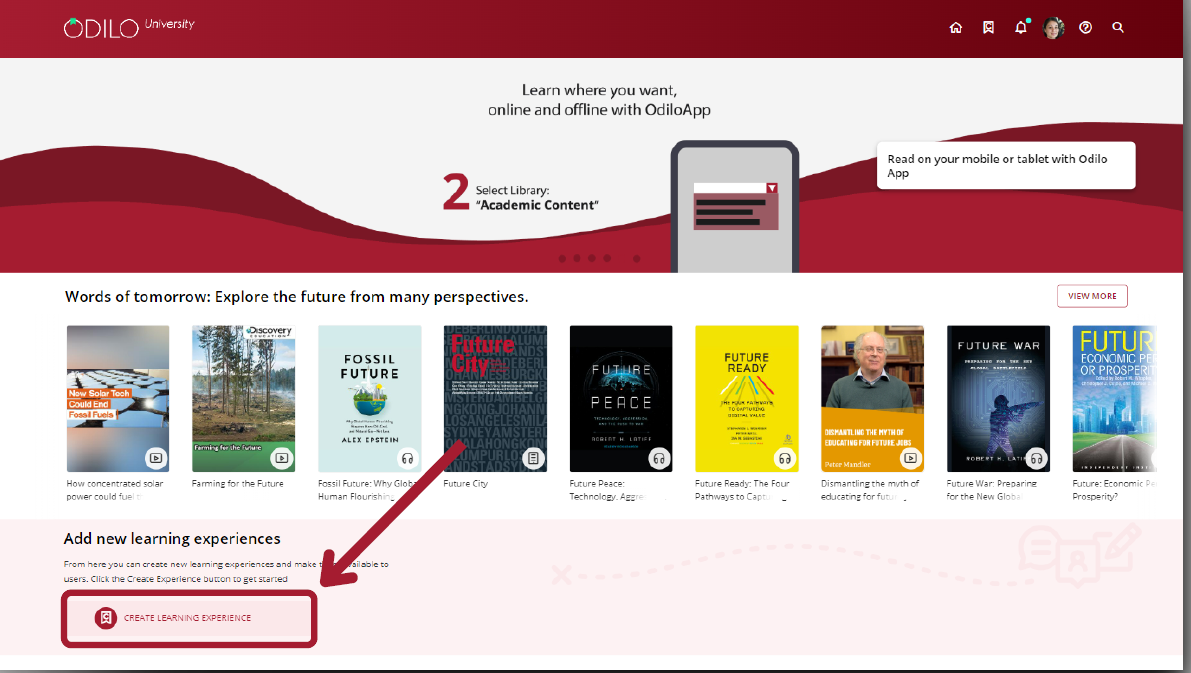
Click on the “Create learning experience” found below the first carousel and choose the type of experience you want to create.

*If you cannot see this button, access “Learning experiences”, from your user area, click on “Go to learning experiences. After that, re-enter your Learning Ecosystem.

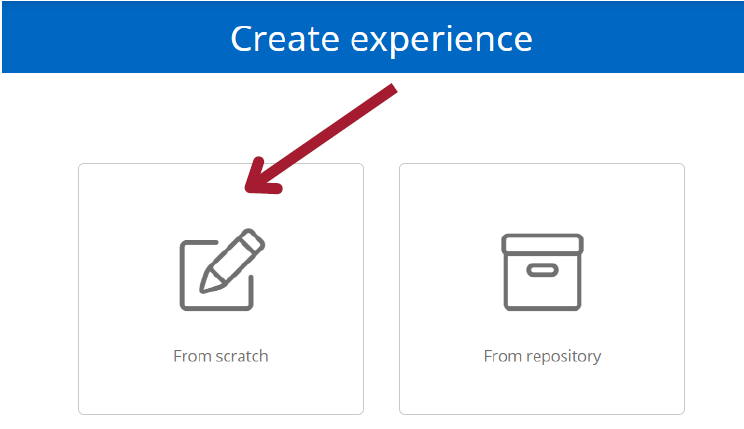
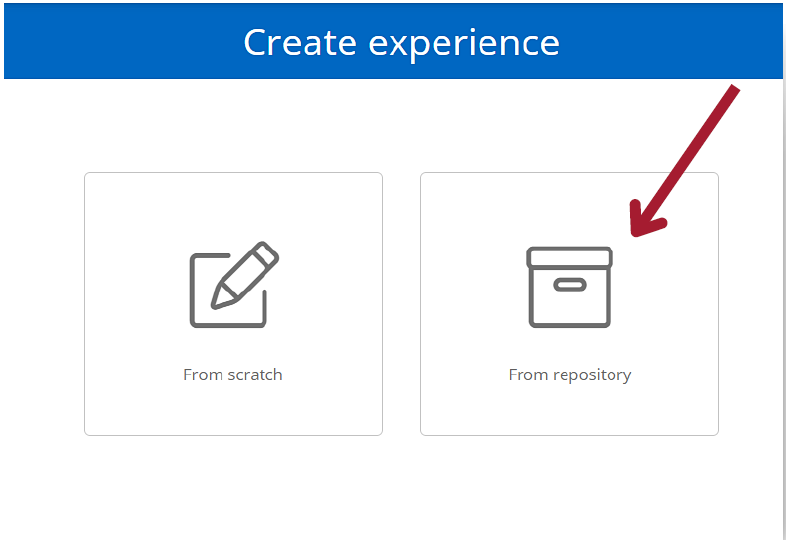
Select the option “From scratch” to create a new, empty experience.
You can configure the experience by completing the required information.
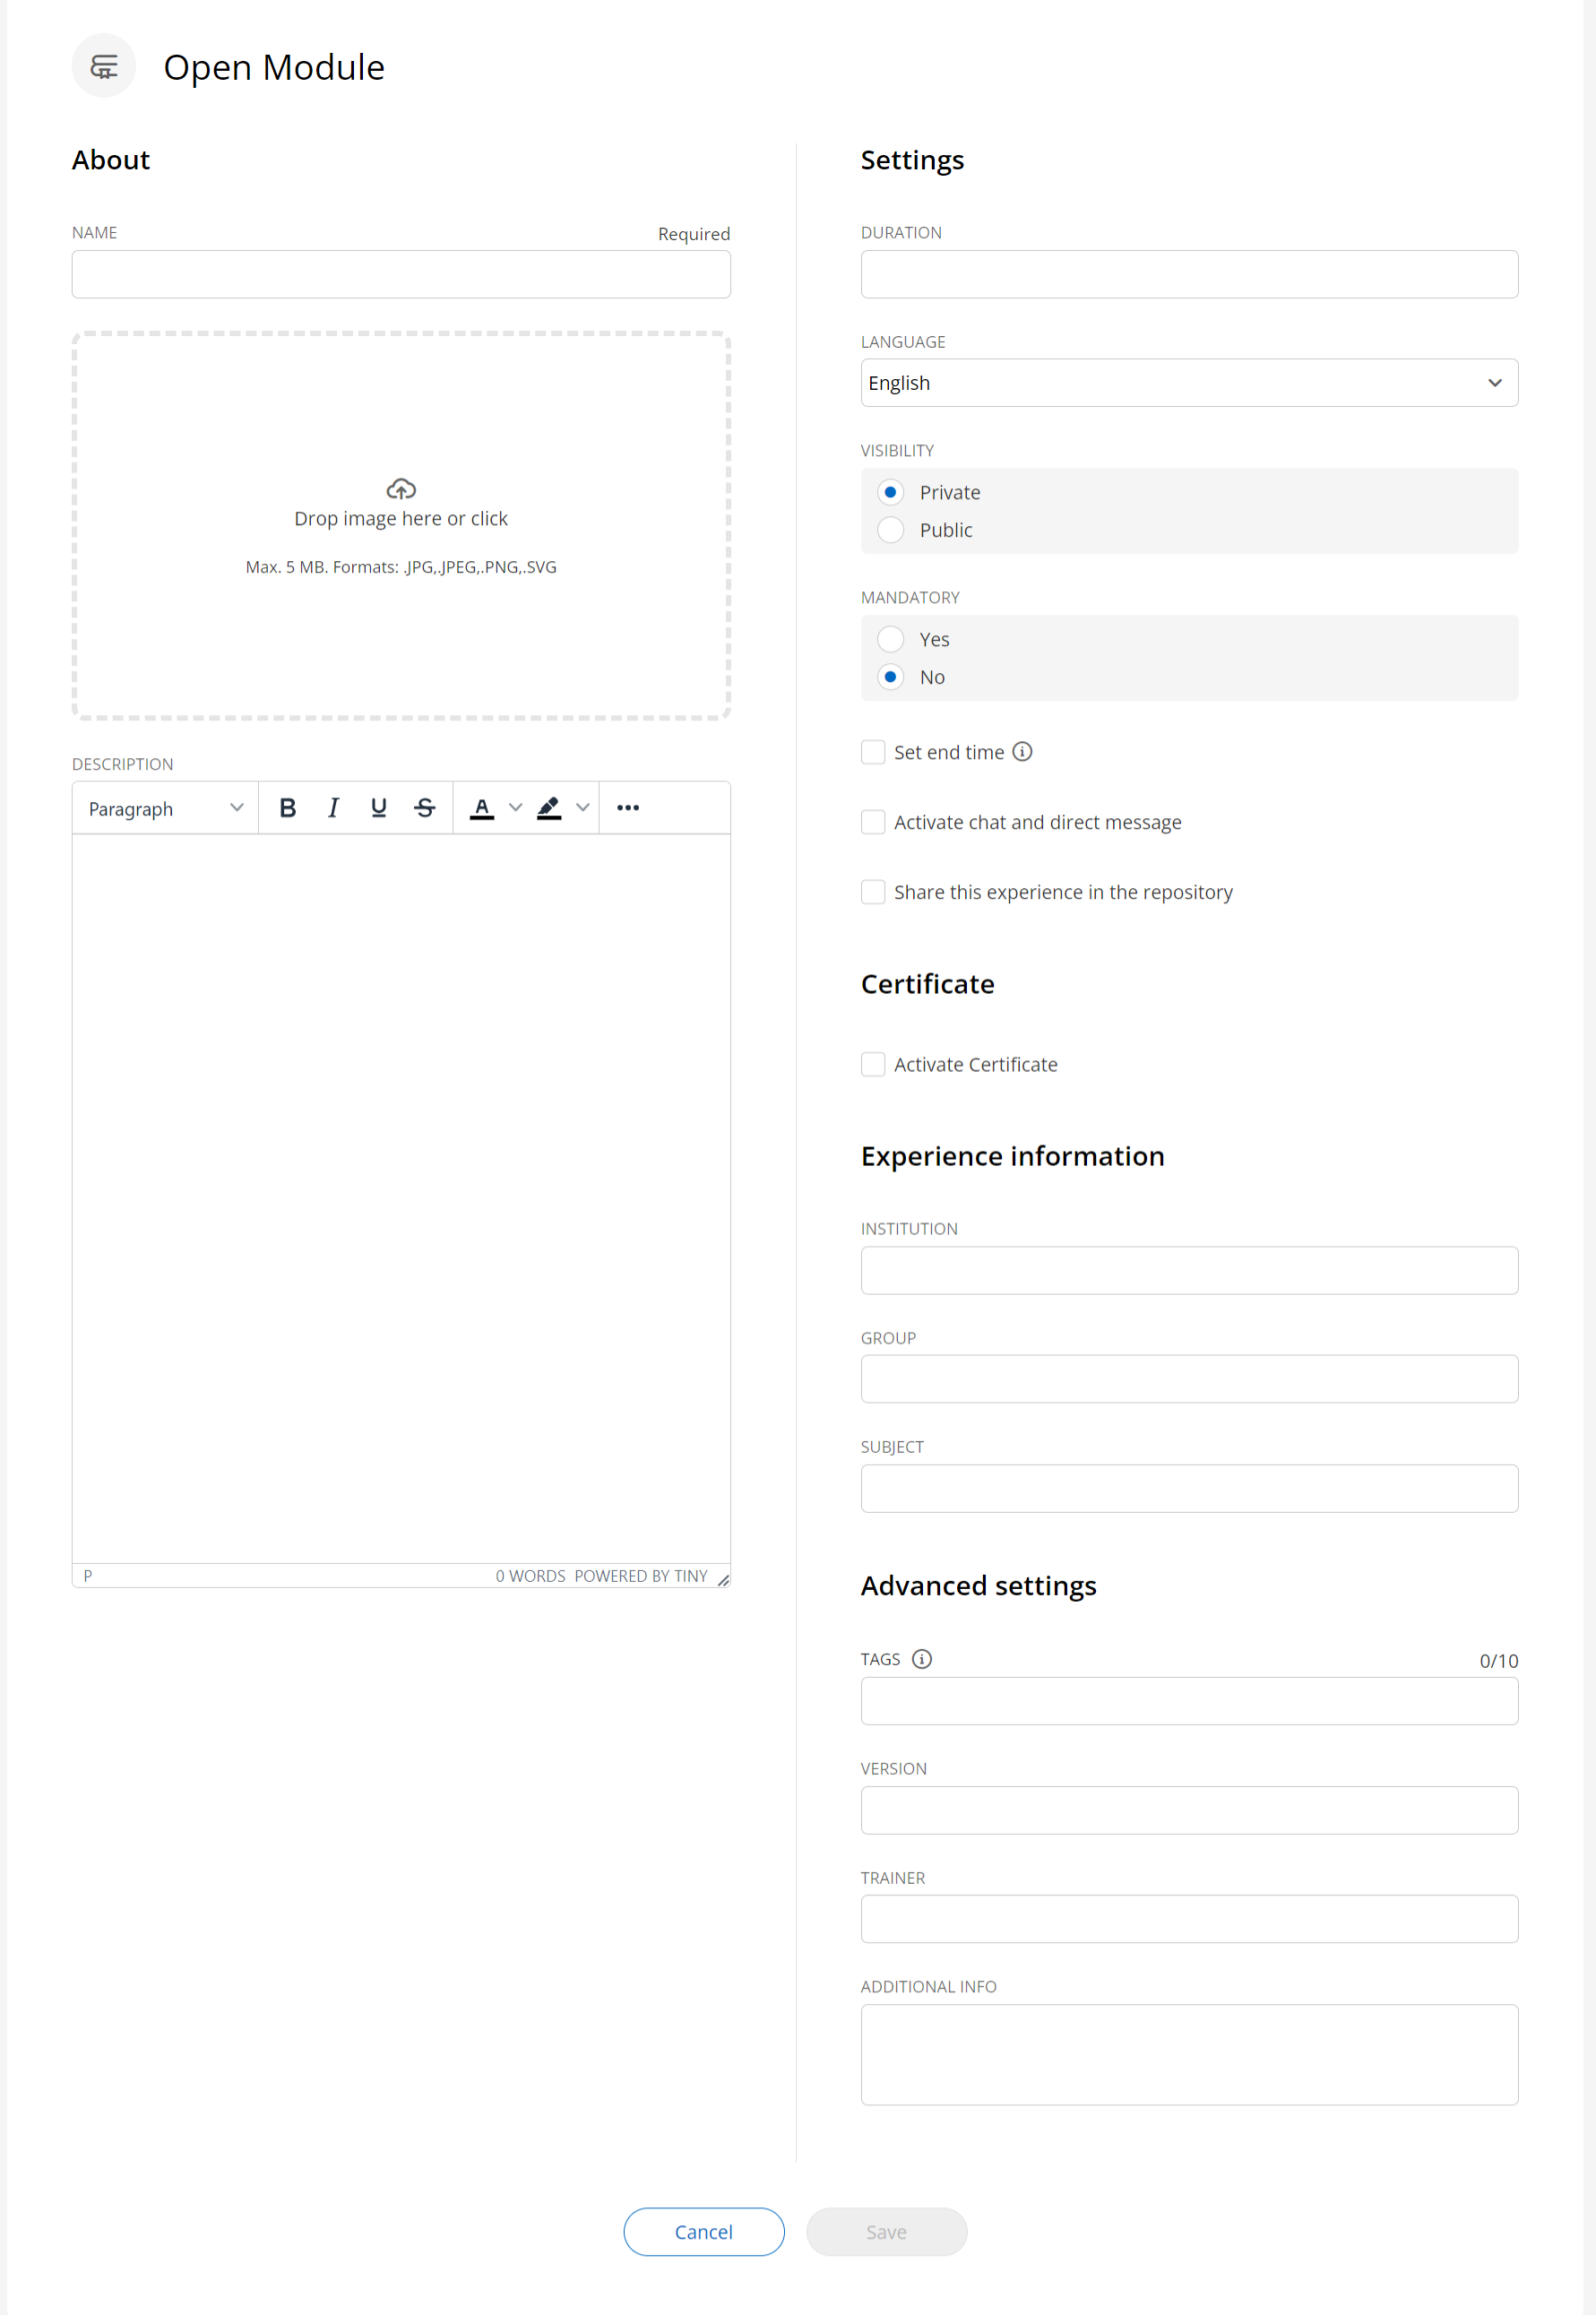
Name: It is recommended to name the experience precisely to be able to quickly identify it, for example: Topic, level and the name of the person responsible for the experience.
Cover: You can add an image from your computer.
Description: Add information relevant to the user regarding the experience. You can add images, graphics, videos or embedded elements. This will be the first thing users see when they access an experience.
Language: Choose the desired language.
Visibility: Public experiences They will be accessible to all members of the institution without the need for an invitation. Private experiences will be visible to all users and can be shared via link. They are preferable when working with specific groups. Participants will need an invitation to join.
Mandatory: By designating mandatory, the user must complete each section and exercises in this Learning Experience in order to finish it and submit their work.
Set End Date: There are two options to configure this setting:
- “Set start and end dates“: Defines a mandatory date range for users to complete the Learning Experience.
- “Limit days for completion“: Sets a specific amount of days to complete the Learning Experience within the given date range.
Important: If the Learning Experience is set as mandatory, an end date must be assigned.
Chat: As a moderator, you can activate or deactivate this tab at any time.
Share in repository: Enabling this option will allow other moderators to clone your experience.
Certificate: You can enable a certificate to be granted at the end of the experience, establishing an issuing date and cut-off mark. Users can download it and will also receive a link that will add this certificate directly to their LinkedIn profile, if they wish.
Experience information: Additional data.
Once you have finished setting up your experience, click the “Save” button and you will have your experience created and ready to use.
You can watch this video to create experiences from scratch:
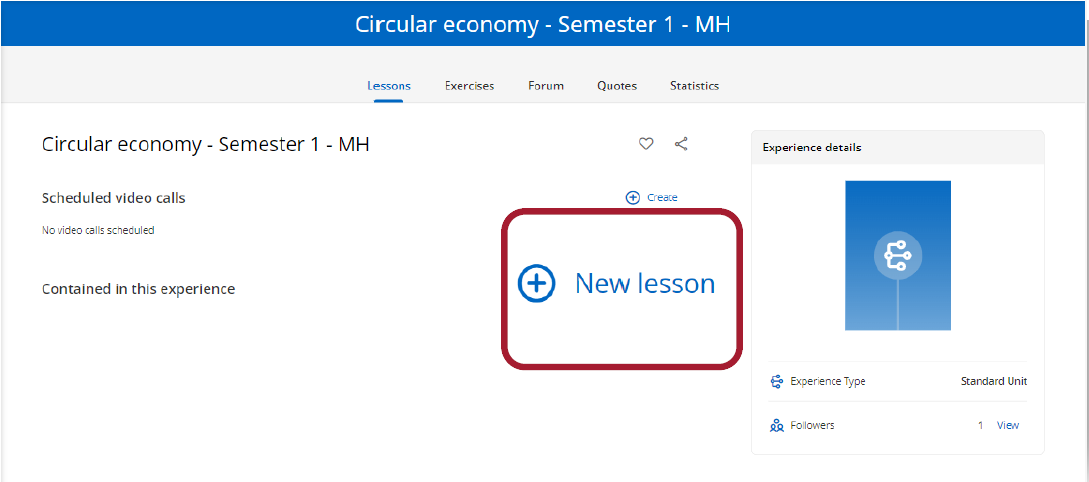
Add lessons
Click on the “New lesson” button. You can set your lesson and add sections within it.

Important: Save your progress if you are not actively working on creating an experience. For security reasons, accounts are logged out after a set amount of inactivity.
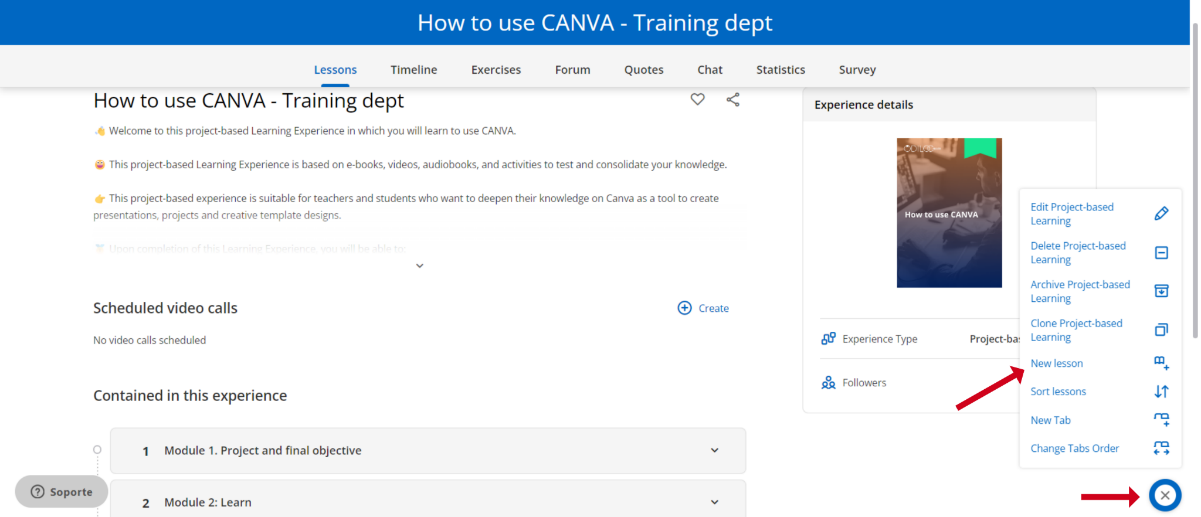
To continue adding lessons to your Learning Experience, click on the editing button in the lower right corner and select the “New Lesson” option.
Type of sections
Within your lessons you can add different types of sections.
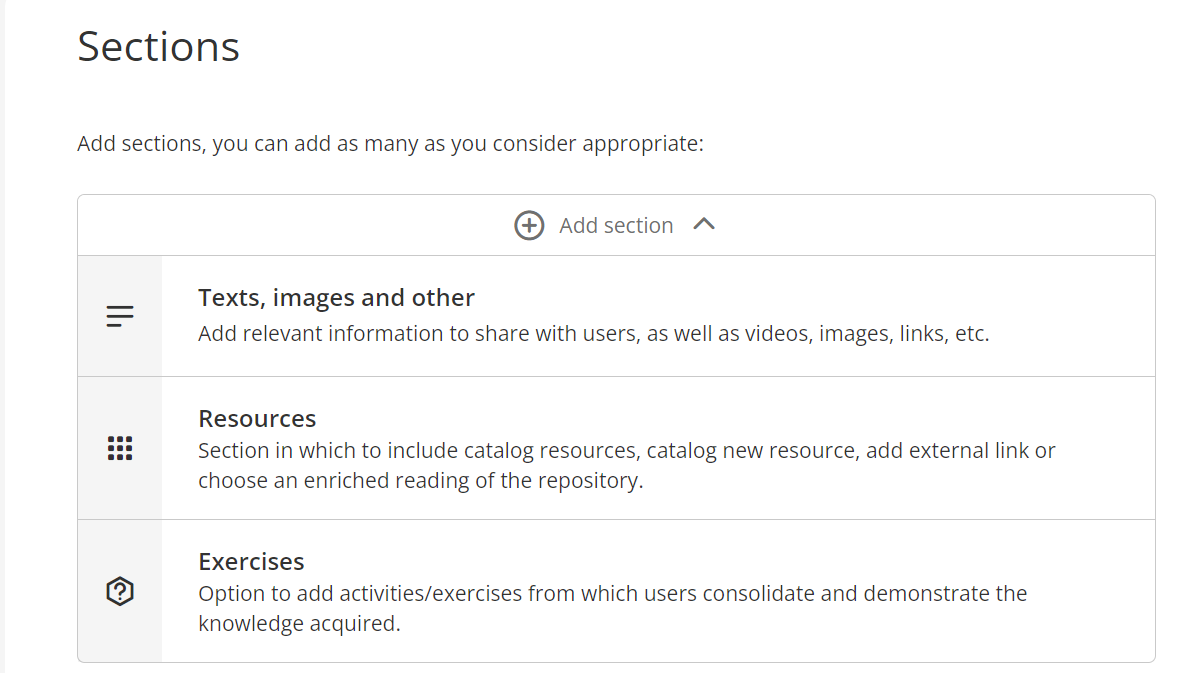
Text section
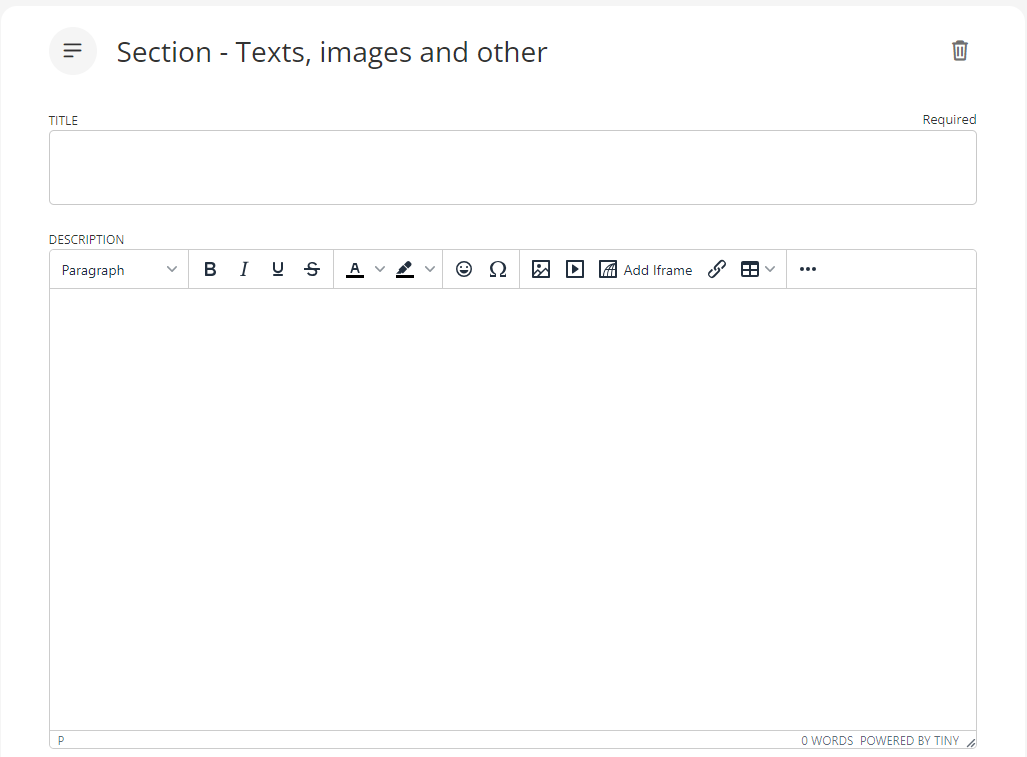
By selecting the option “Text, images and others” your new section will be displayed. Add a title for this section and then include the information within the description section.
- Text.
- Images.
- Videos from Youtube (Click on the button
 and paste the video URL).
 - External Links.
- Insert “Iframe” elements
 from this button, paste the link to insert the element).
Resources section
You will be able to directly add: resources from the Learning Ecosystem catalog, your own resources that you want to catalog in your experience and even add external links. Users will enter directly to these resources according to the itinerary you have established.
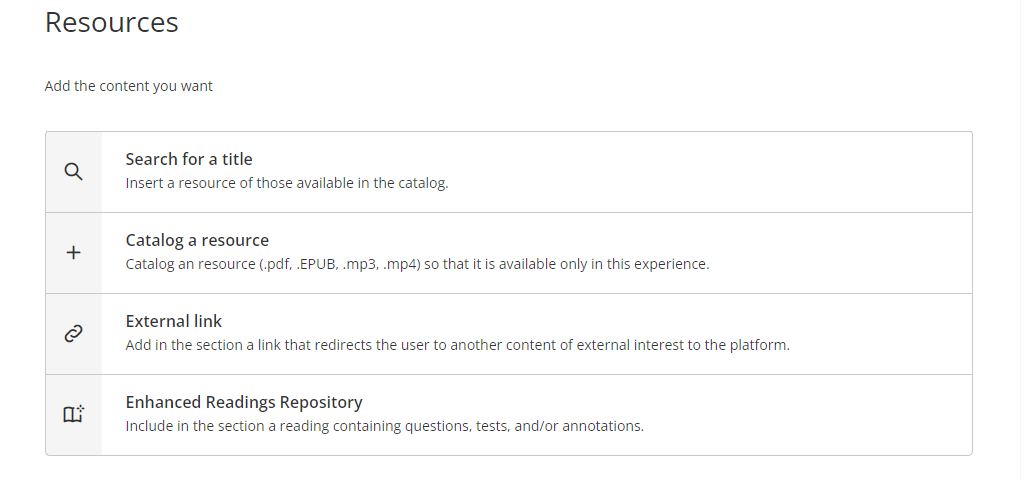
Add the content you want by choosing from the following options:
- Search for a title: Search for content from the Learning Ecosystem’s catalog by typing the name of the resource in the search bar. Then, if you wish, you can choose the dates on which that content will be available to the user.
- Catalog a resource: Upload your own content to the lessons through this option. To do this, complete the information, title, author, synopsis fields and then import the desired resource from your computer (supports pdf, mp3, mp4, epub formats).
- External link: Add a direct link to other websites within your lessons. When you click on this option, complete the required information and then paste the desired link in the URL section.
- Enhanced Readings Repository: Add already enriched readings from the repository to your lesson. To do this, write the title of the content you want in the search bar. To review these enhancements, click on the name of the resource and a pop-up window will show you information related to the content.
Exercise section
To add an exercise to your lesson, add a section title, add a brief description, and then add the exercise.
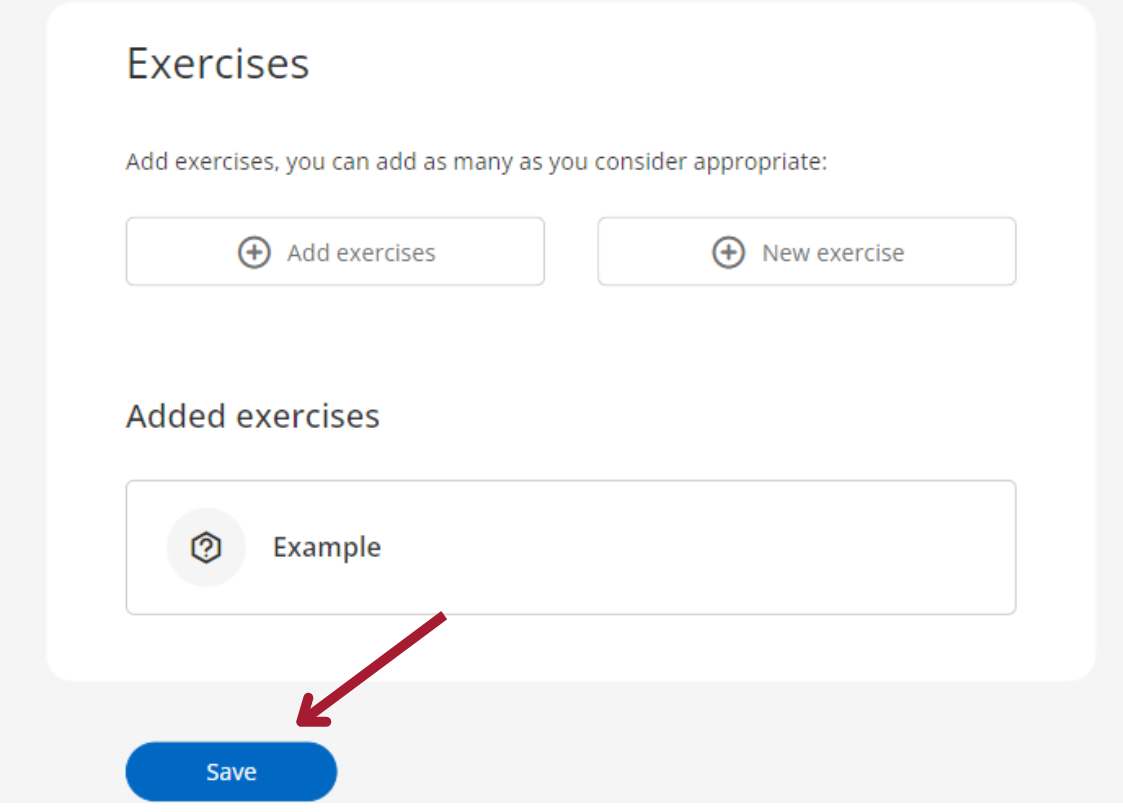
You can add exercises in 2 ways, depending on your needs:
- Add exercises from repository: Your platform allows you to create an exercise bank from the “Exercises” tab, which you can set independently and at any time. You can include any of these exercises in your lessons directly in the section.
- Add a new exercise: If you haven’t set up your exercises bank, you can create new exercises on the go, directly from your sections by clicking “New exercise” you can configure it.

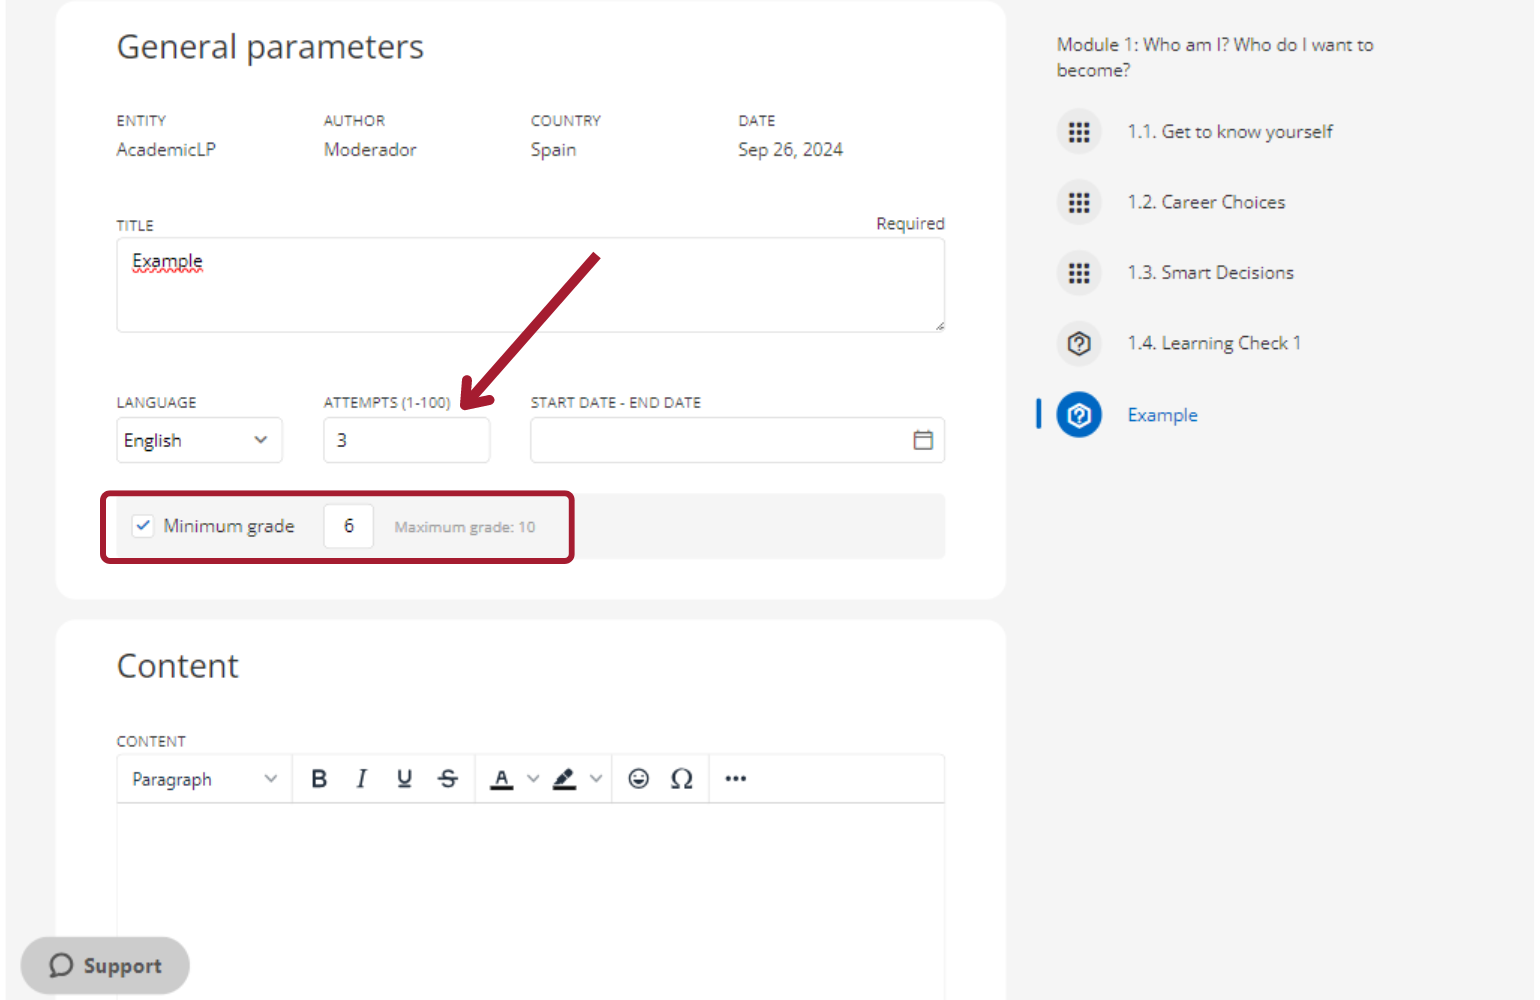
When creating a new exercise, a form will open where you will need to complete the required fields. You can configure your exercise for 1 to 100 attempts, allowing users to retry if they do not achieve the expected score. By enabling this option, you can set a minimum passing score for the exercise, so the user will only be able to submit it once they achieve the minimum score.
When selecting a start and end date, users will only be able to access and interact with the exercise during these specified dates.
Additionally, from the “Grades” section, as a moderator, you can reset the exercise to give the user another chance to complete it if they fail to meet the minimum score.
By adding exercises within the lesson you can choose between different types of questions with both automatic and manual correction.
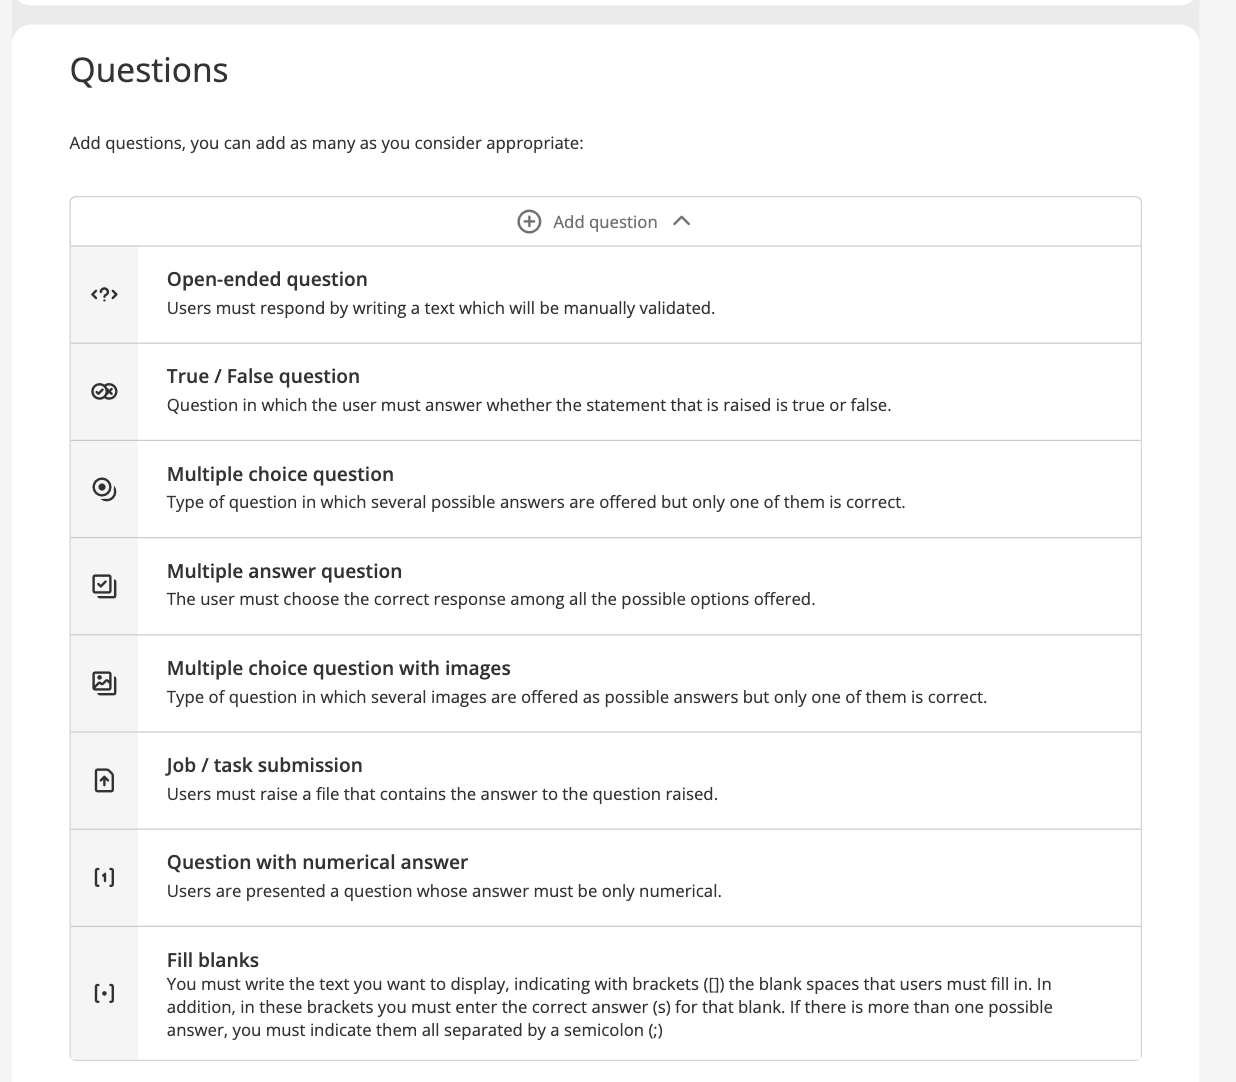
Configure it and save it. You will see the created questions at the bottom of the page. You can add as many questions as you wish in a single exercise.
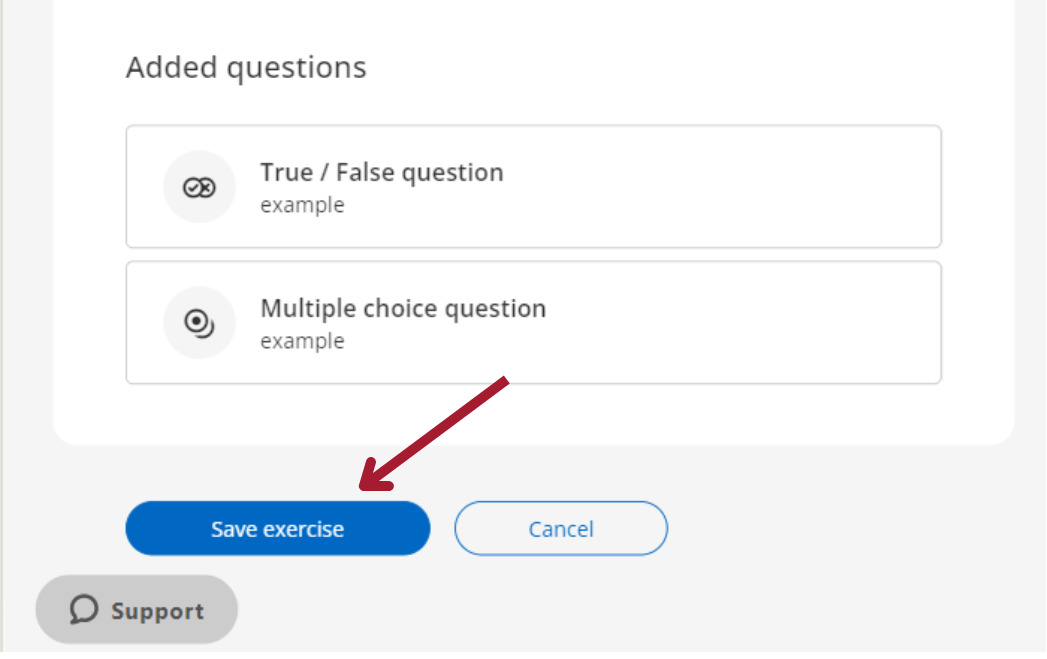
Save your exercise, then save your section.
As a moderator, you will have access to manual correction, only, of questions classified as “Job/Task submission”, “Open-ended question” and “Question with numerical answer”, later, you can review the responses of the participants and enter their grade from the “Grades”. The rest of the exercises will be graded automatically according to the answers you have established.
Important: If the exercise has more than one attempt, the user needs to press the “Send” button within the exercise for their answer to be graded. In exercises with multiple attempts and a minimum passing score, the user has to reach that score in order to submit the exercise; otherwise, the “Send” button will not be available.

Create a Learning Experience quickly (clone)
To clone any experience, click the “Create learning Experience” button that is located under the first carousel.
* If you do not see the button, access your user area, select “Learning experiences”, click “go to learning experiences” and re-enter your Learning Ecosystem.
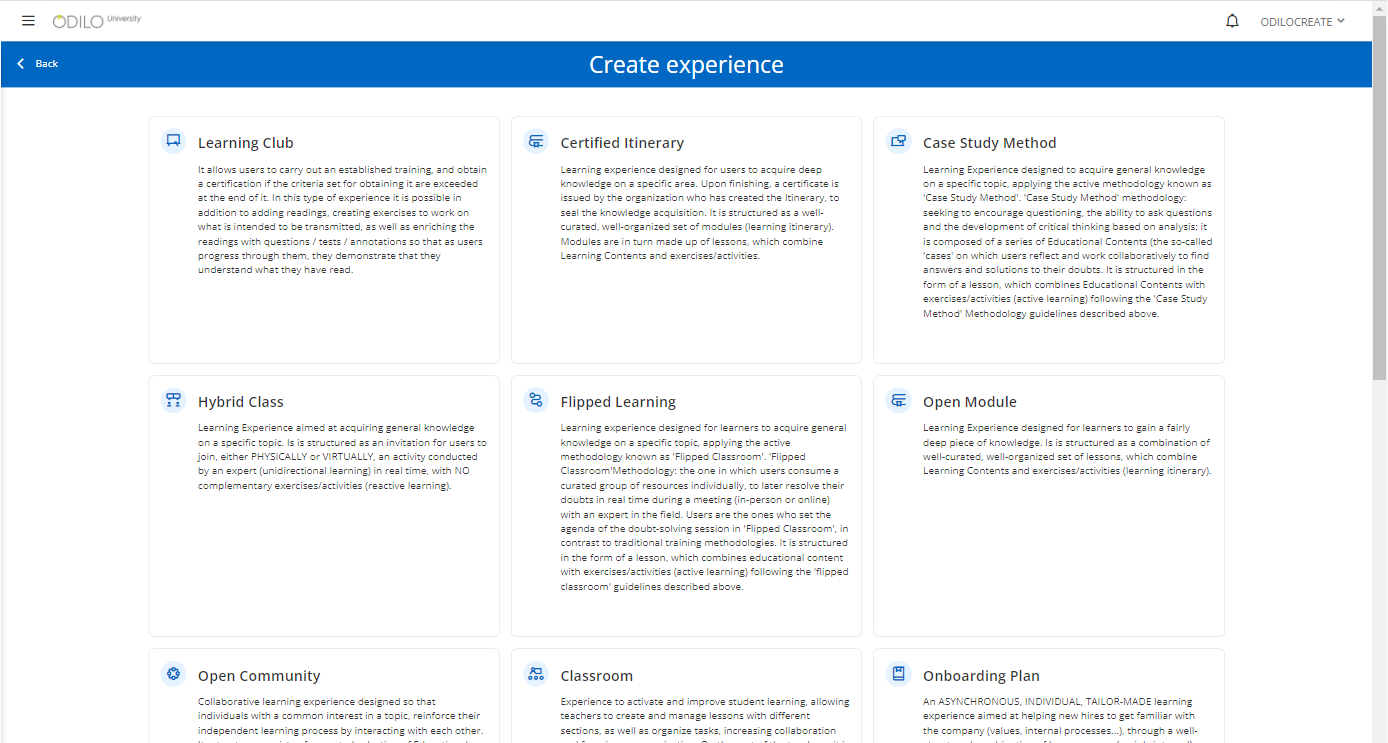
Choose the type of experience you want to clone by clicking on it. You will be able to review a brief summary of the types of experiences under each of them.
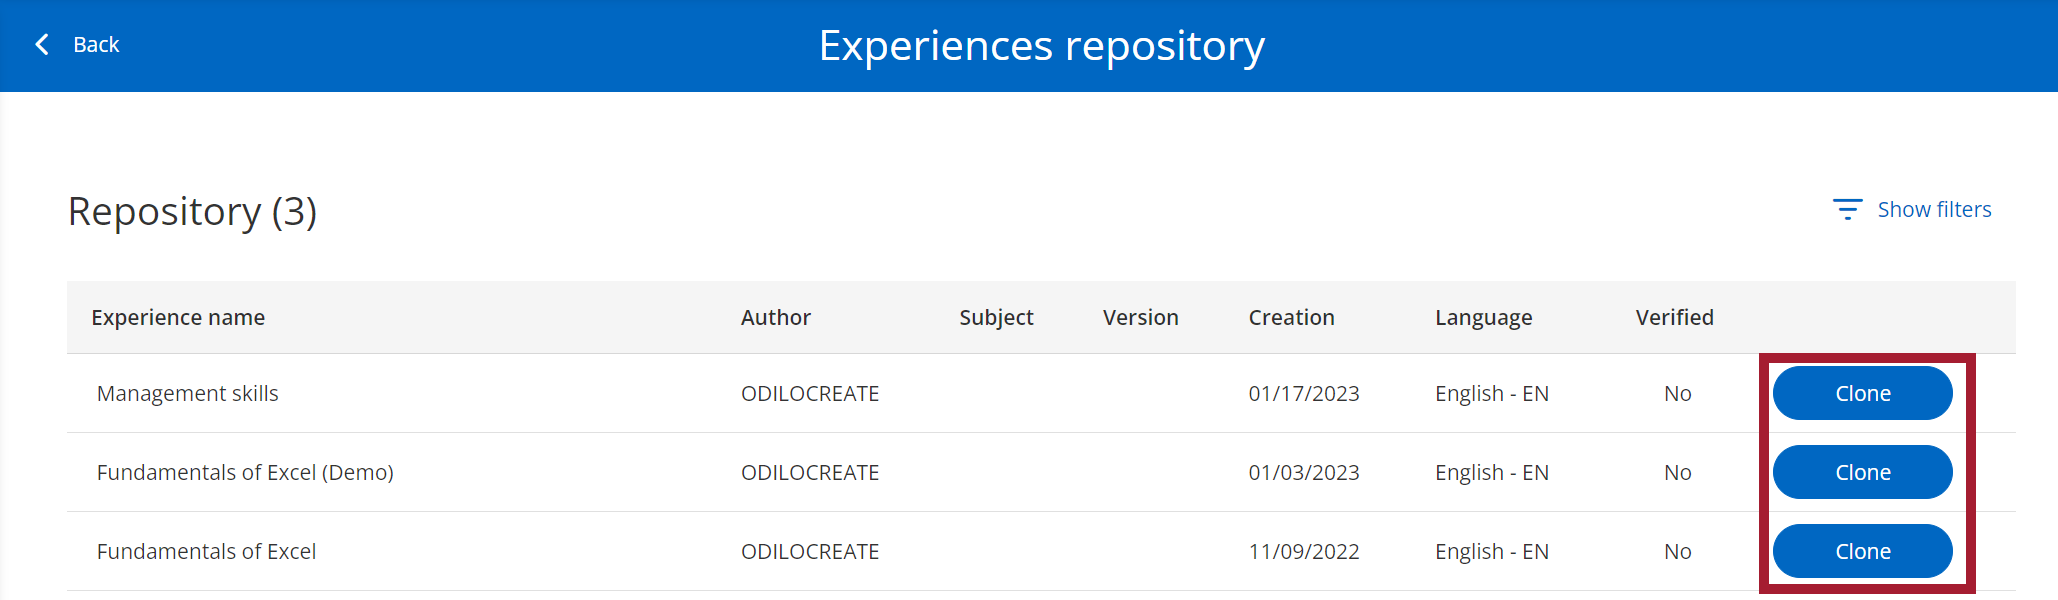
Choose the option “From repository”, this will show you all the options available for cloning.
To perform a more precise search, you can filter by name, language, author or date using the filter button at the top right “Show filters”.

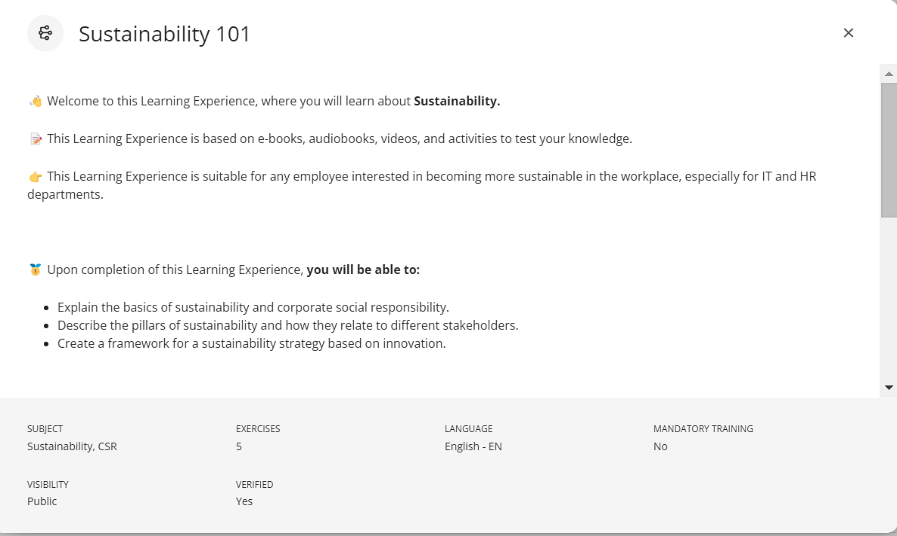
If you want to know the topic and contents found within an experience, click on its name to preview it.
Clicking “Clone”, you can begin to set your experience, indicating the information in the required fields.
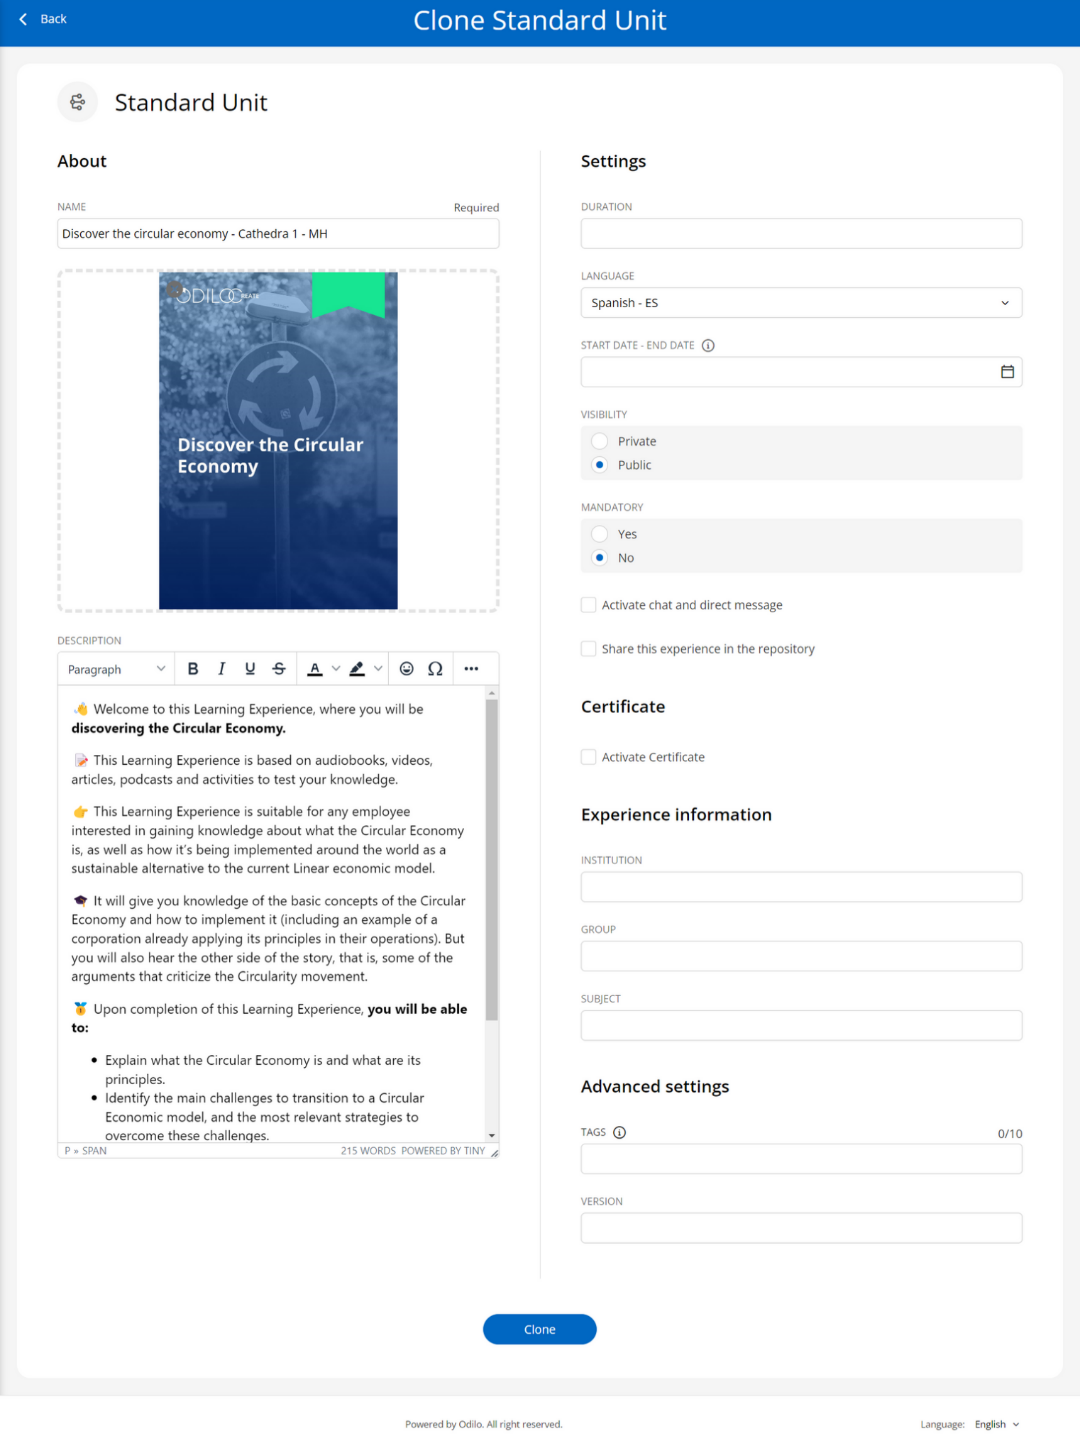
Name: It is recommended to name the experience precisely to be able to quickly identify it, for example: Topic, level and the name of the person responsible for the experience.
Cover: You can edit the image by clicking on it (clone will take an image by default).
Description: It will already be available in the corresponding section, however, you can edit everything you want from the text area. You can add images, graphics, videos or embedded elements. This will be the first thing users see when they access an experience.
Language: Choose the desired language.
Visibility: Public experiences will be accessible to all members of the institution without the need for an invitation. Private experiences are preferable when working with specific groups. Participants will need an invitation to join them.
Mandatory: By designating mandatory, the user must complete each section and exercises in this Learning Experience in order to finish it and submit their work.
Set End Date: There are two options to configure this setting:
- “Set start and end dates“: Defines a mandatory date range for users to complete the Learning Experience.
- “Limit days for completion“: Sets a specific amount of days to complete the Learning Experience within the given date range.
Important: If the Learning Experience is set as mandatory, an end date must be assigned.
Chat: As a moderator, you can activate or deactivate this tab at any time.
Share in repository: Enabling this option will allow other moderators to clone your experience.
Certificate: You can enable a certificate to be obtained at the end of the experience, establishing an issuing date and cut-off mark. Users will be able to download it and will also receive a link that will add this certificate directly to their LinkedIn profile, if they wish.
Experience information: Additional data.
Once you have finished setting up your experience, click “Clone” and you will have your first experience created and ready to use.
Important: As a moderator, you will have an edit button within each experience that will allow you to edit its content![]() .
.
You can add tabs, lessons, sections or whatever you want at any time.