Create a Book Club
Create a Book Club from scratch
Create a Bookclub quickly (clone)
To create your own Book Clubs, you’ll have two options: either by cloning or duplicating existing Clubs, meaning making a copy of an existing Book Club and adjusting its sections according to your needs, or by creating one entirely from scratch. Both options give you the opportunity to customize and modify them as you wish.
Create a Book Club from scratch
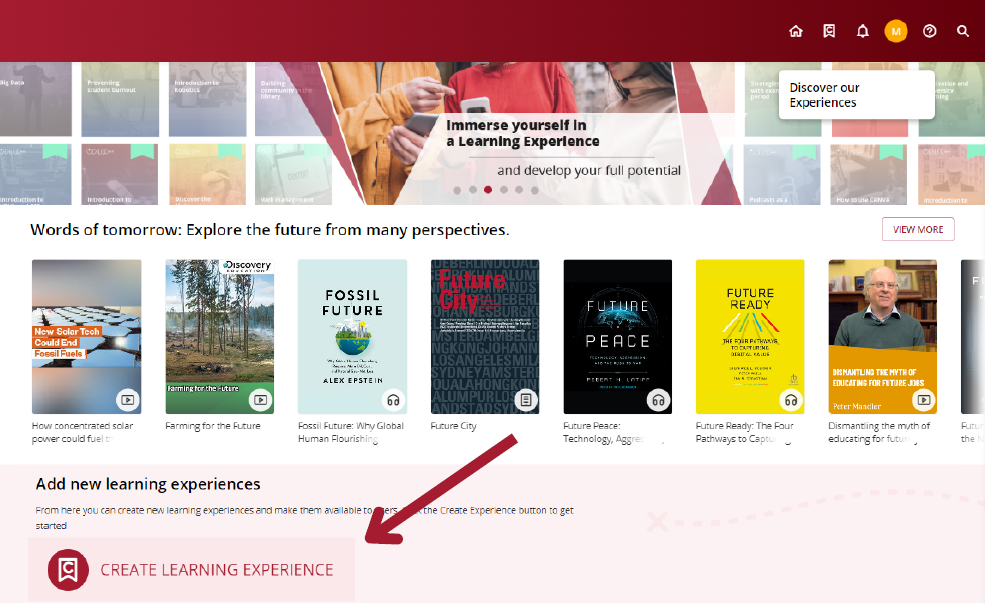
Click on the “Create Learning Experience” which is located under the first carousel.

*If you cannot see this button, access “Learning experiences”, from your user area, click on “Go to learning experiences. After that, re-enter your Library.
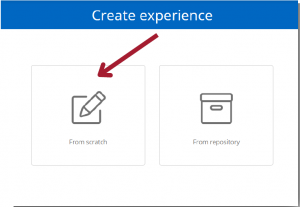
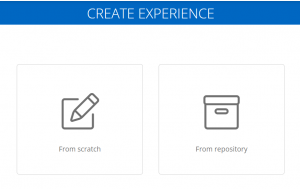
Select the option:“From scratch”.
Complete the information section.
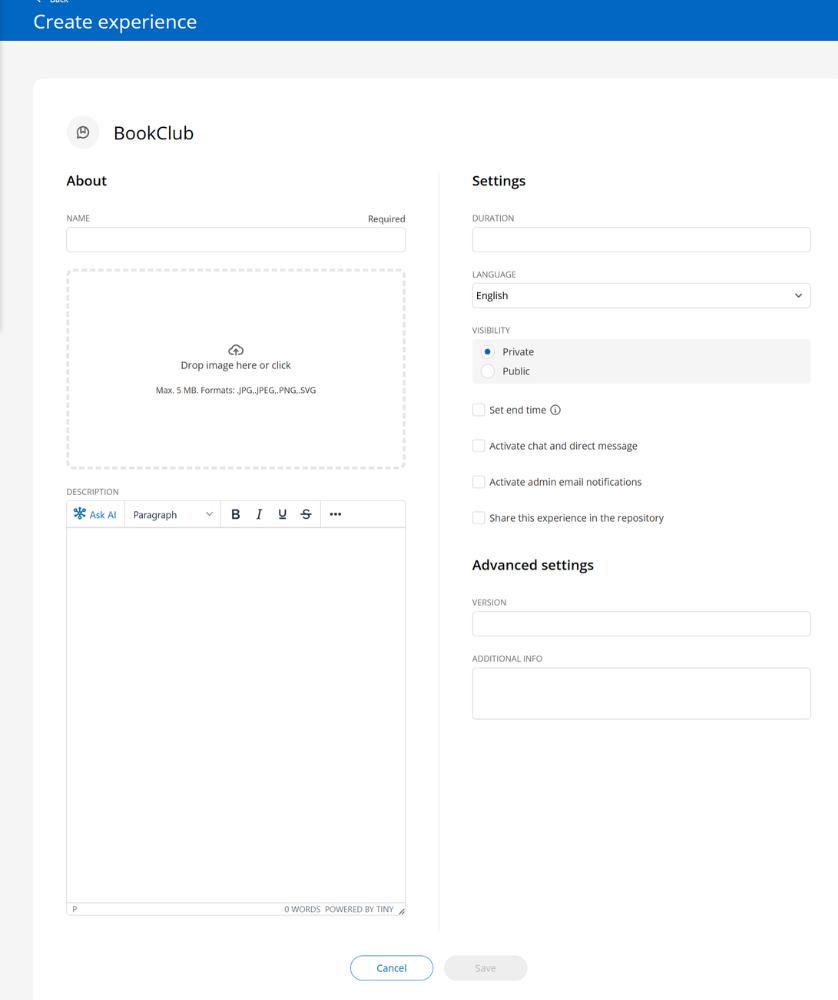
Name: The Book Club should have a name so you can find it quickly.
Cover: You can add a cover image and edit it at any time.
Description: You can add the information you want, as well as images, tables, videos or integrated gamification activities.
Duration: Corresponds to the period in which the Book Club will be available.
Visibility: From this section, you can set the Book Club as private or public. If set to private, members will need an invitation to access, if public, anyone can follow and join the club.
If you choose to create a public book club, please note that you must include resources with the “Recommended” tag. Since this label will allow the use of the resource to a greater number of users.
Set End Date: There are two options to configure this setting:
- “Set start and end dates“: Defines a mandatory date range for users to complete the book club.
- “Limit days for completion“: Sets a specific amount of days to complete the book club within the given date range.
Activate chat and direct message: Tool that works as instant messaging between all Book Club users, including the moderator.
*As a moderator, you can turn this tab on or off whenever you want.
Share in repository: Enabling this option will allow other moderators to clone your Book Club.
Important: All fields are editable once the book club has been created.
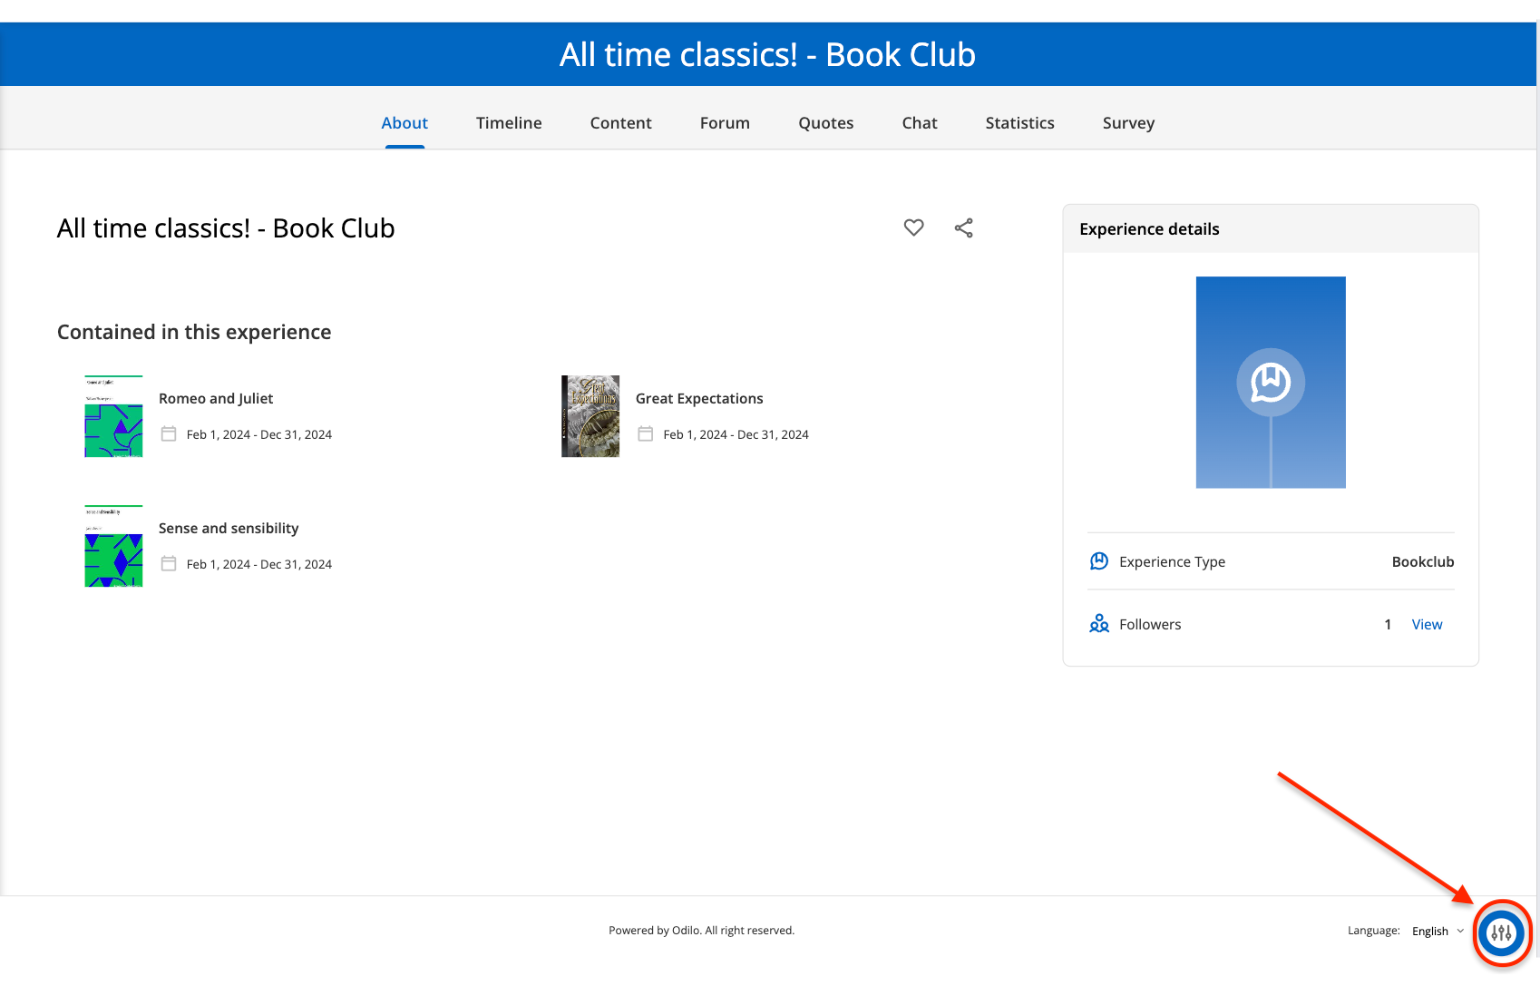
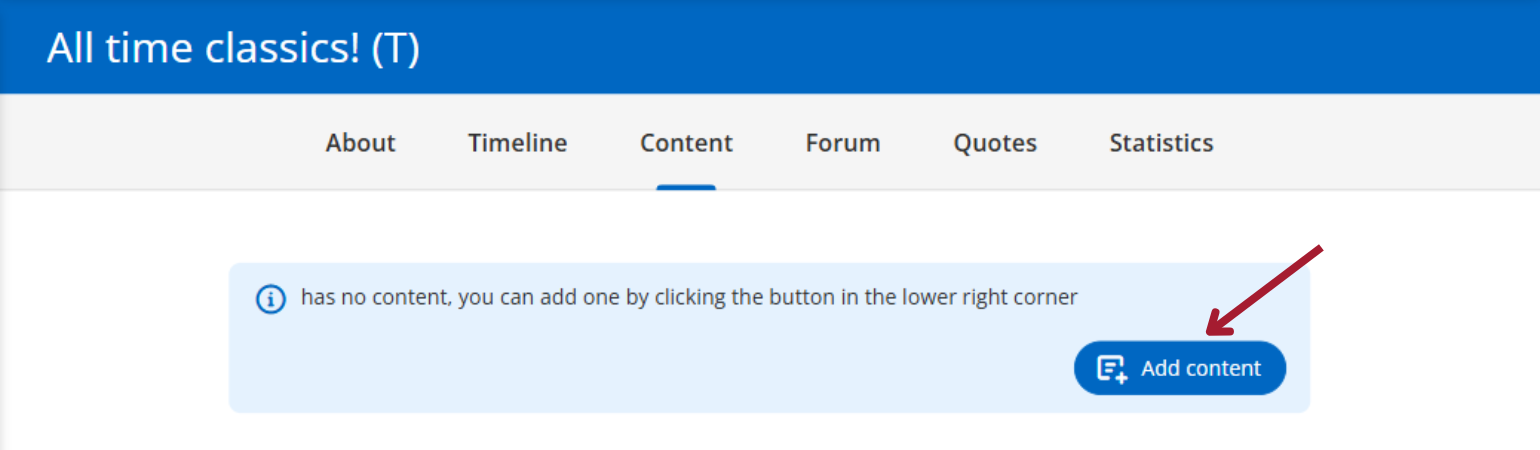
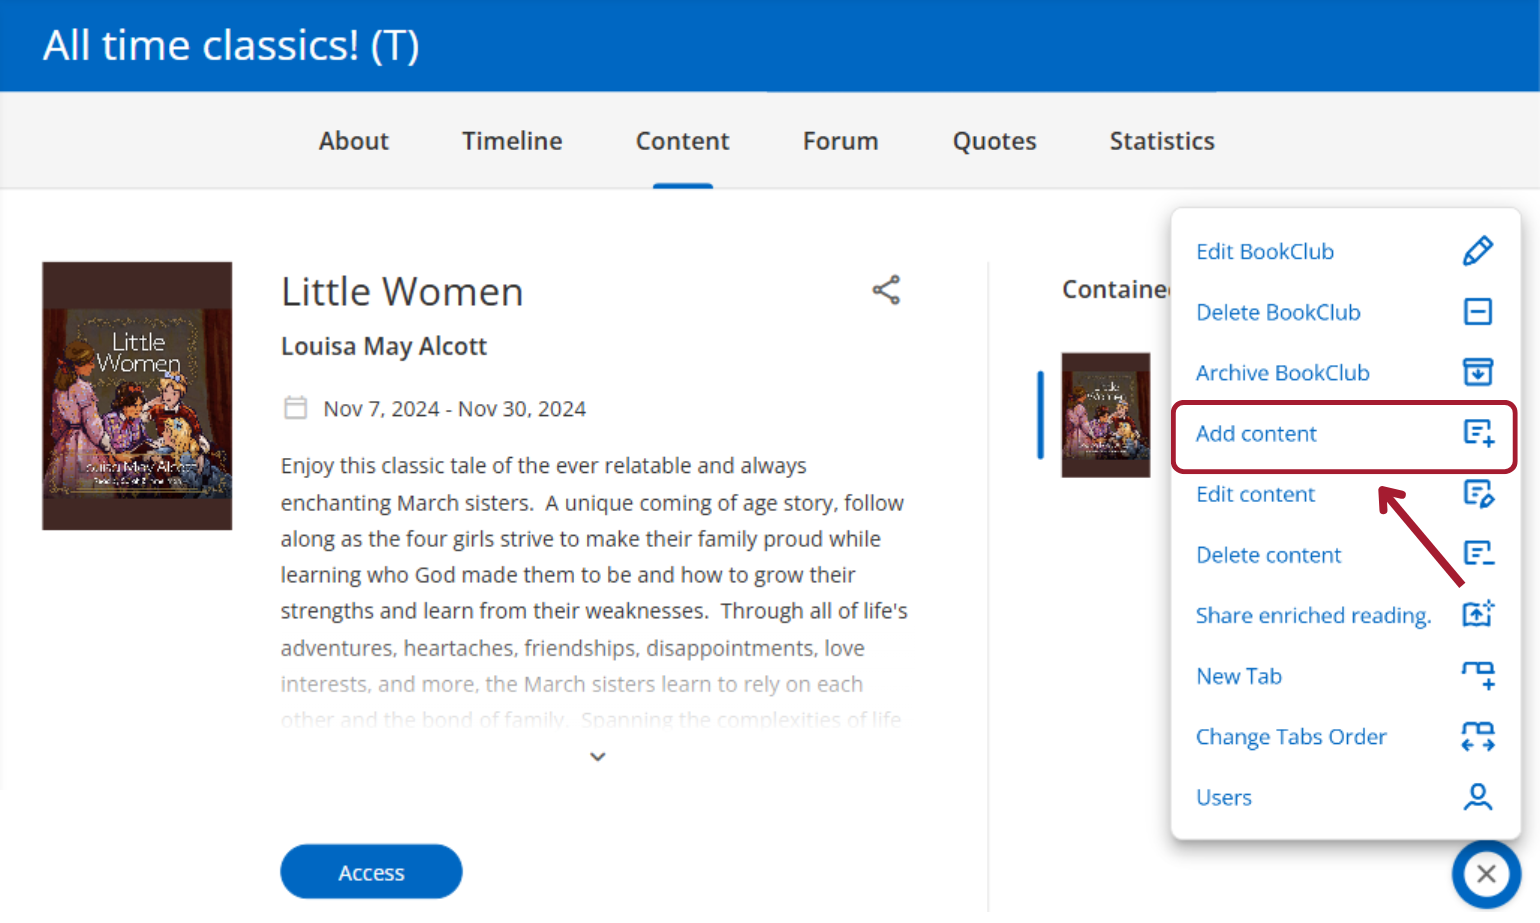
From this moment on, you must use the editing button to include content within each of the tabs that will appear under the club title:
Add content
———-> Before you start
When choosing the content that you will use with the participants, keep 2 important aspects in mind:
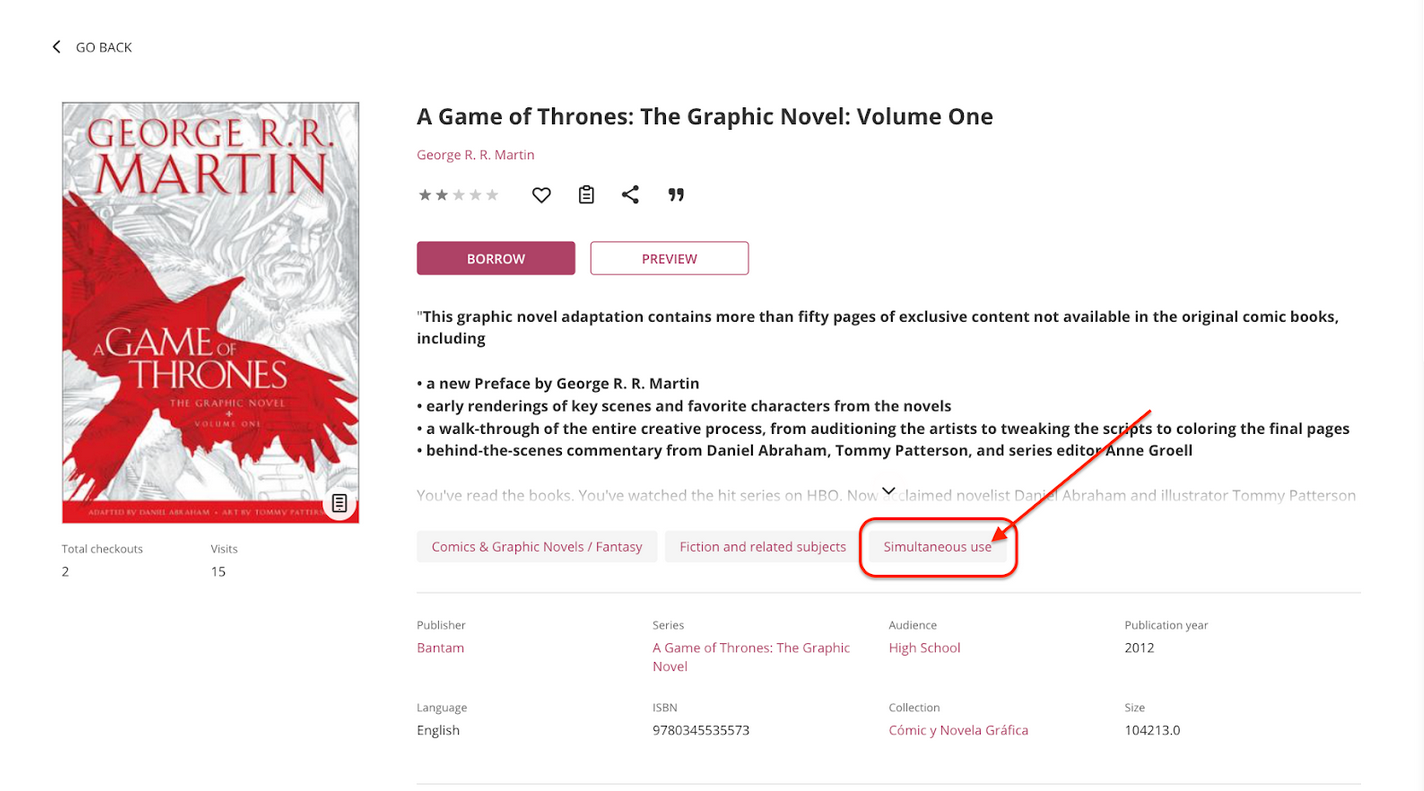
- Consider using resources that contain the tag “Simultaneous use”. This will allow this resource to be accessed by multiple users at the same time and will make the work of the participants easier.
- It is important that you consider that if your library manages resources with PPU (pay per use), once you know the resources you would like to add to your Book Club, it is advisable to review and confirm with the contact person at your institution before launching your book club to the public. Confirm the ISBN, the title of the resource, the start and end date of the virtual Book Club and the number of attendees you would like to participate, considering the expense per user that each loan will generate
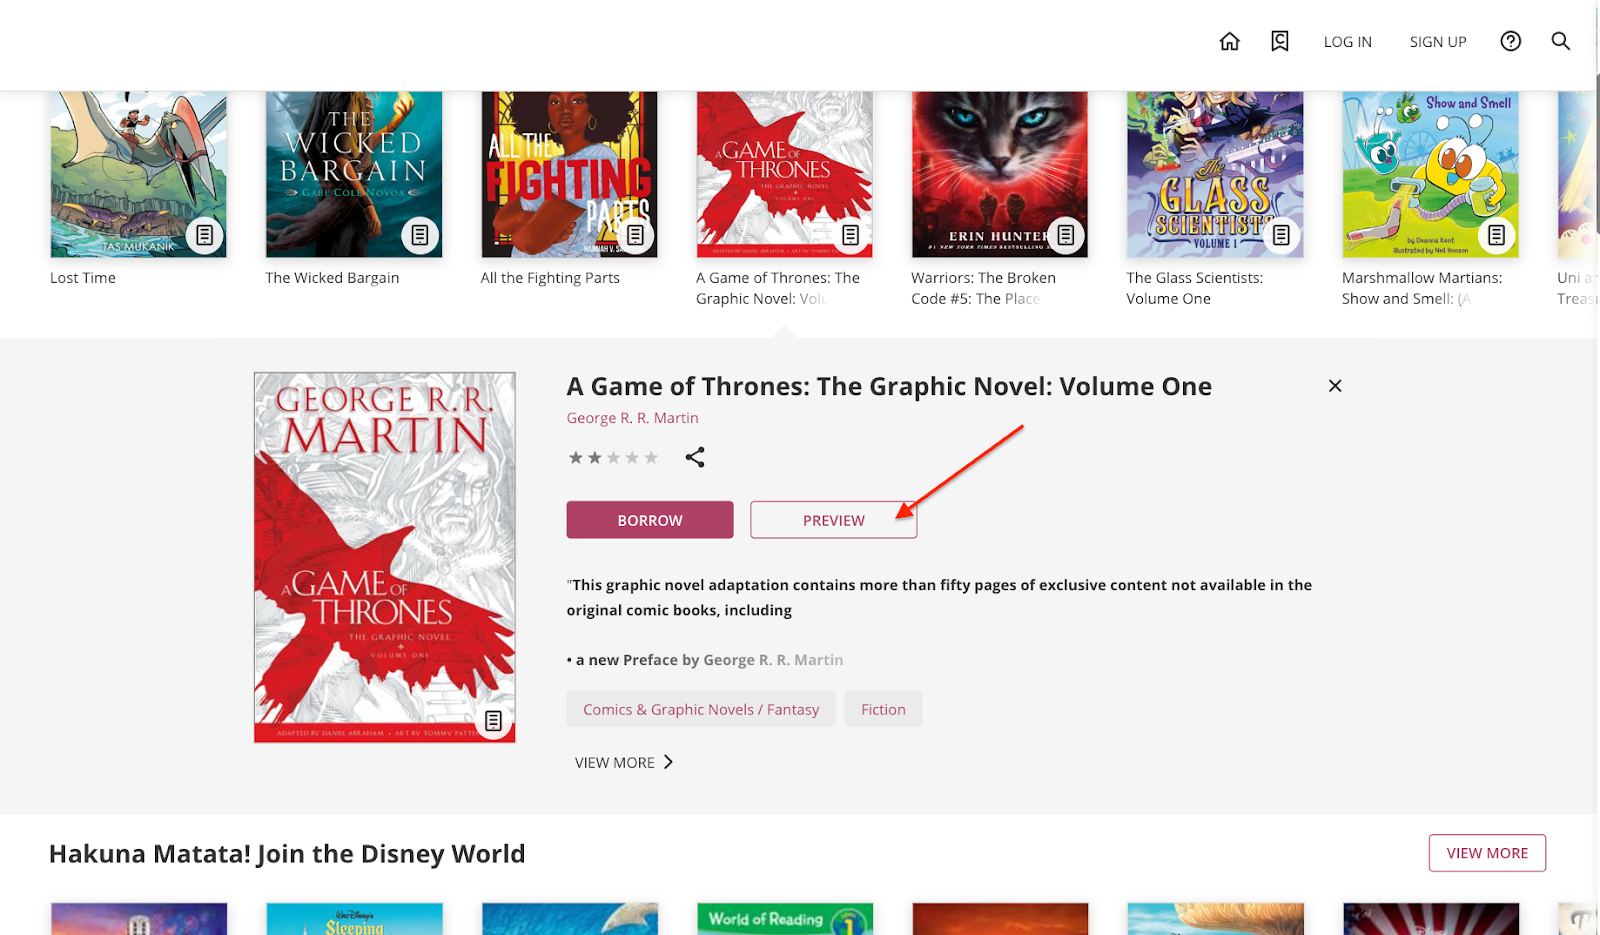
- Review the contents through the option “Preview” and avoid borrowing the content. This will help you not use your maximum loans in a short time.
To add your first content, go to the Content tab and click on “Add Content.” For any additional content you’d like to add, you can do so by using the editing button located in the bottom right corner of the page.
You can add content that is available in the digital library catalog or from an external link.
If you want to add a content from the catalog, you must write the name of the content in the search bar and then choose from those that are marked as “Recommended”.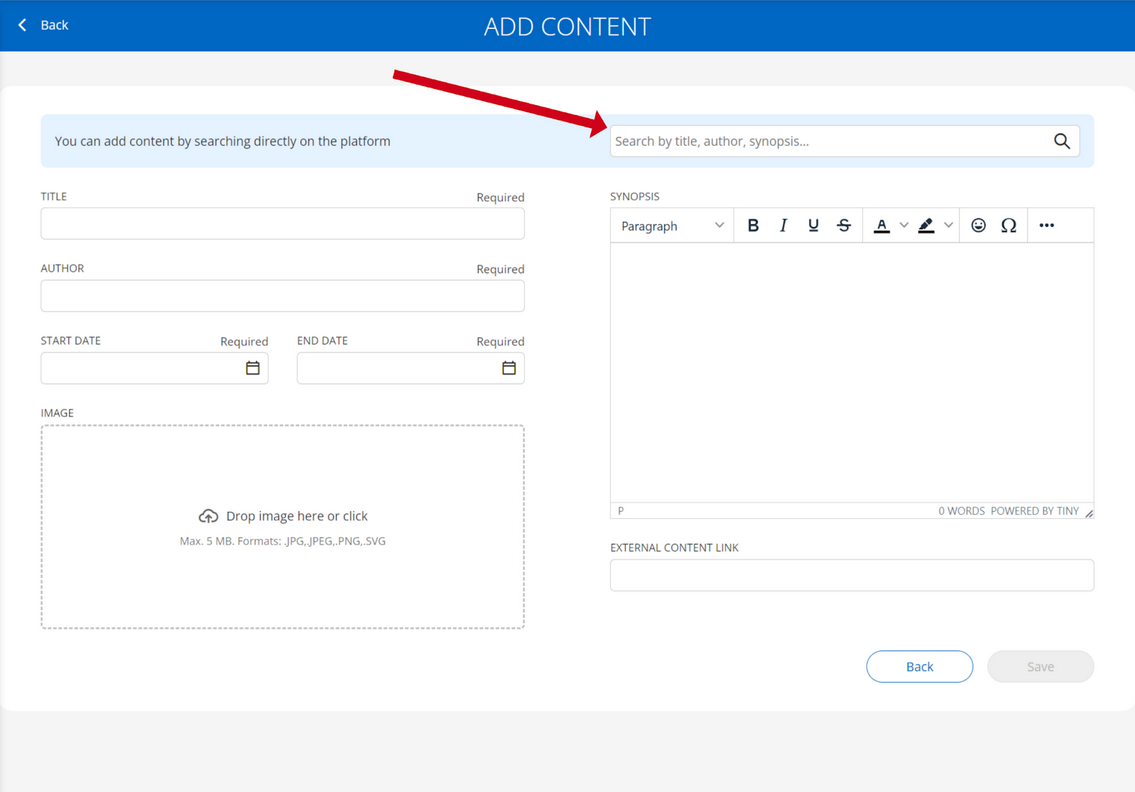
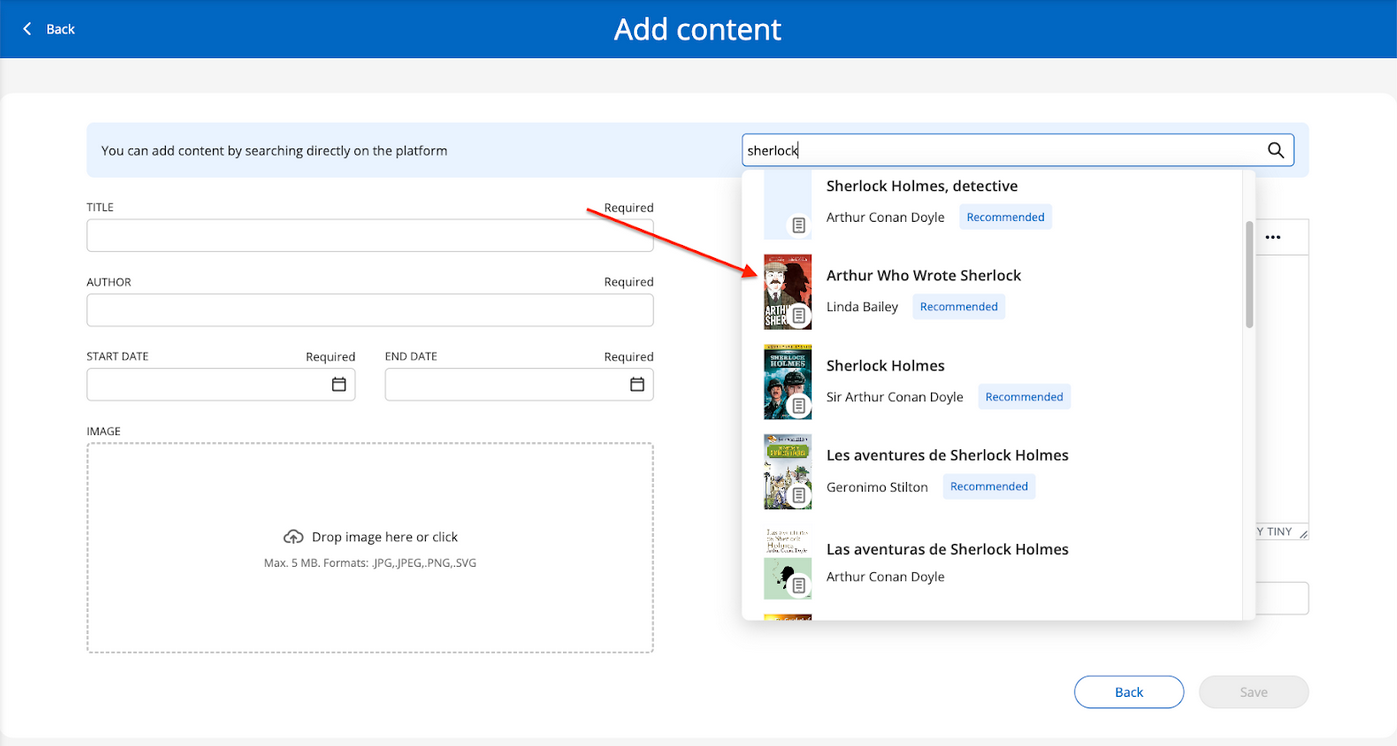
Once you have chosen it, the digital library will automatically fill in the Title, Author, Description and Cover fields.Select the start and end dates of this new content.
If you want to add own content, you must share it through the URL from the “External content link”.
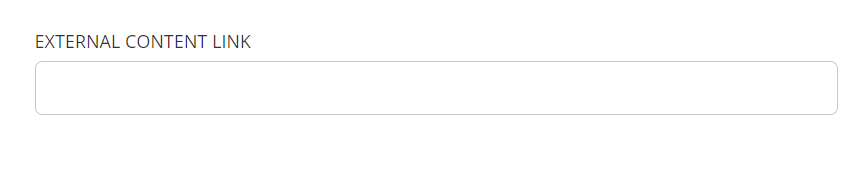
As it is your own content, the Title, Author, Description and Cover sections, will have to be completed manually.
Create discussion threads based on quotes
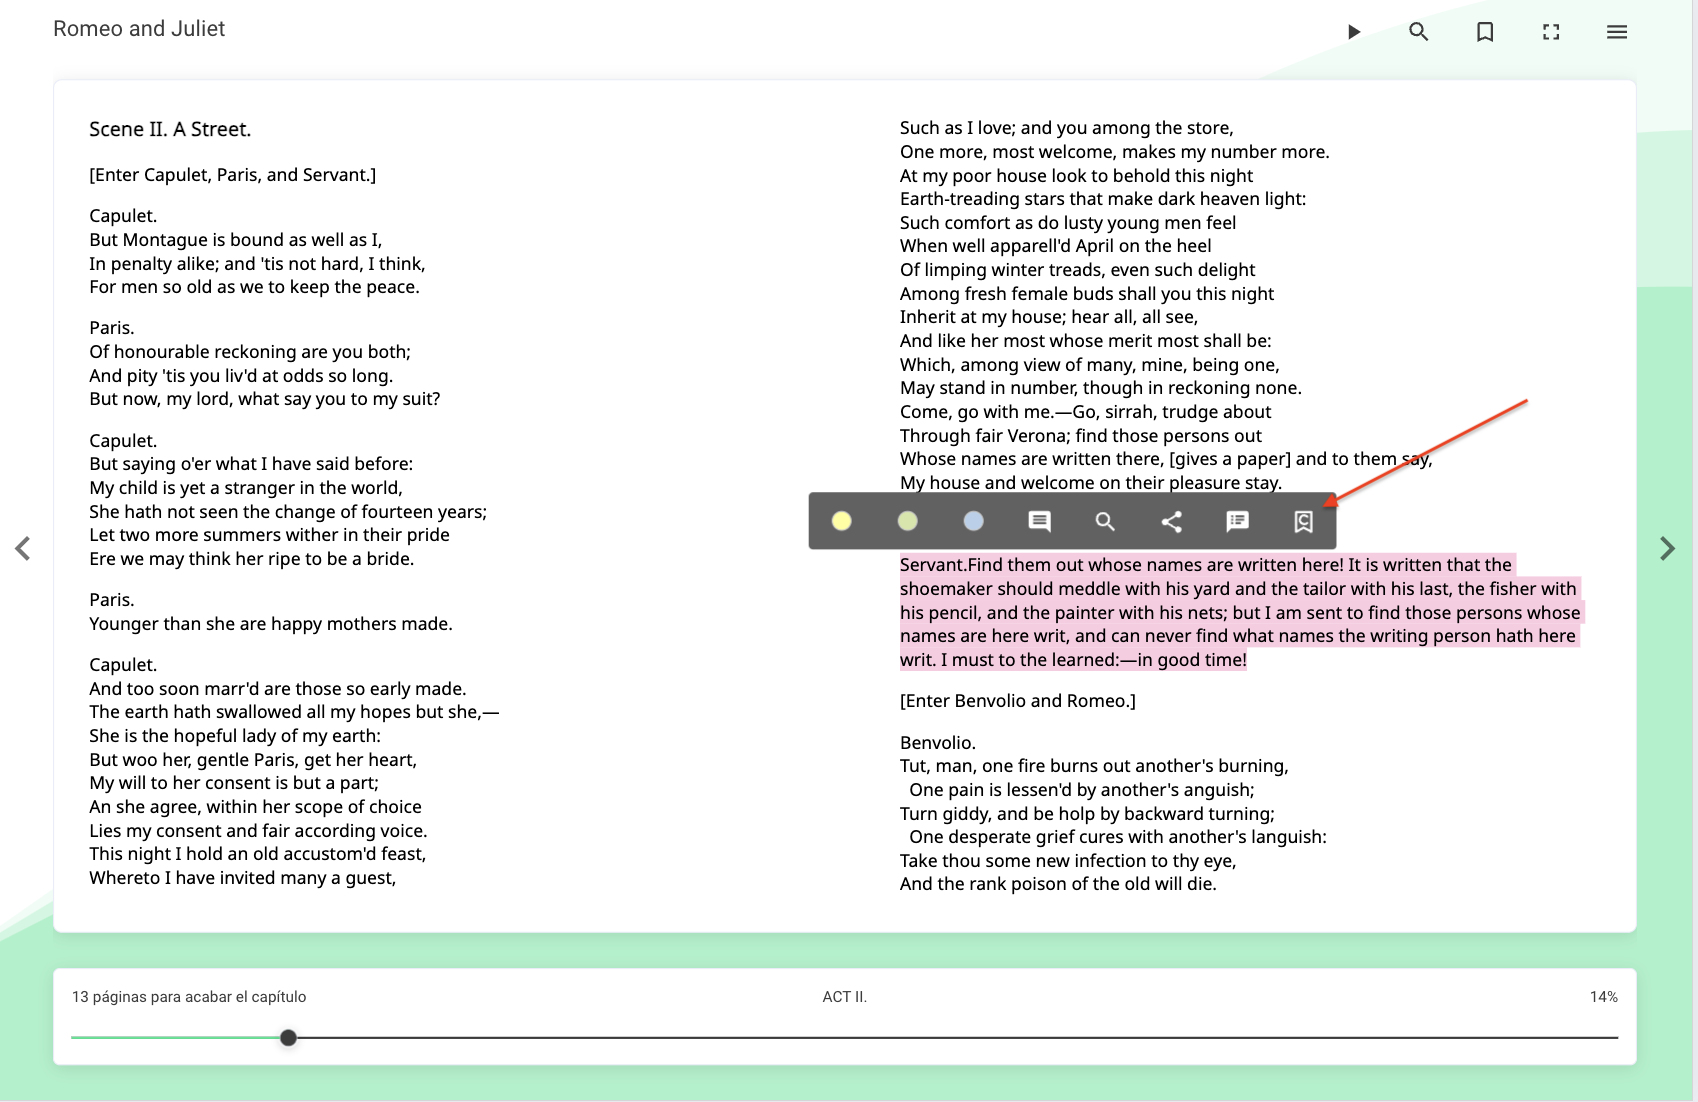
Using quotes you can select the part of the text of an ebook that you want to work on and enter comments or instructions in them, so that Club participants can work on the same text.
To add a quote you must select the part of the text you want to cite within the ebook and click on the ![]() icon that appears in the options menu:
icon that appears in the options menu:
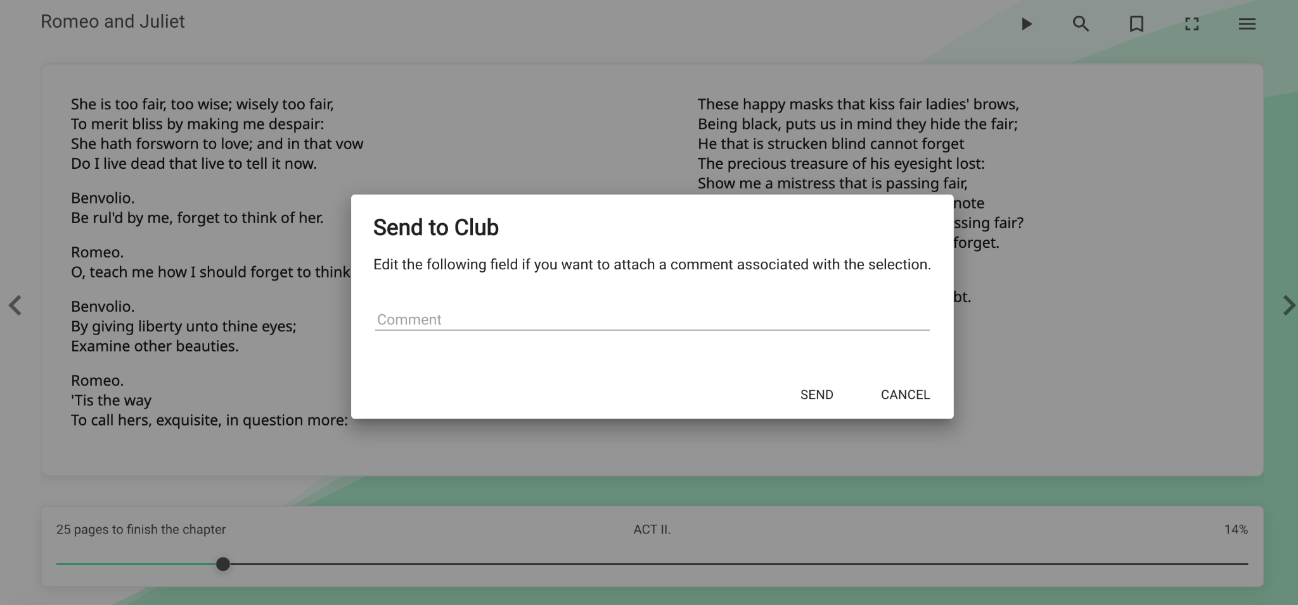
Then you can add a comment related to the quote you have highlighted if you consider it necessary, and click on “Send”.
When you return to your Book Club home page, you will find what you just added in the “Quotes” tab.
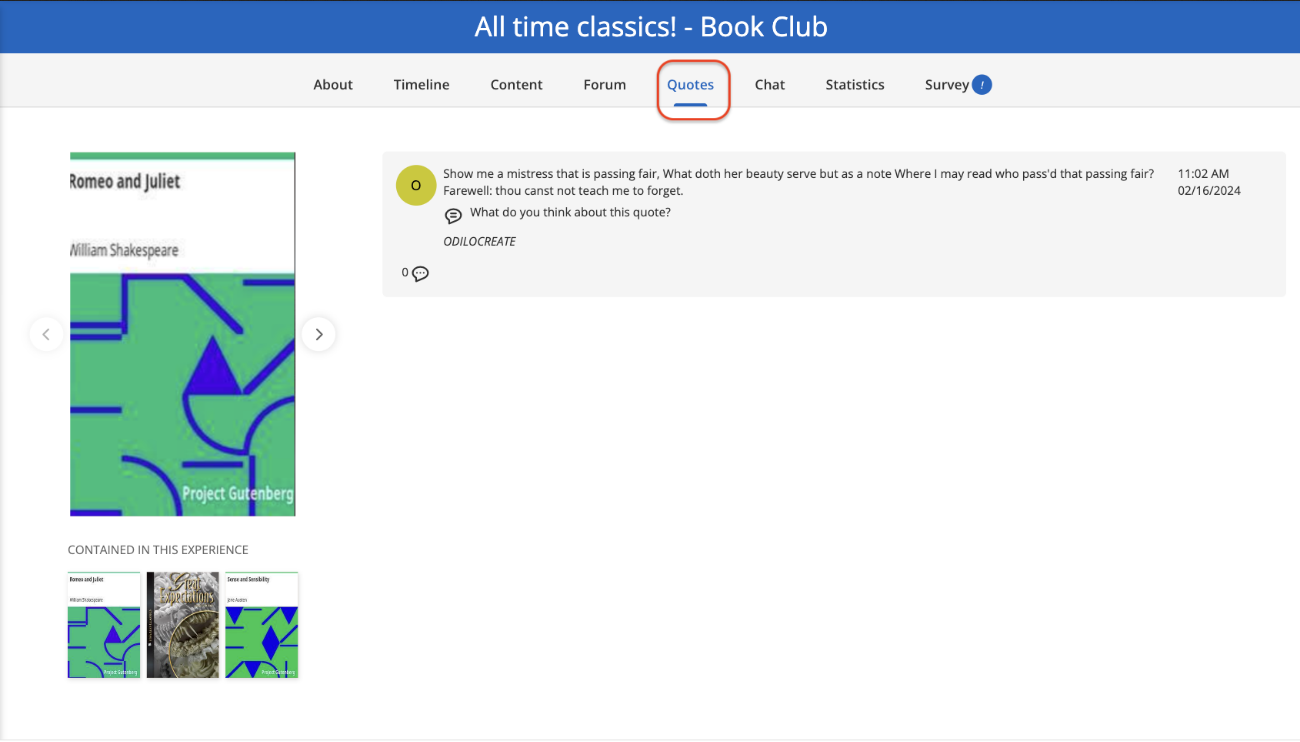
Book Club users will be able to leave their comments on this quote, or even add their own quotes by following the same route shown in the previous screenshots.
Create discussion forums
In the forum section, debates or questions can be raised to develop communicative activities in conjunction with the content. Each forum is independent and will group opinion threads for each content.
To create a question and start a discussion thread, click the forum tab. Select the title you want to discuss and then you can type a question or create a new thread in the text box. Once the question is set, simply click “Add”.
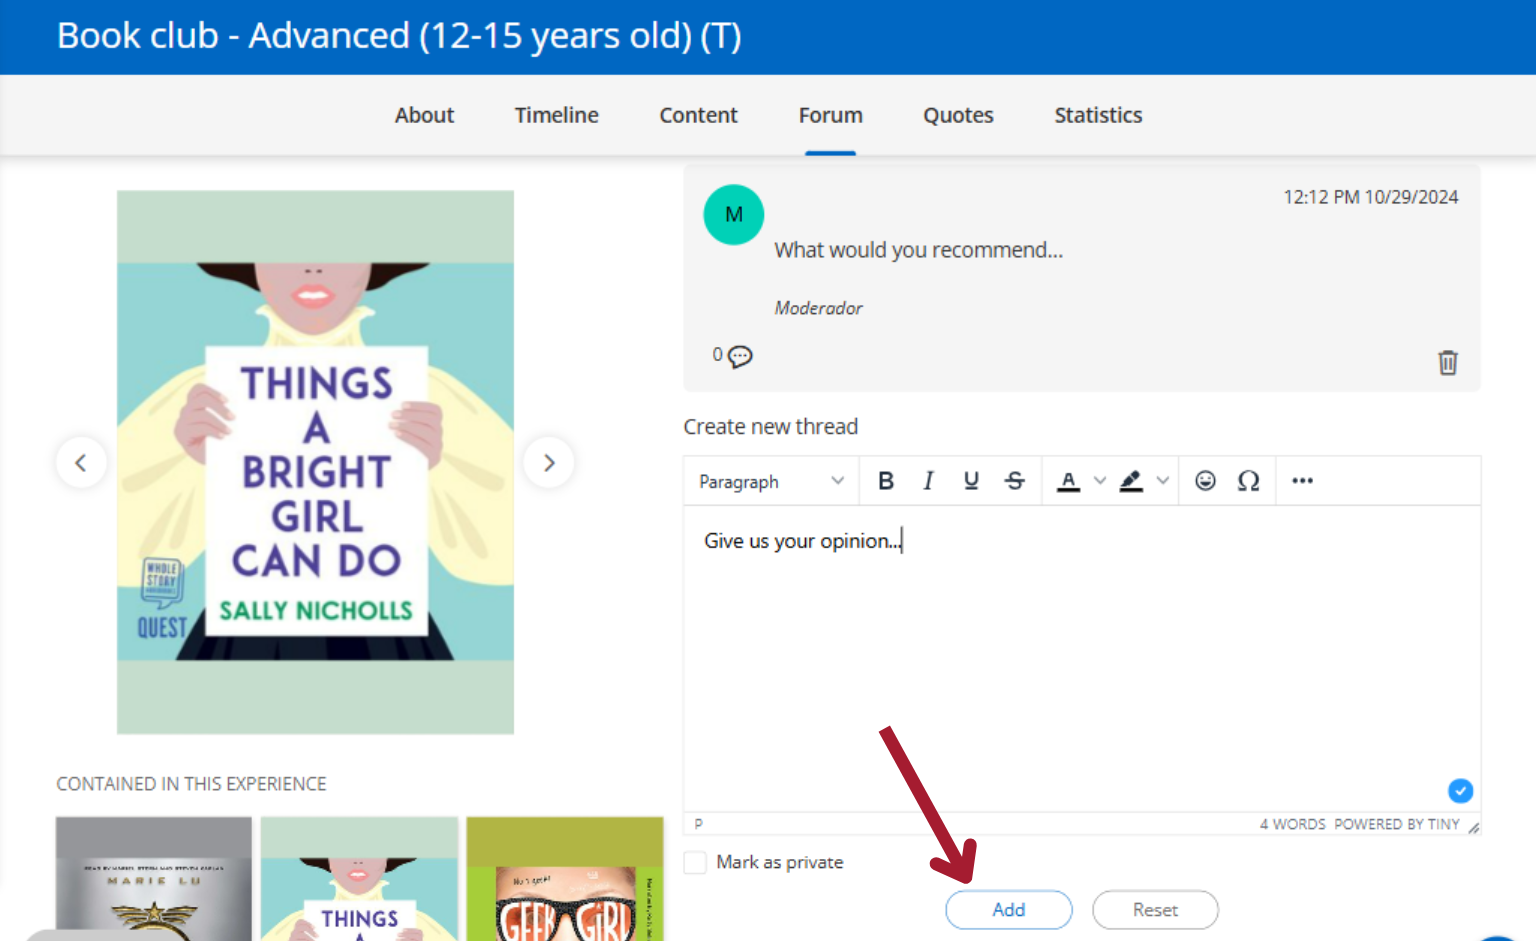
To participate in the discussion thread, both moderators and participants can click on the dialogue icon and enter the forum for that particular question. To answer the question, simply type in the text box and click “Send reply”.
Create quickly (clone)
To clone, that is, duplicate an already created Book Club, you must click on the button “Create Learning Experience” which is located under the first carousel.
* If you do not see the button, access your user area, select “Learning experiences”, click “go to learning experiences” and re-enter your library.
Next, select the option: “From repository”.
From this option all the Book Clubs that have been previously created and shared will be displayed, and that have been shared in the repository for cloning.
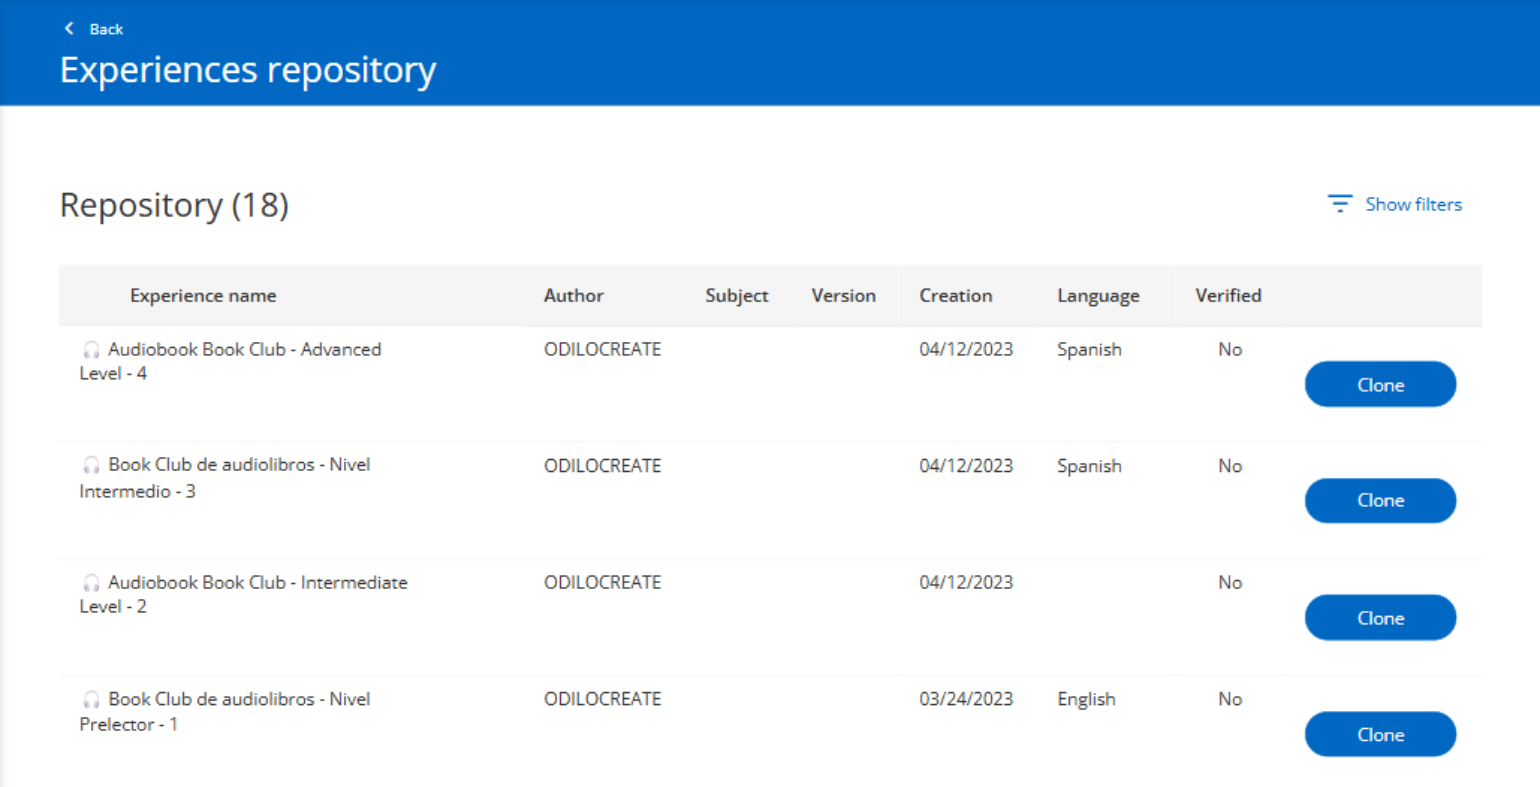
You can perform a more precise search through the filter button at the top right.

Another option is to review all the options from the displayed list.
Once you have chosen the Book Club you want to clone, click on the “Clone” button, on the right.