Edit a Learning Experience
Edit experience settings
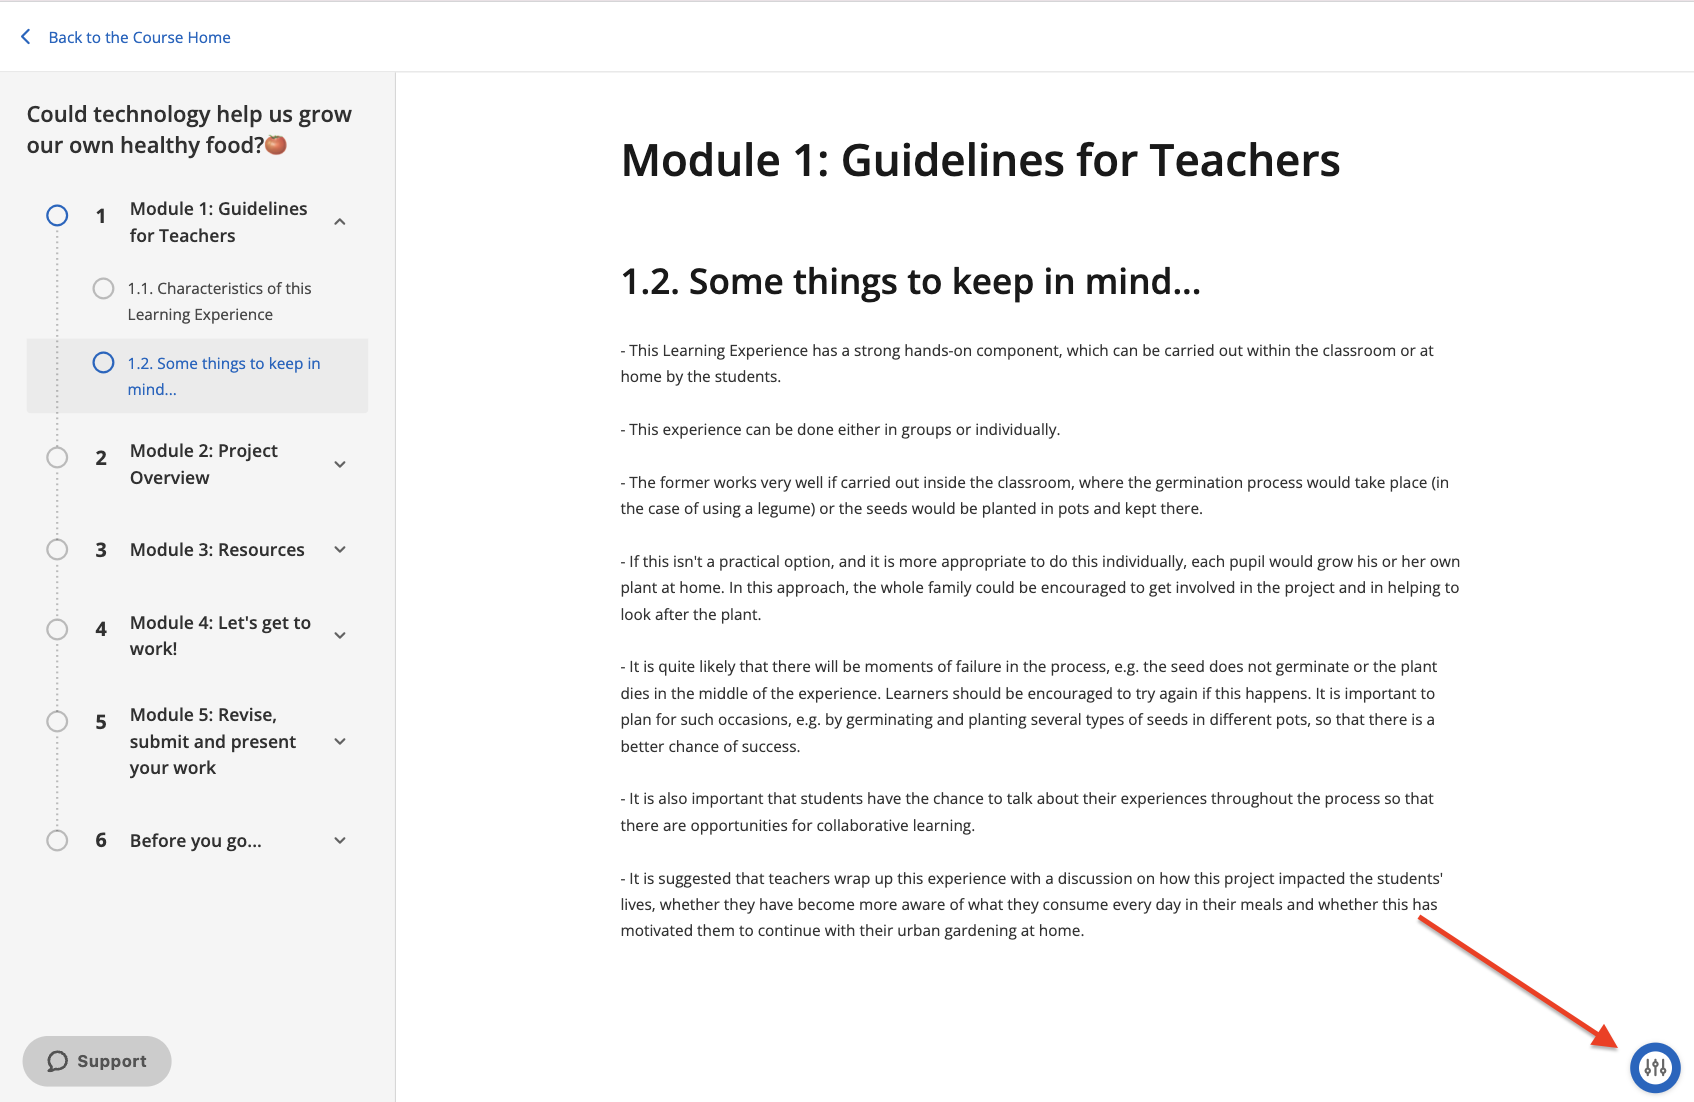
To edit the initial settings of any Learning Experience, click the edit button ![]() at the bottom right of the learning experience. Click on the first option to enter settings.
at the bottom right of the learning experience. Click on the first option to enter settings.
Edit a literacy experience
To edit this type of Experiences, you will have an edit button that will enable options within each top tab.
Add or delete content
Add content
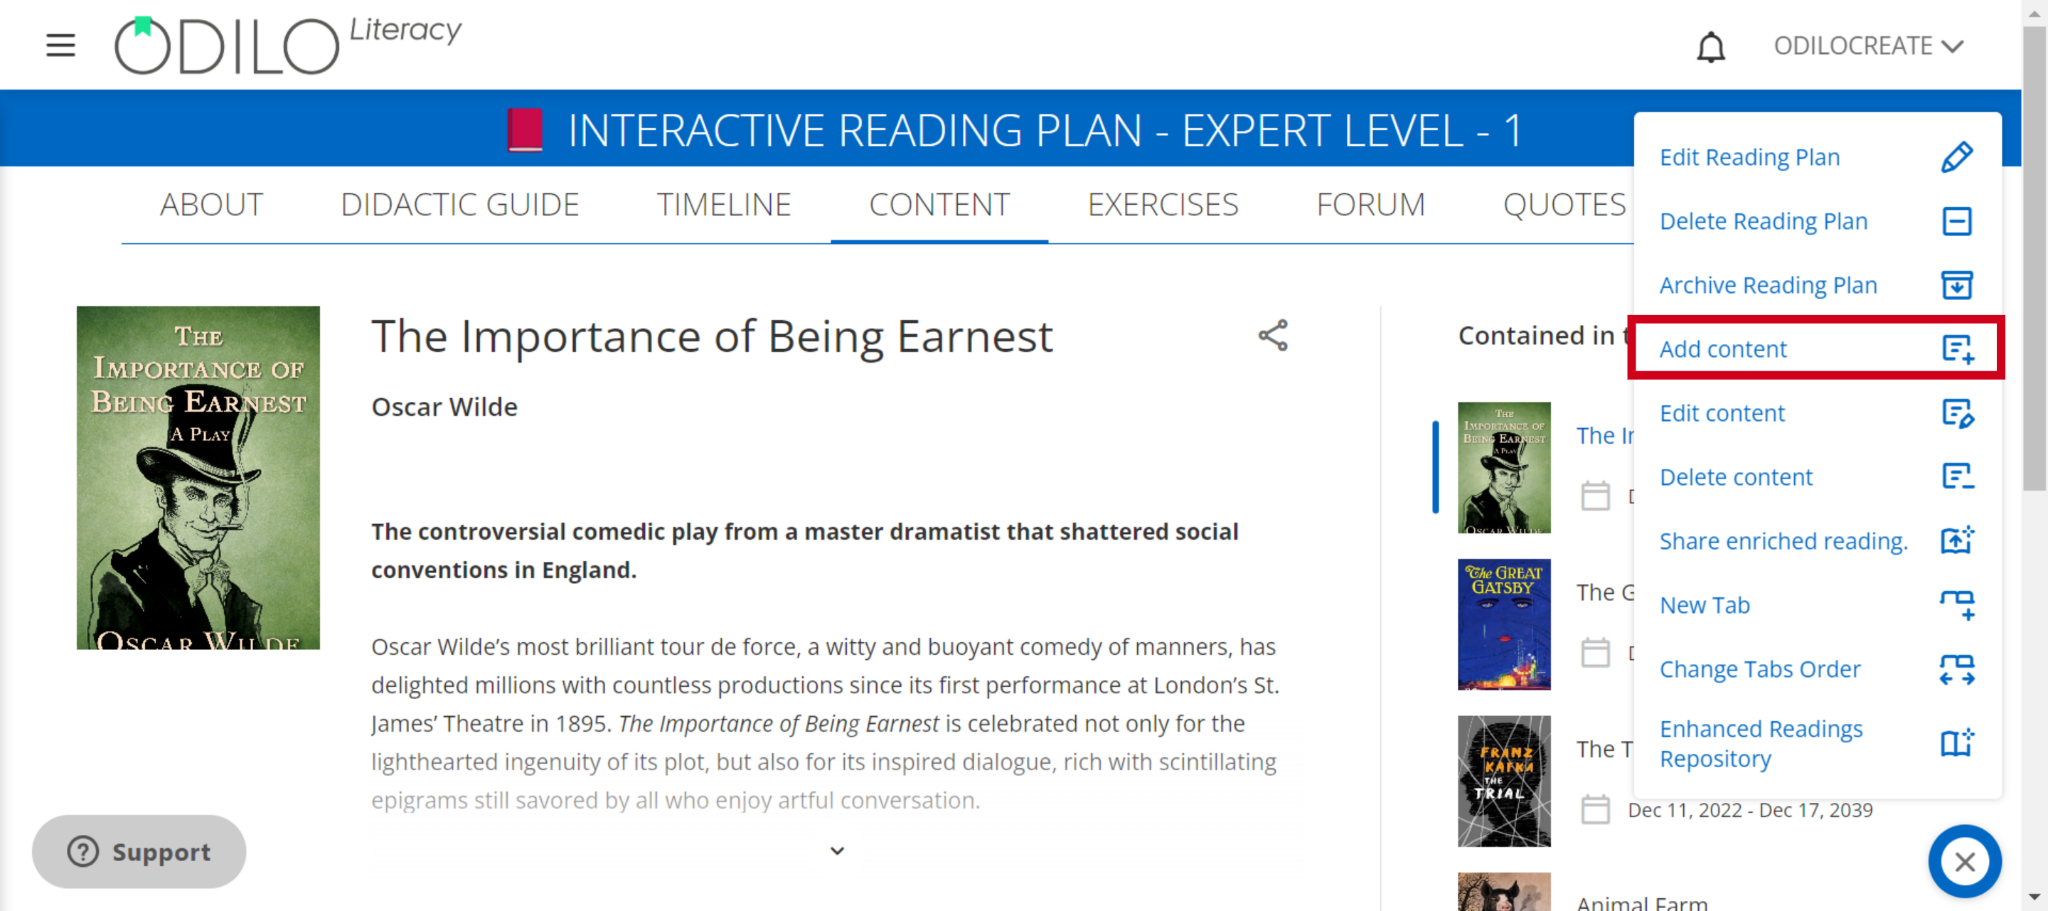
To incorporate new content, navigate to the content tab, and select “Add content” from the button located in the lower right corner.
You can add content that is available in the ecosystem’s catalog or from an external link.
Check how to add, edit and delete content on the following video:
Add from catalog
Write the name of the content in the search bar and then choose from those that are marked as “Recommended”.

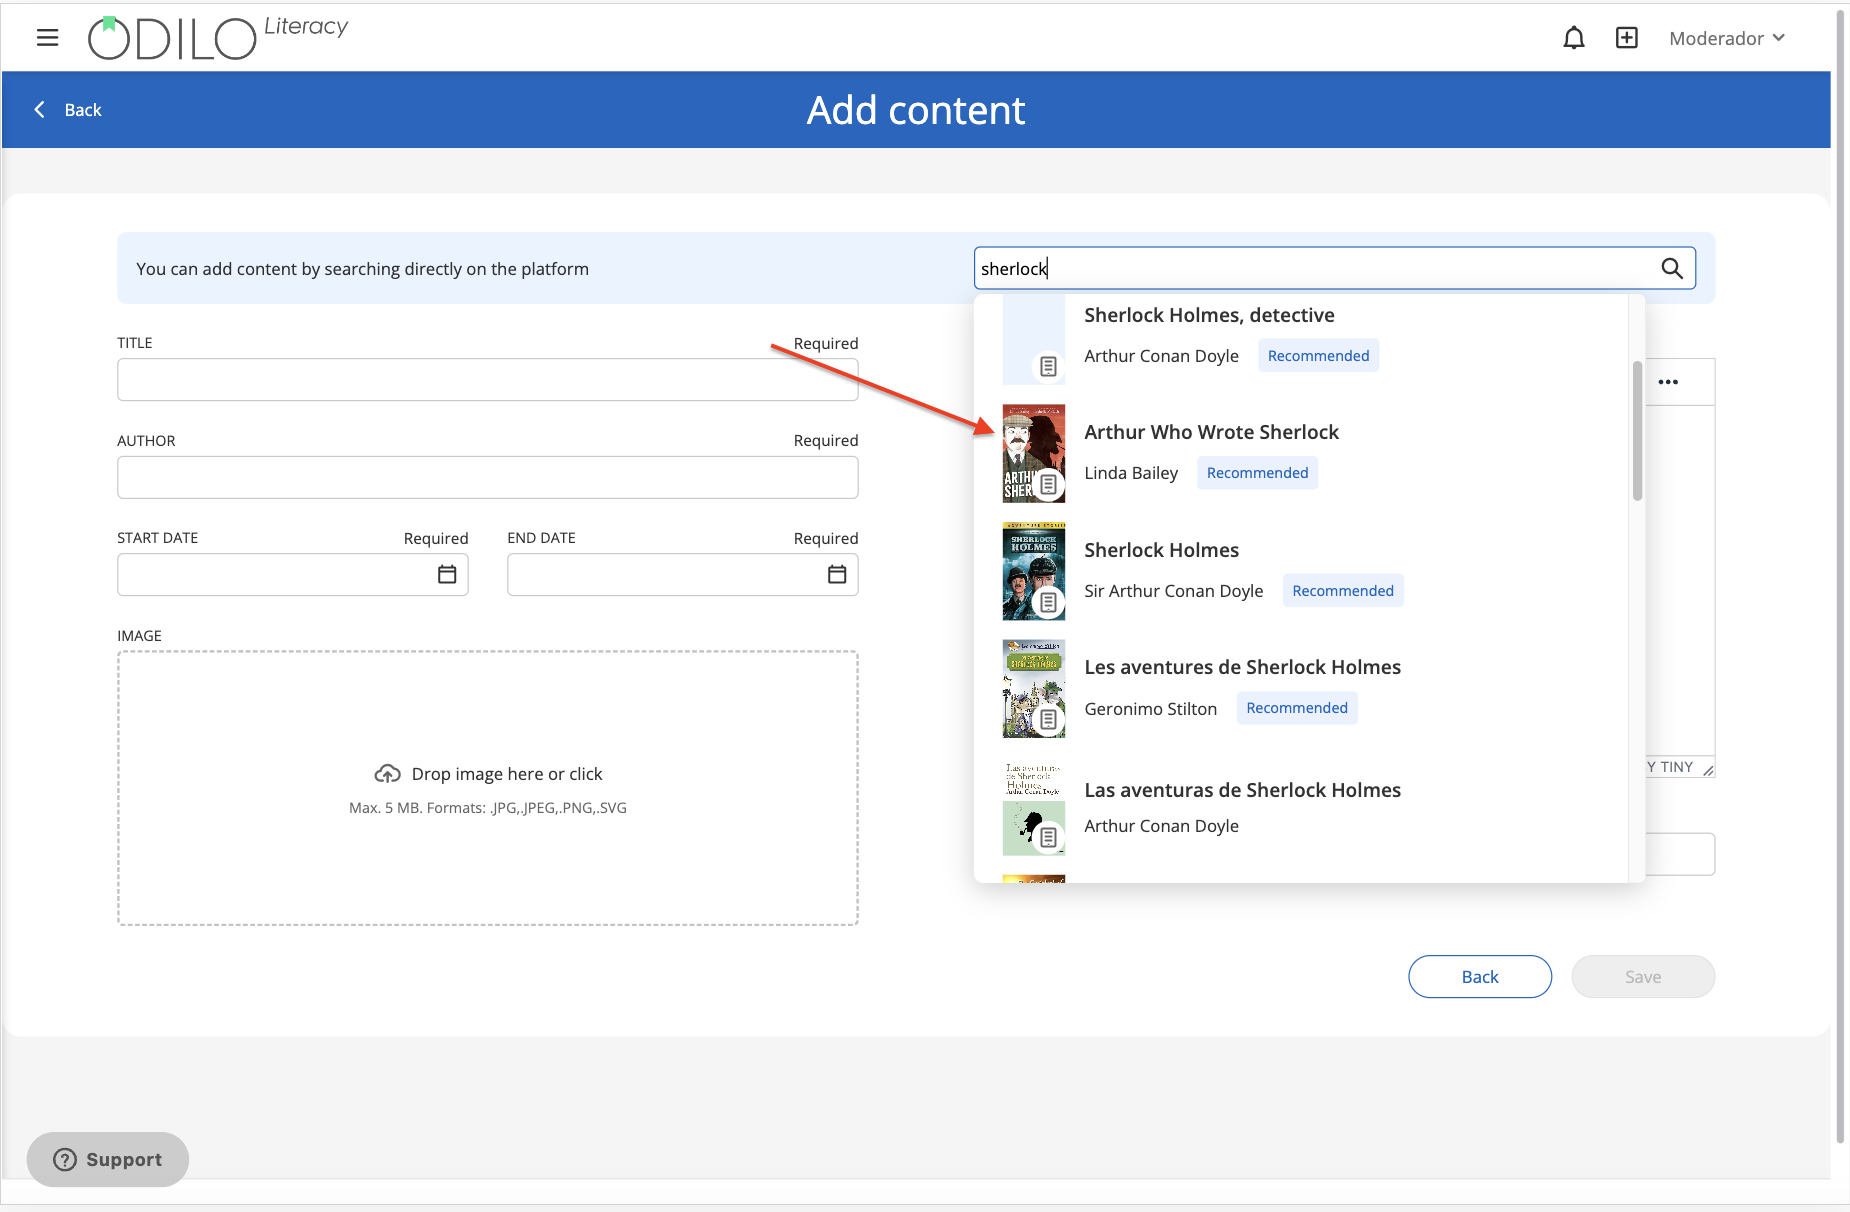
Select the dates when the reading will be available. Click save.

Own content
Share your own content through a URL from the “External content link”. 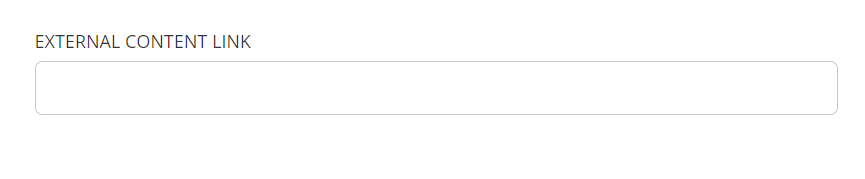
As it is its own content, the sections ofTitle, Author, Description and Cover, will have to be completed manually.
Delete content
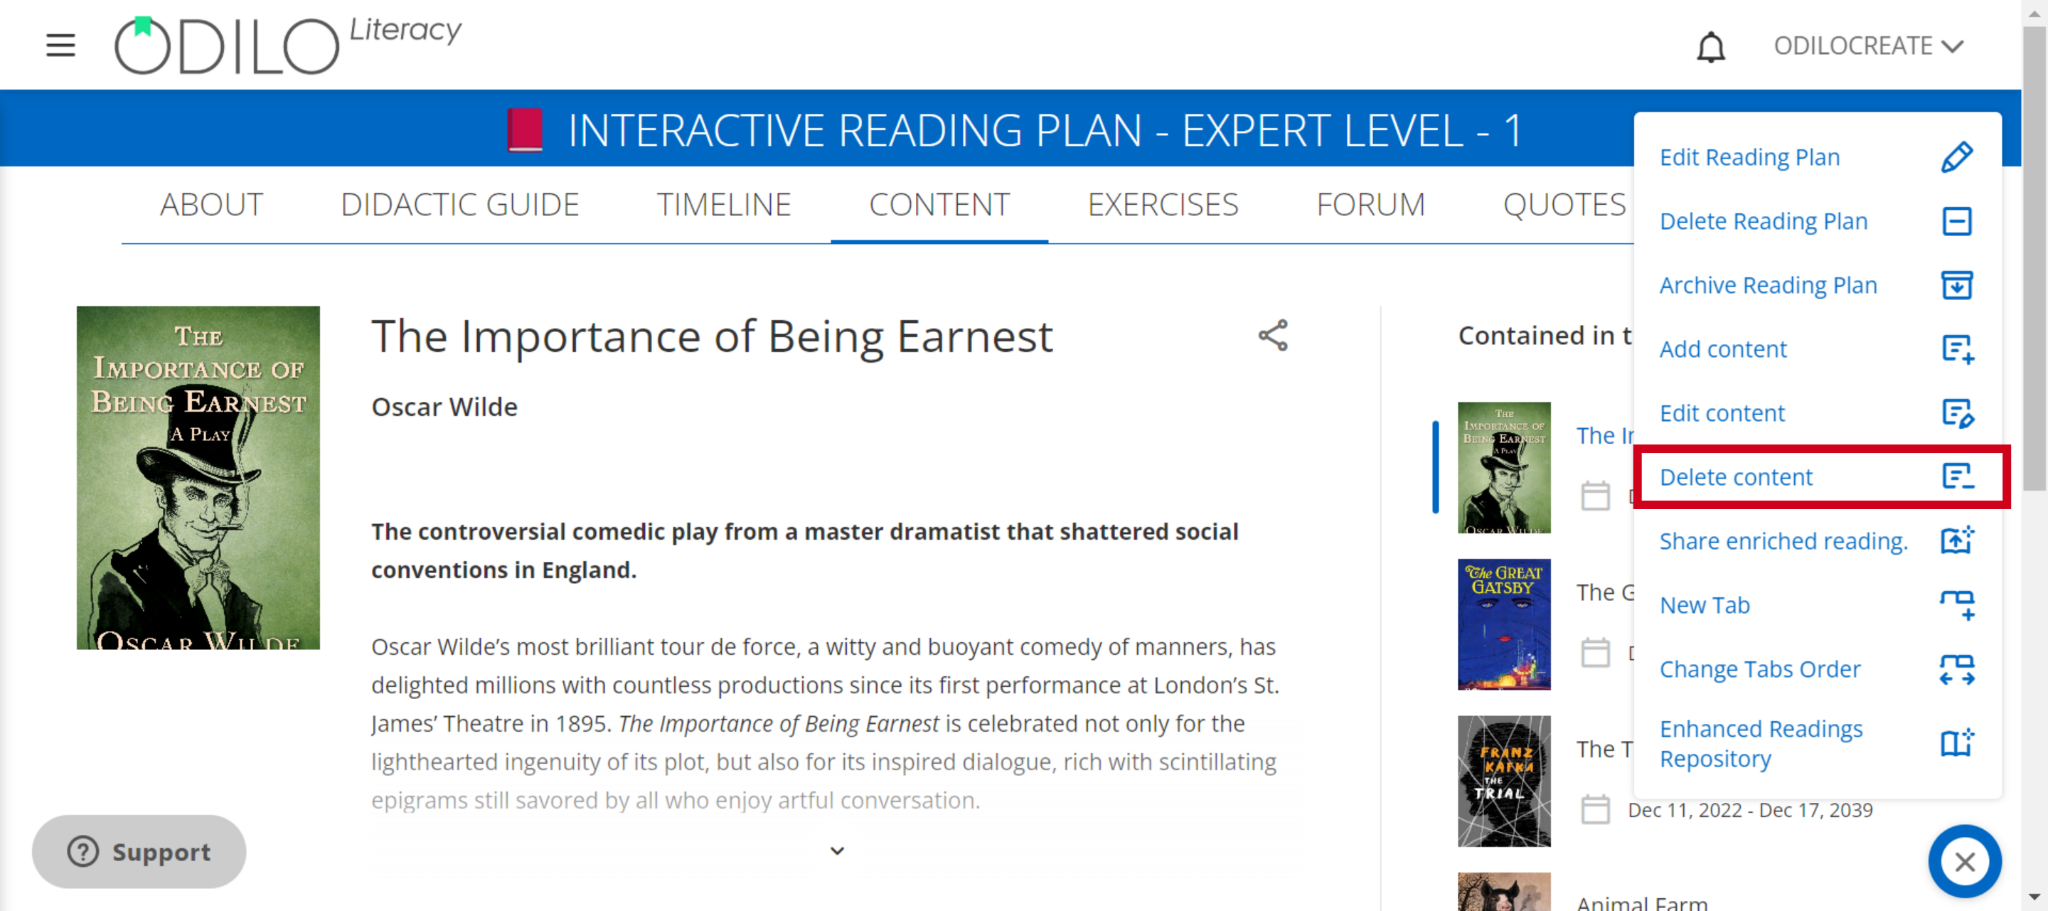
To delete content (in this case ebook), click on the “Content” tab. Select the content to delete by clicking on its cover.
Click on the edit button located in the lower right corner and select the “Delete content” option.
Click “Accept” and the content will be deleted.
Check this video to review:
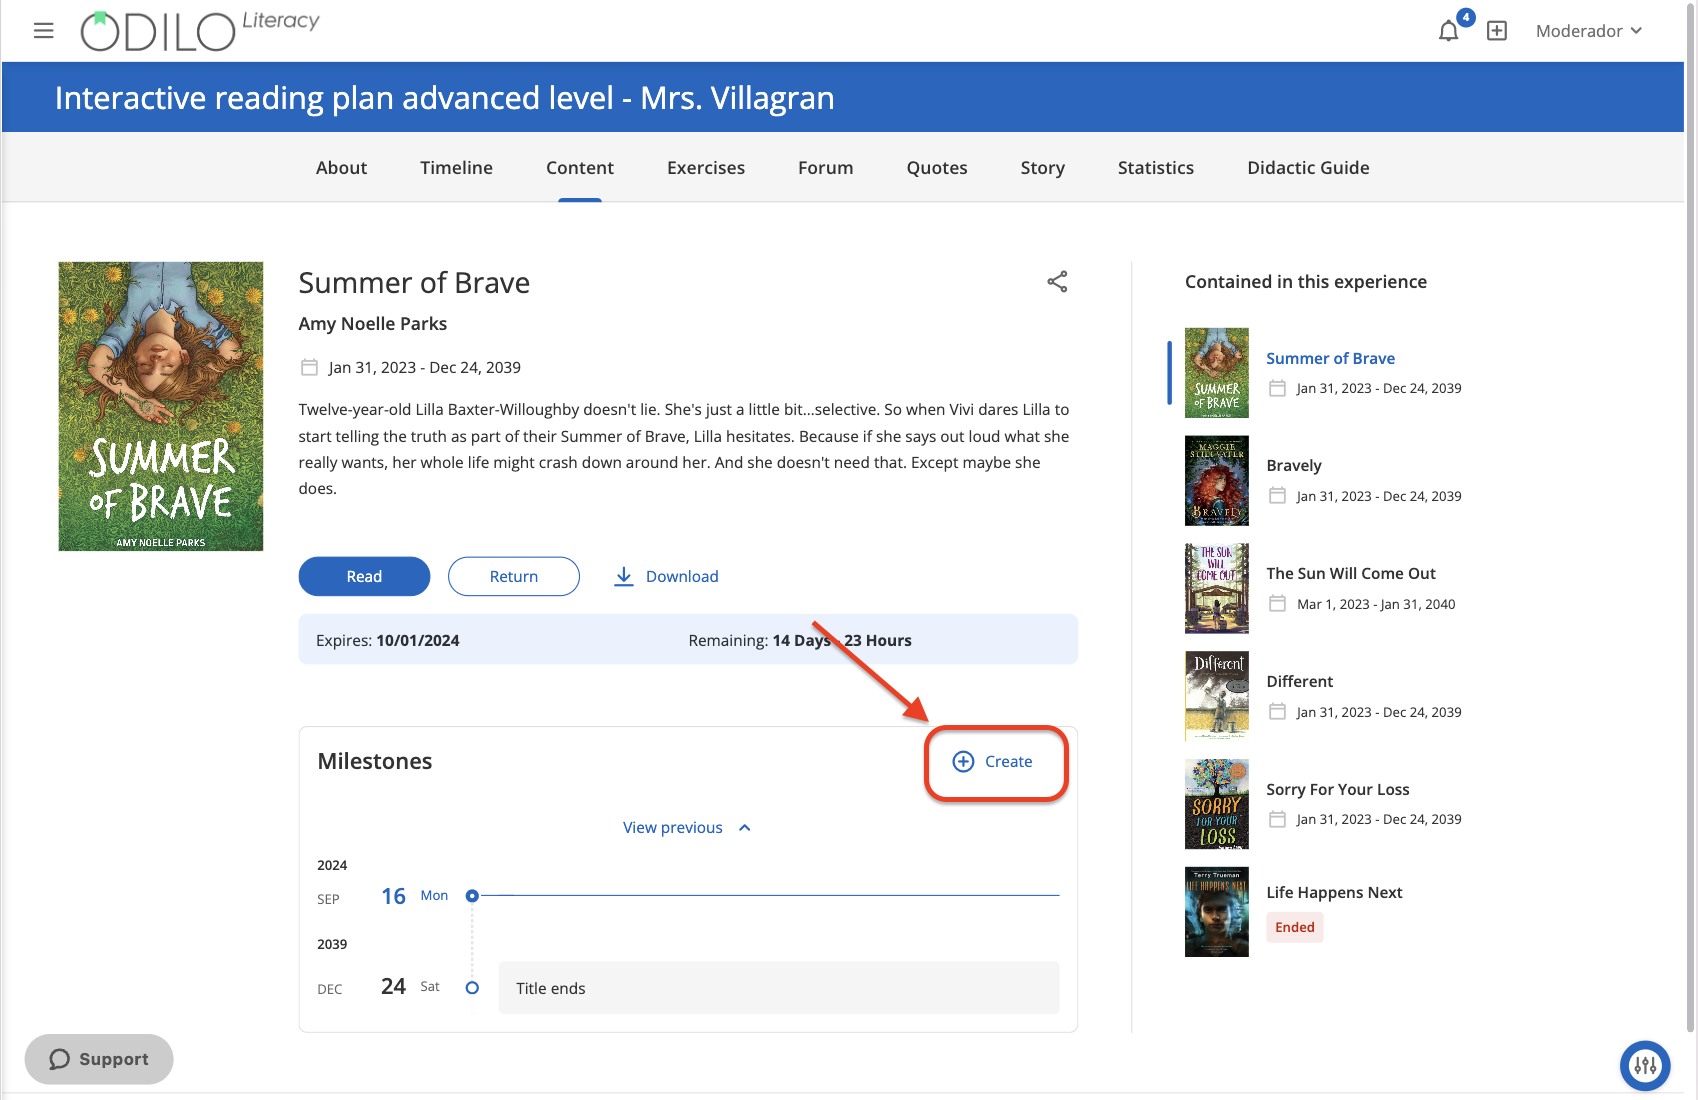
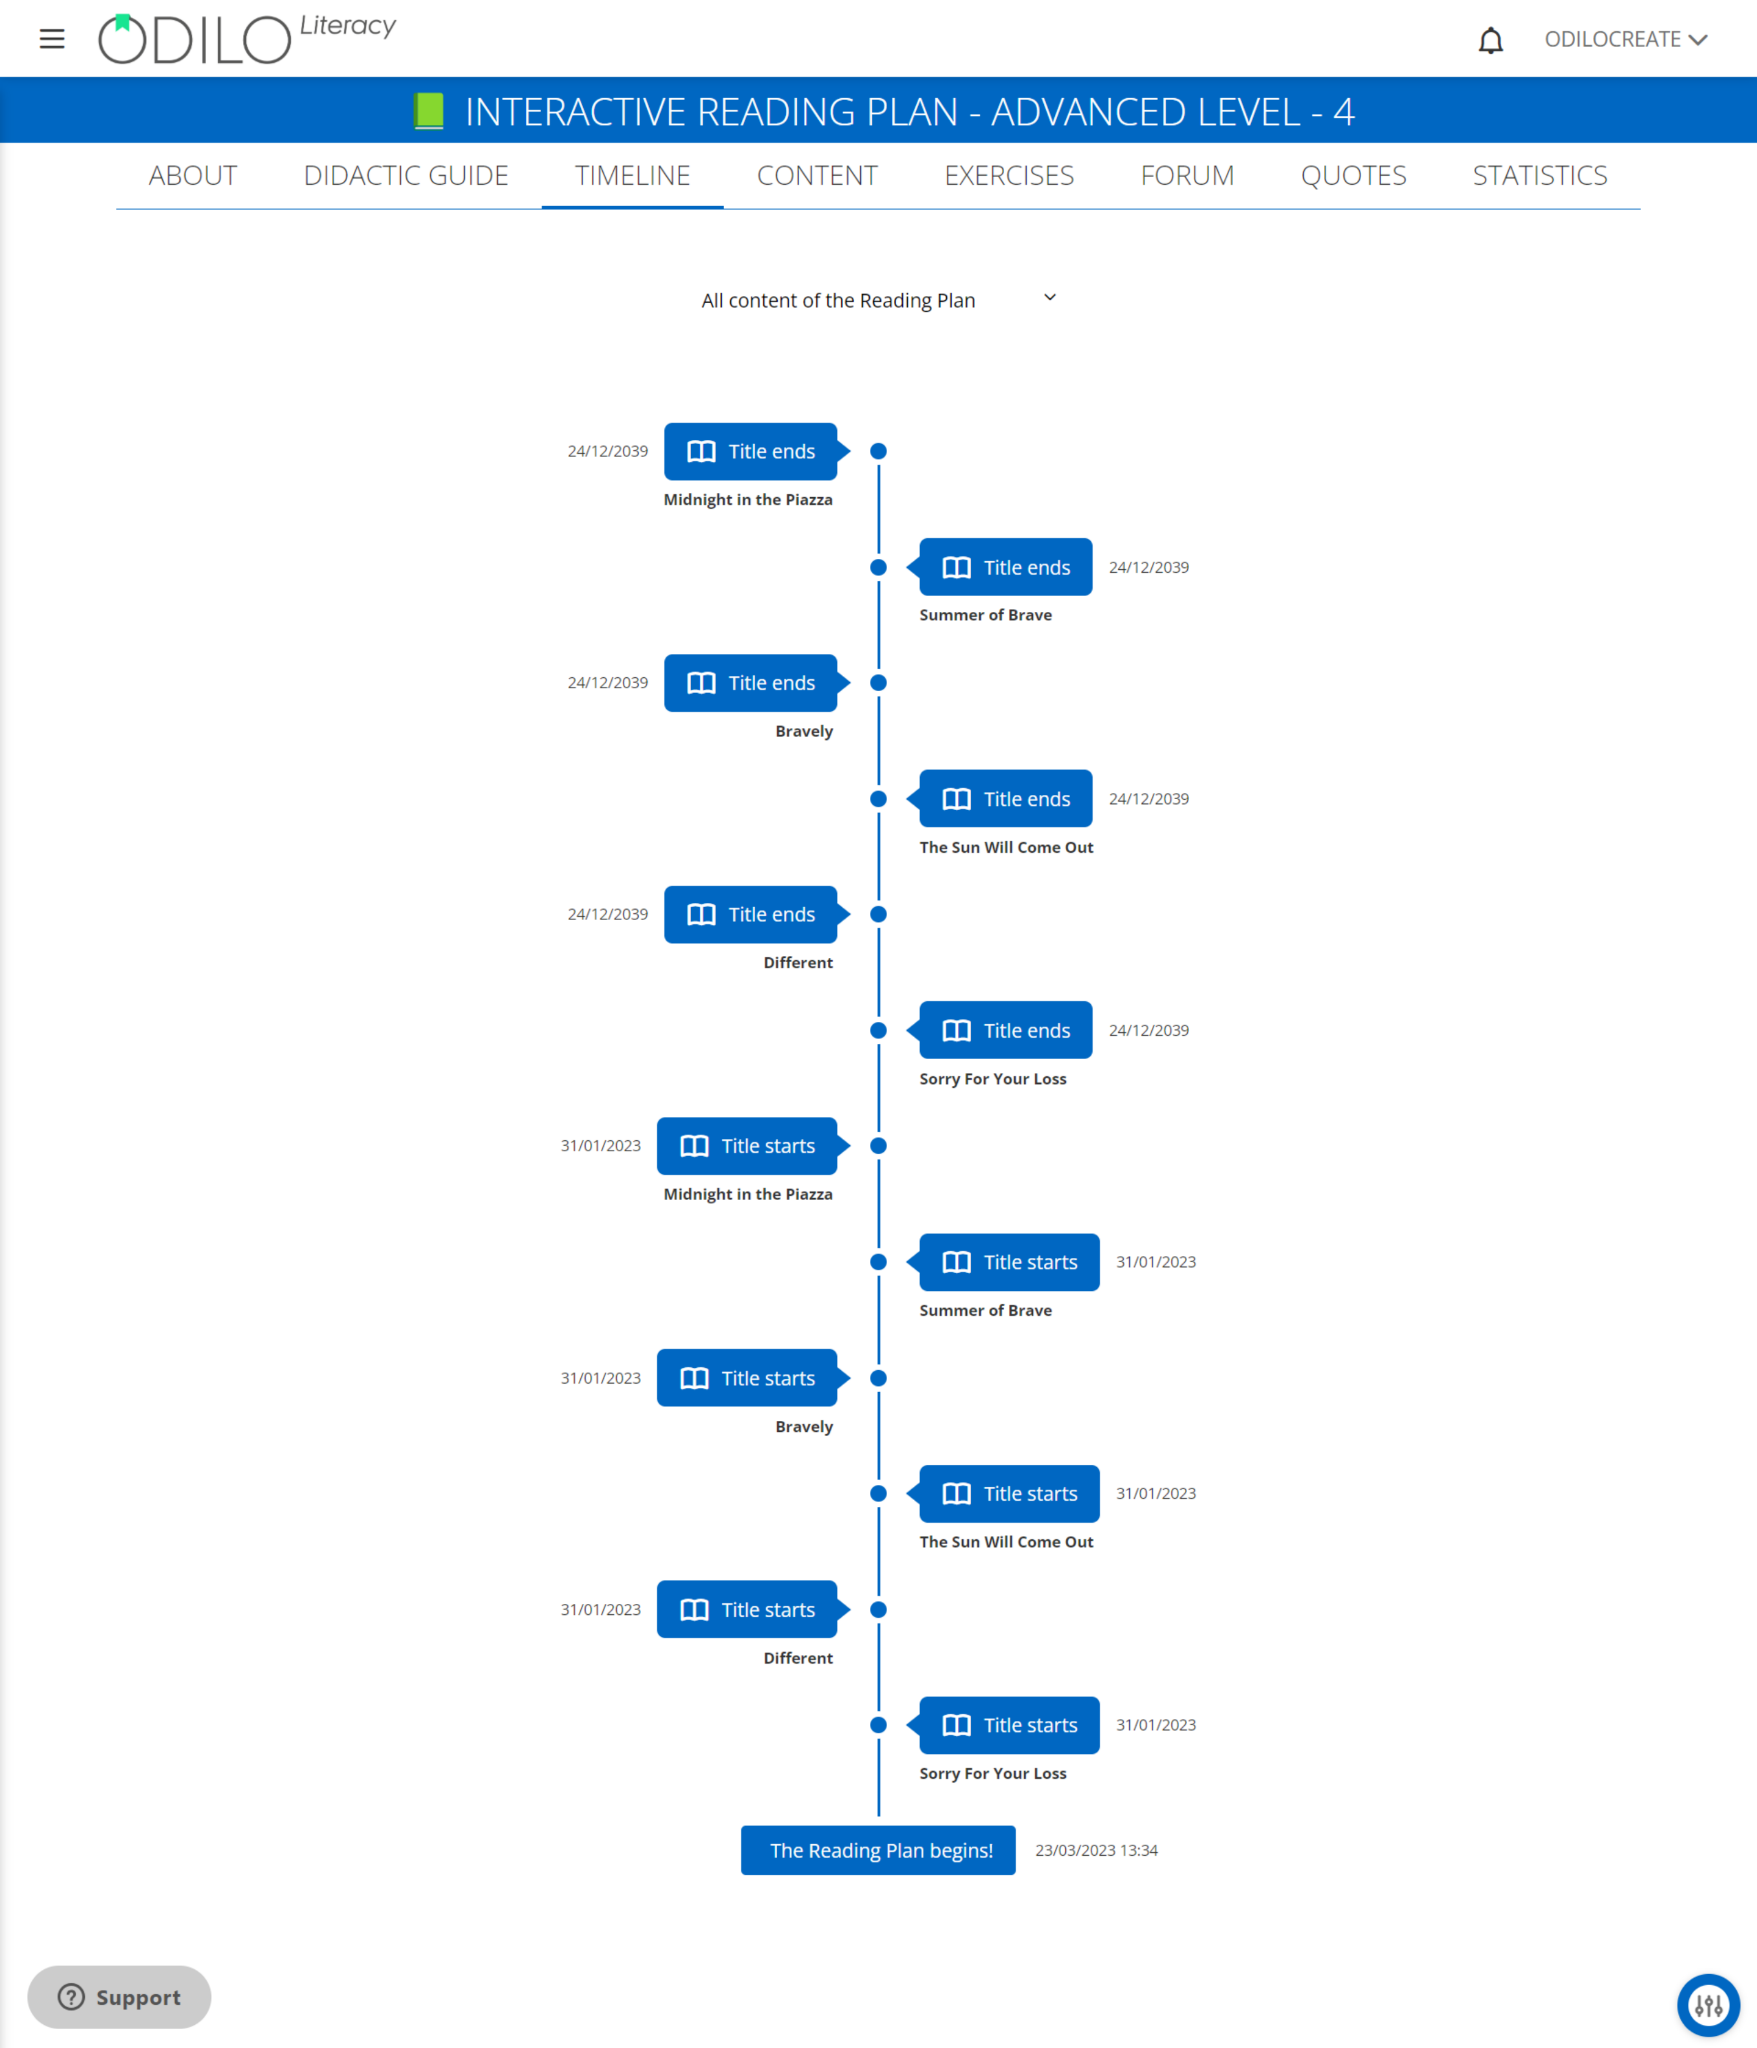
Add milestones: Dates and reminders
Milestones or reminders allow you to plan, within content, notices that are important to participants.
These milestones will always be automatically reflected in the “Activity” tab.
Click the button ![]() to add a milestone as a reminder or video call.
to add a milestone as a reminder or video call.
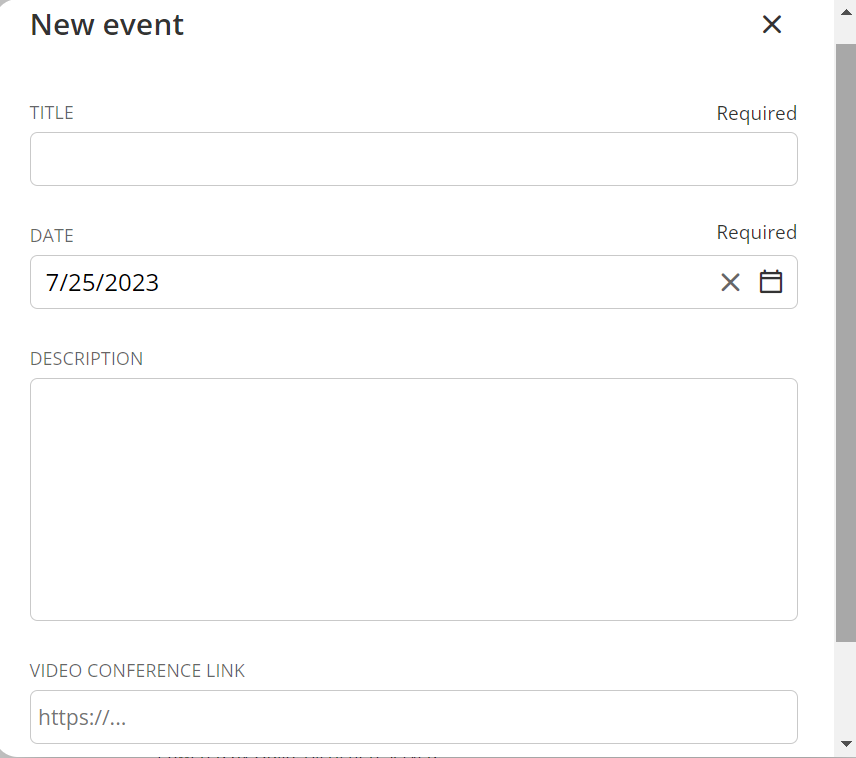
Add a title, select the date of the event and/or write in the description section.
If you wish, include a link to a video conference, which should be generated externally with the platform you usually use (Google Meet, Zoom, etc.).
All changes you make will be automatically reflected in the activity section. This section will show an overview of all the activities that your Learning Experience has.
Enhance content
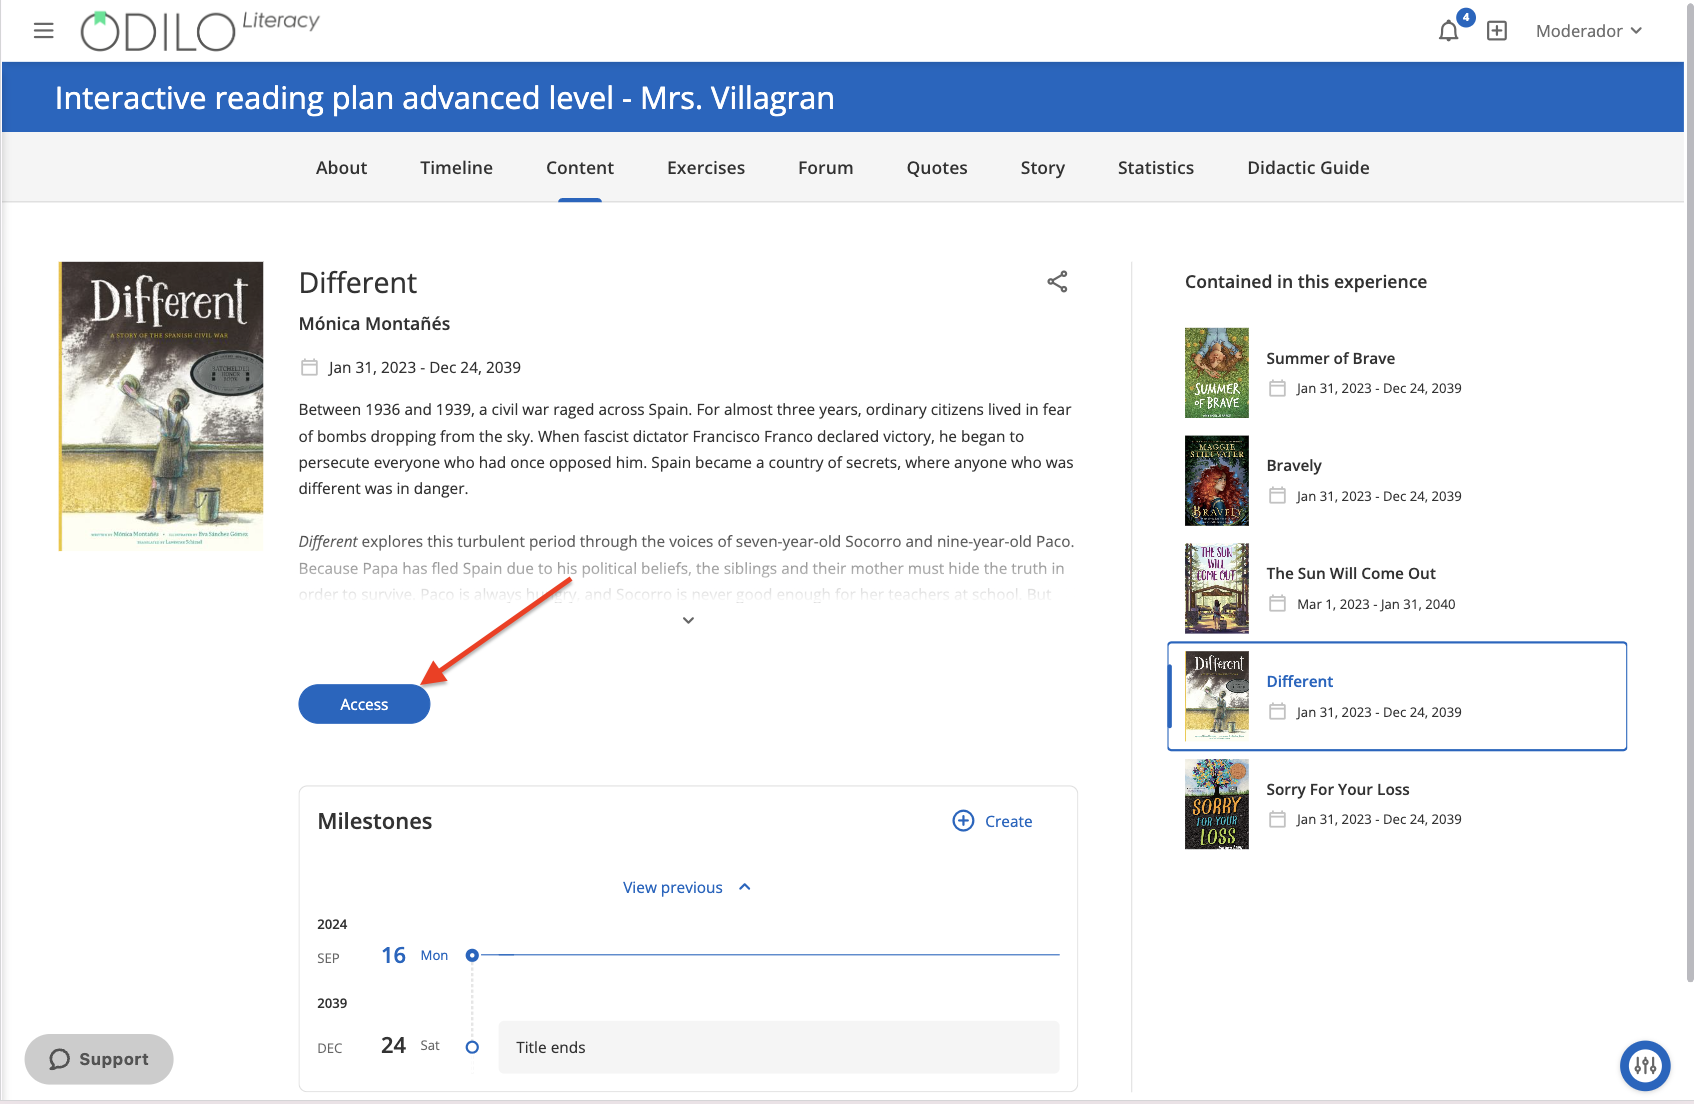
In the case of a cloned Reading plan, you can view the enhancements within a resource, from the content tab, clicking on the cover of the resource you want to review and then selecting the option “Access”. Afterwards, click read (the content will load in another tab).
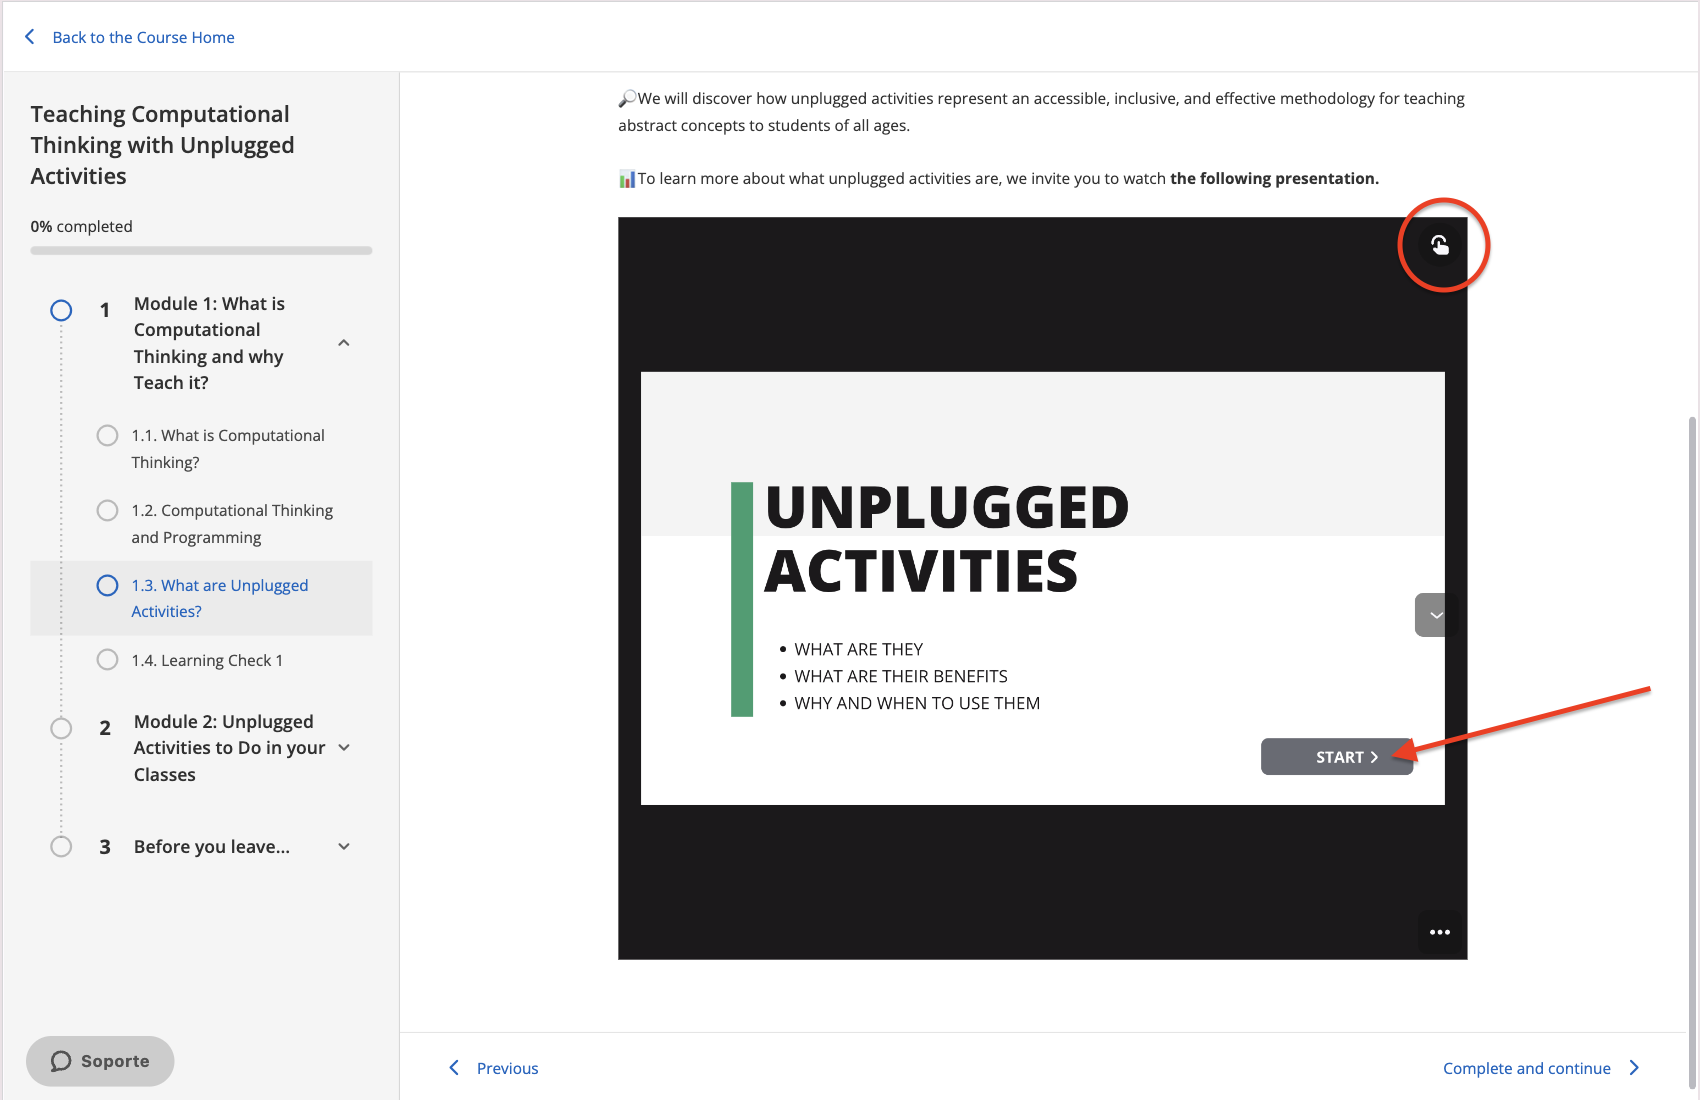
Inside the content, your students will discover icons that appear in the upper right corner of the content.
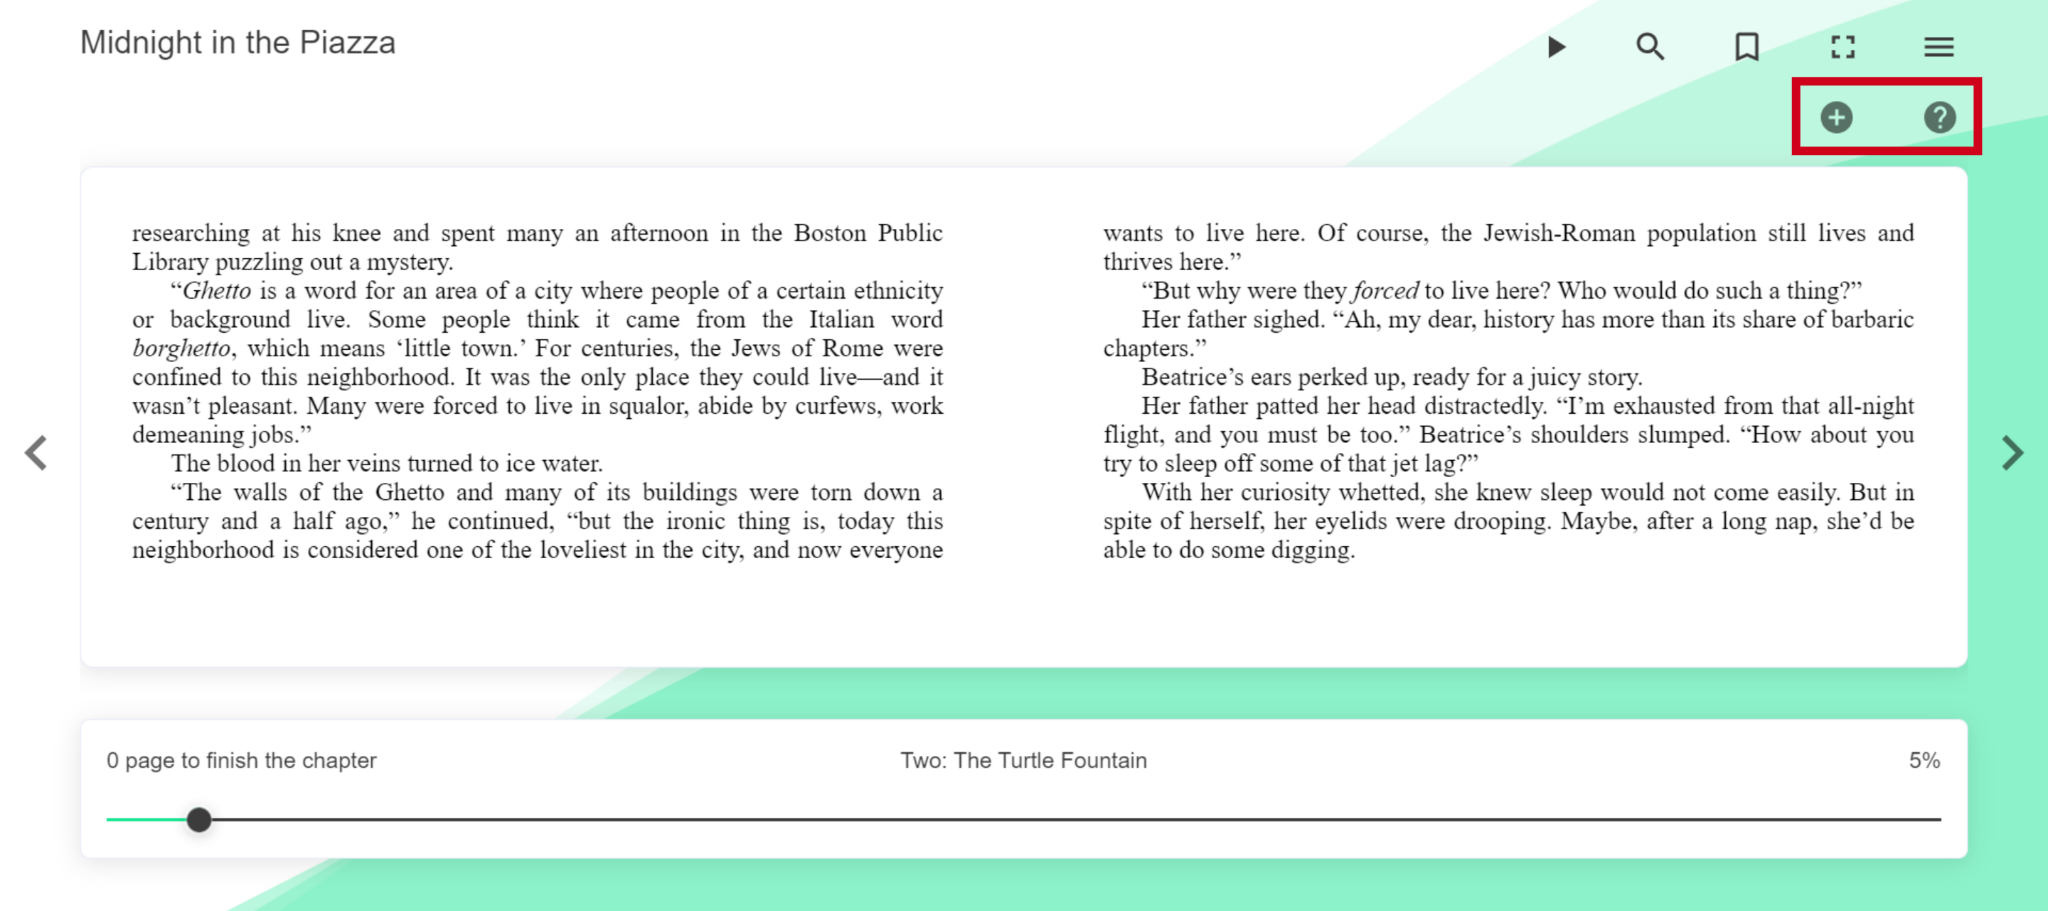
You can move through pages of content to discover enhancement material if you’ve cloned the experience or create your own enhancements within the reading:
![]() Ask: This symbol shows one of the questions that is already created within the cloned Reading plan.
Ask: This symbol shows one of the questions that is already created within the cloned Reading plan.
![]() Annotation: This symbol indicates a note already created within the reading, which can be used for clarification and even expand the information of the content itself.
Annotation: This symbol indicates a note already created within the reading, which can be used for clarification and even expand the information of the content itself.
![]() Video: This symbol indicates that a video has been linked.
Video: This symbol indicates that a video has been linked.
![]() Test: This symbol indicates an automatic correction test/quiz.
Test: This symbol indicates an automatic correction test/quiz.
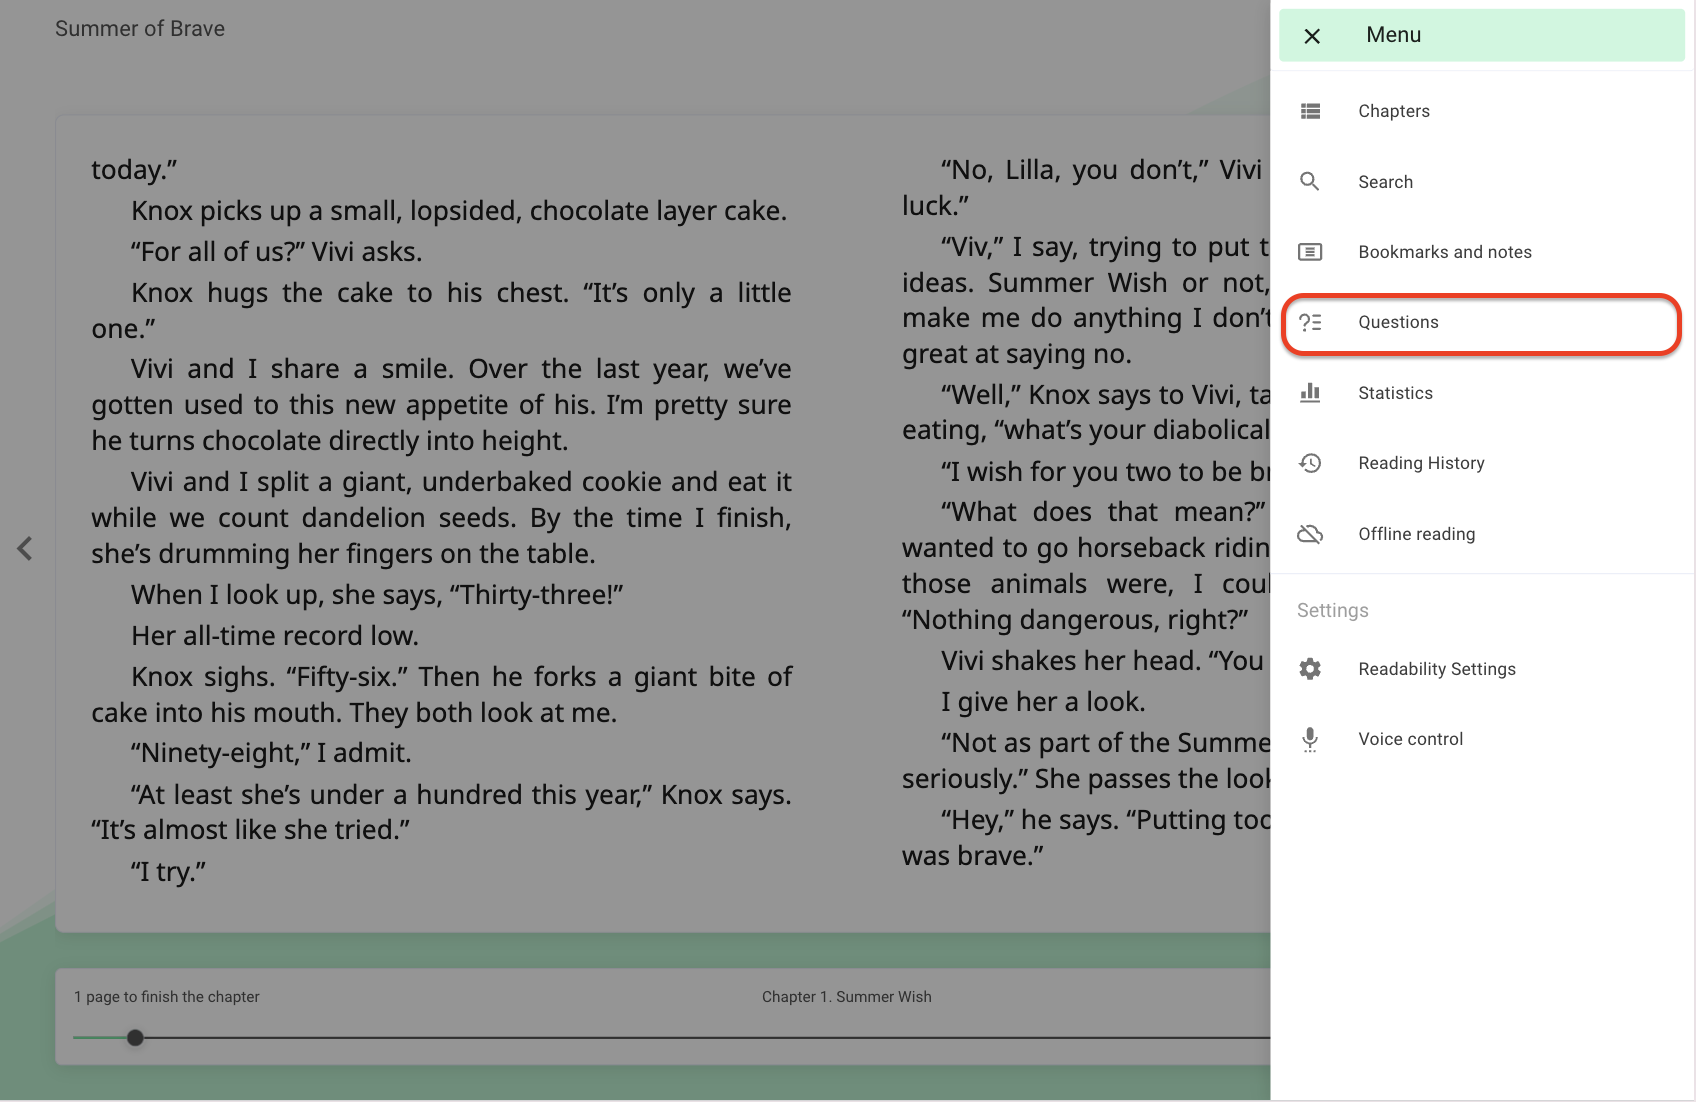
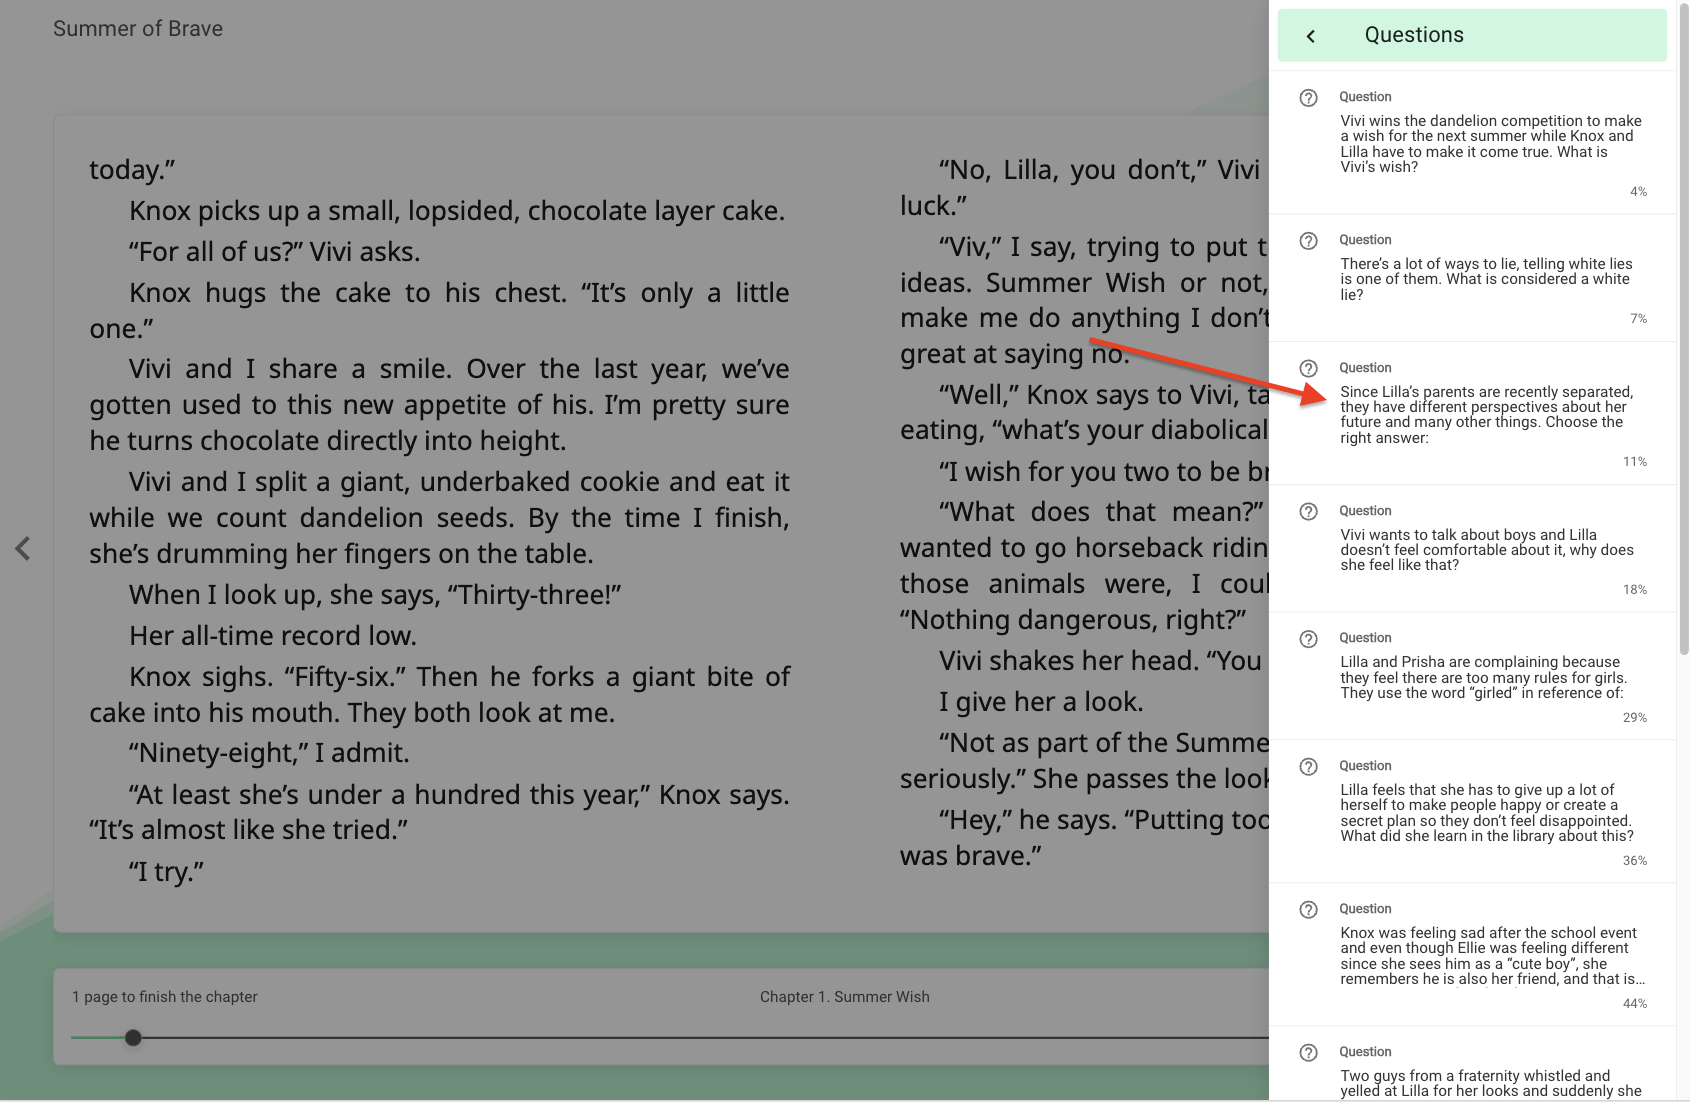
Review the enrichments from the side panel, clicking on the “Questions” option. Clicking on any of them will take you directly to the page where the question is added, and you can edit or delete it if you wish.
Add new enhancements
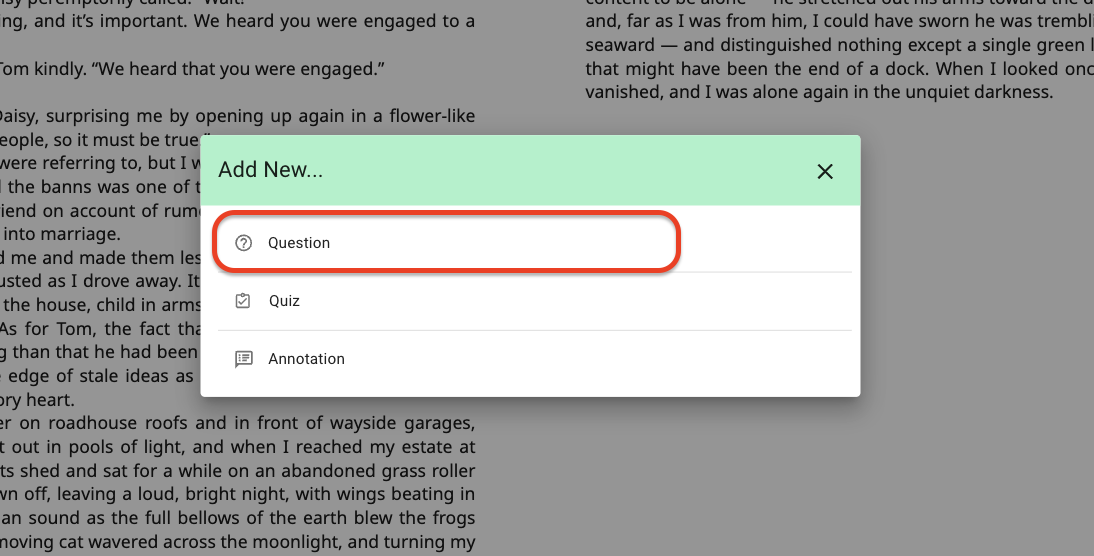
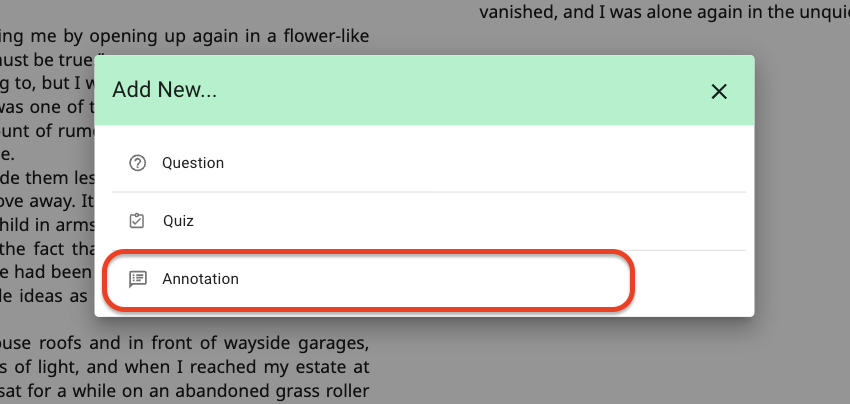
To add a new activity (questions, annotations, and tests), click on the ![]() button, choose the option you want, and configure your activity.
button, choose the option you want, and configure your activity.
Review this option in more detail in the following video:
Add question
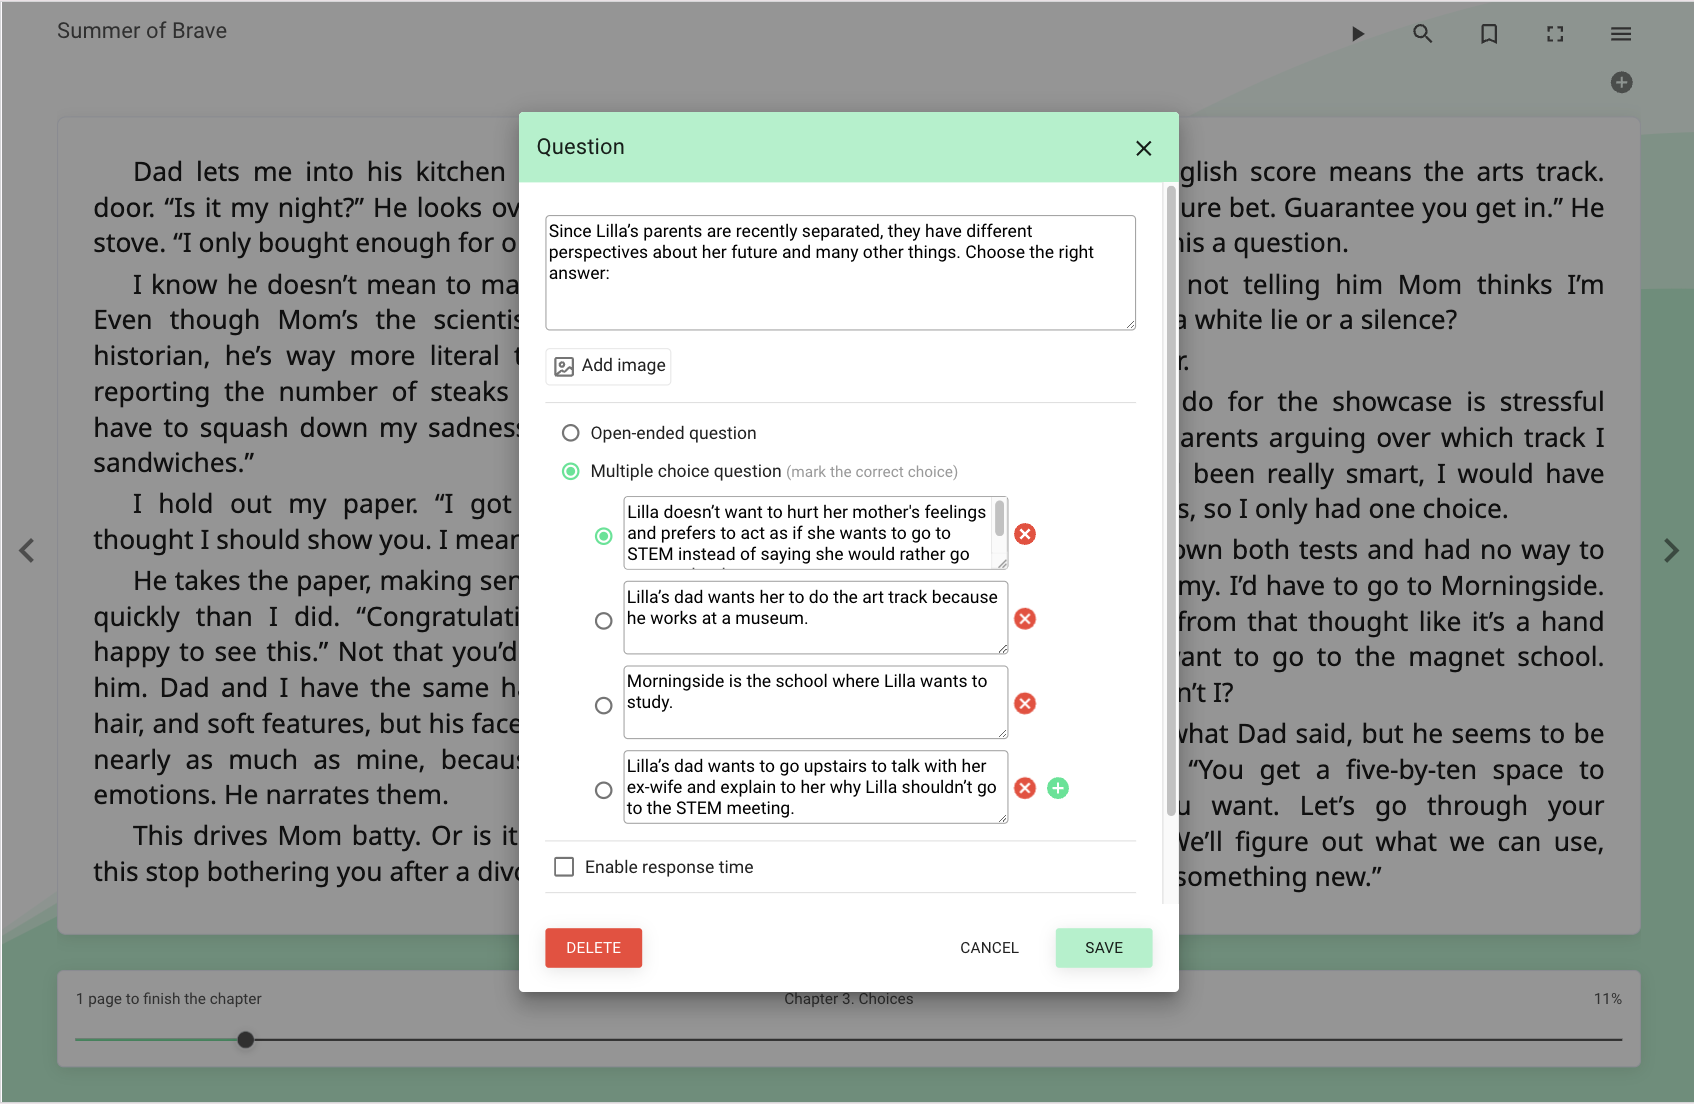
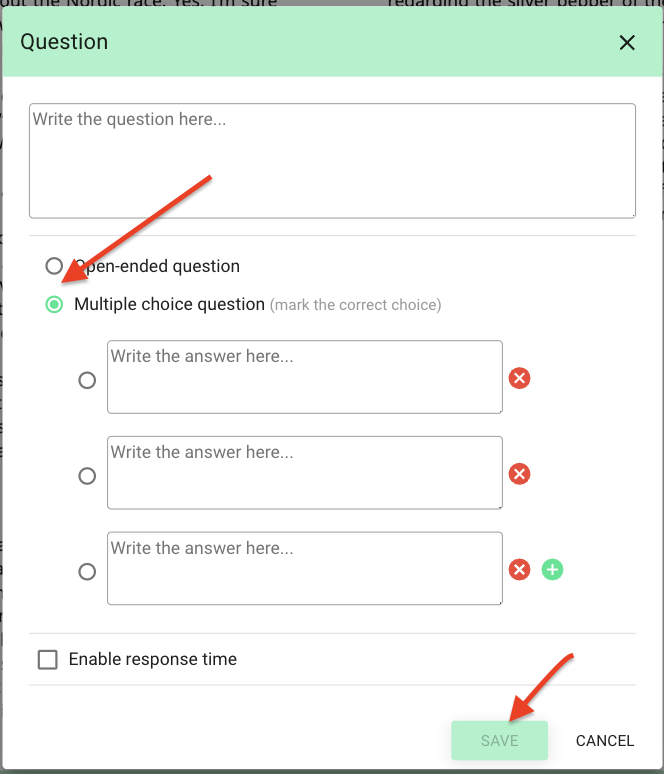
To add a question, click on the “+” sign and choose the question option. You can add open-ended questions (manual correction) or multiple-choice questions (automatic correction).
Configure your question and click on “Save.” The icon in the upper right corner will show your added question on the chosen page.
Students will see the question icon at the top.

Add a quiz
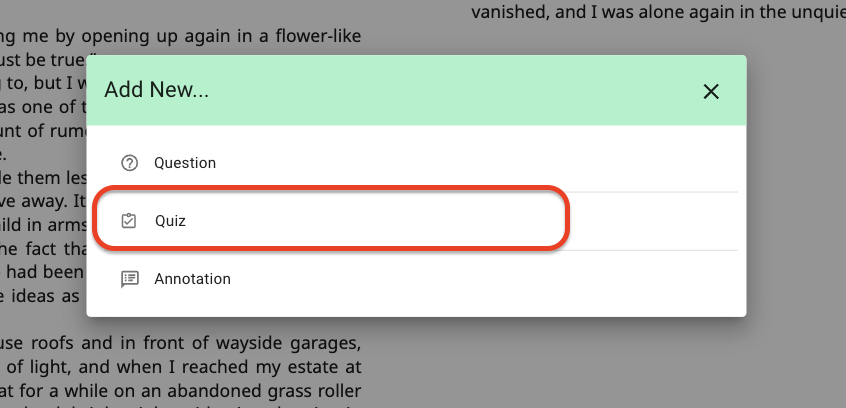
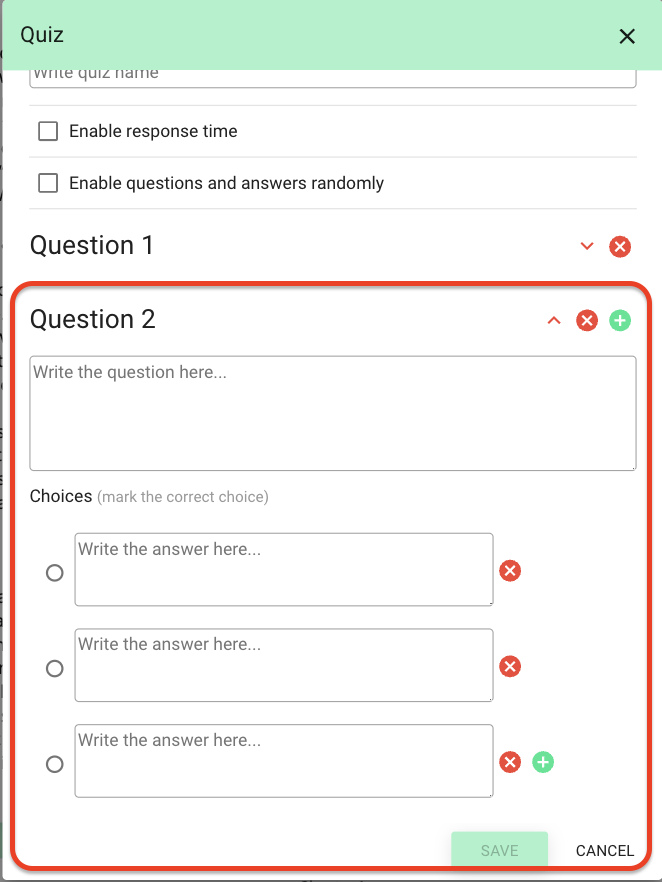
To add a multiple-choice question quiz with automatic grading, click on the + button on the page you want to enhance and choose the “Quiz” option.
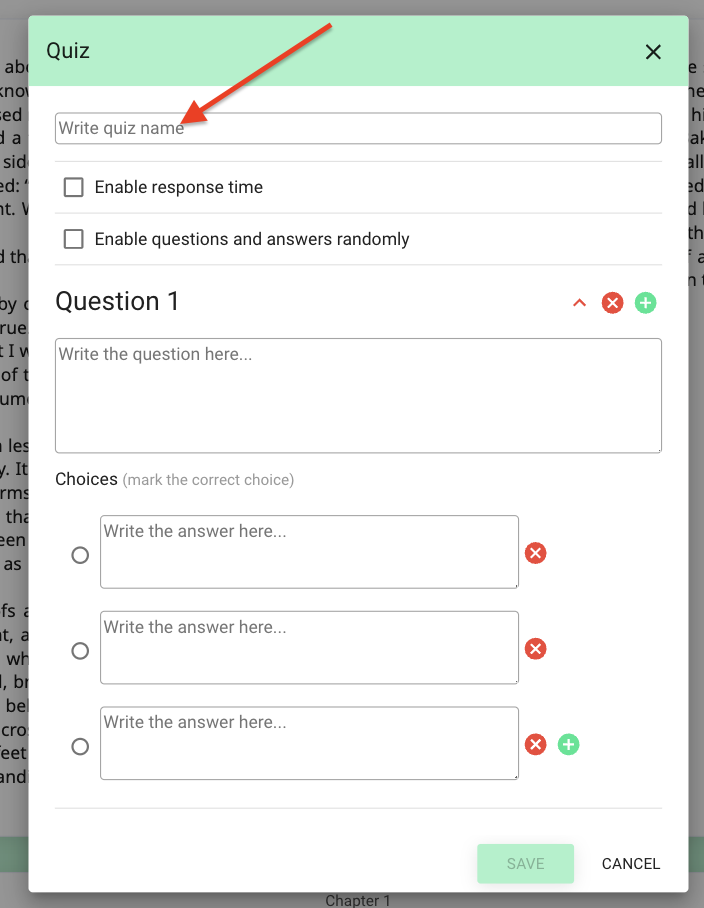
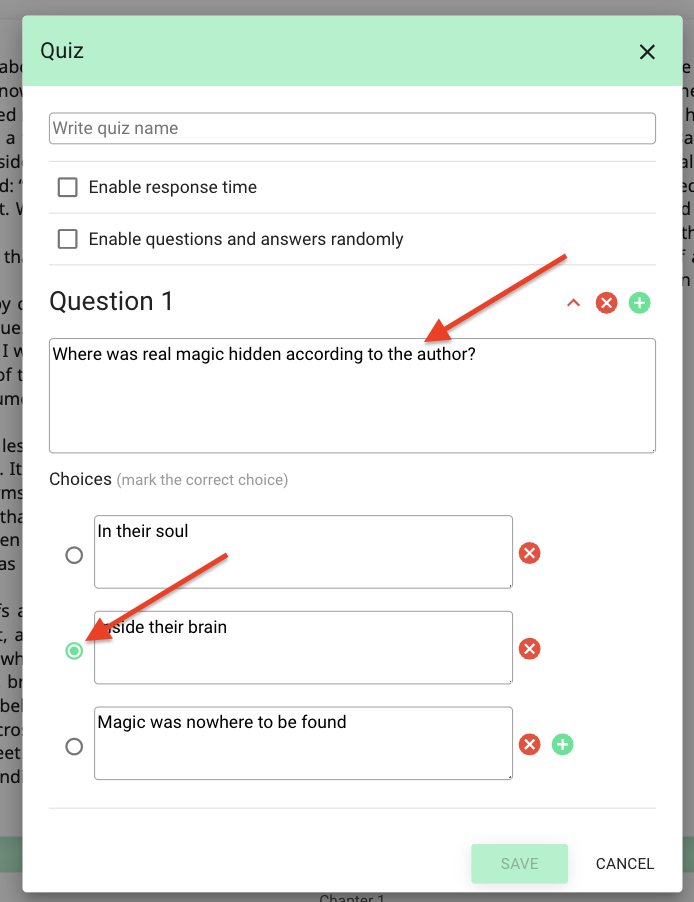
From here, you can configure your quiz and add questions and their options one by one. Name the test before starting to set it up. Then, add questions in the question section and add options in the answer section. Make sure to mark the correct answer using the circles on the left side.
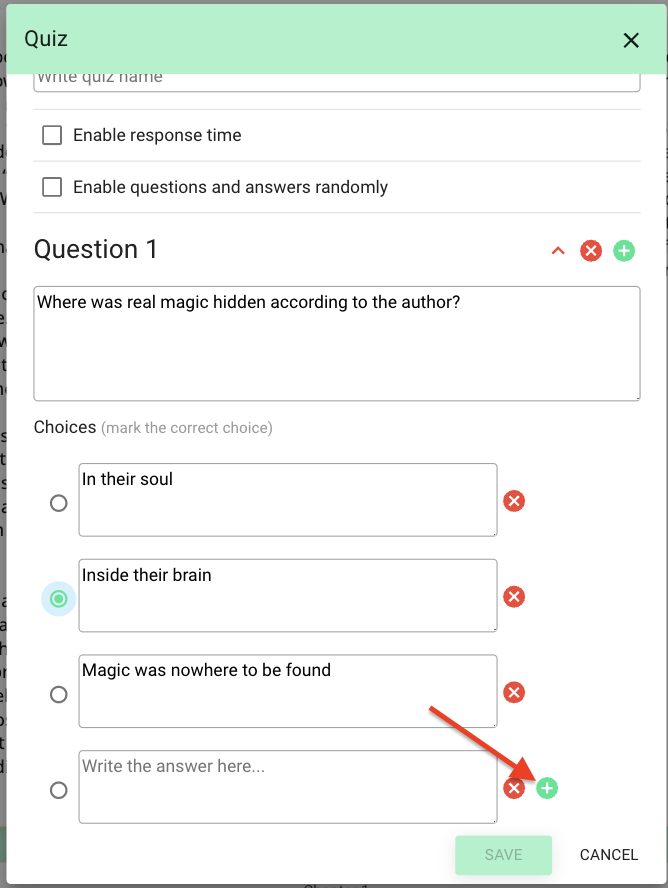
If you want to add more answer options, click on the green button next to the last option to enable more spaces.
To add a new question, click on the + button on the left side of the existing question. This will create a new question for you to configure.

This question bank within a test can be configured for participants as random. This means that users will receive different sets of questions randomly selected from the total pool of created questions. Therefore, not all participants will answer the same questions or have the same order of answers.
To activate this option, choose “Enable random questions and answers” from the top. Choose the number of questions that will be shown to participants and save your configuration.
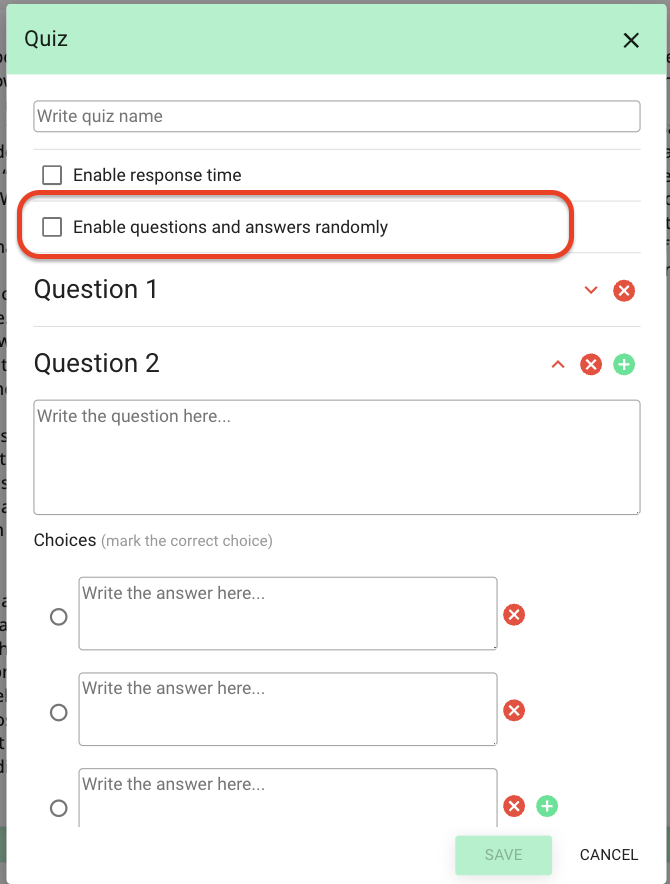
You can also enable a time limit for this test. When the time limit is reached, participants will no longer be able to continue answering, and their responses up to that point will be saved.
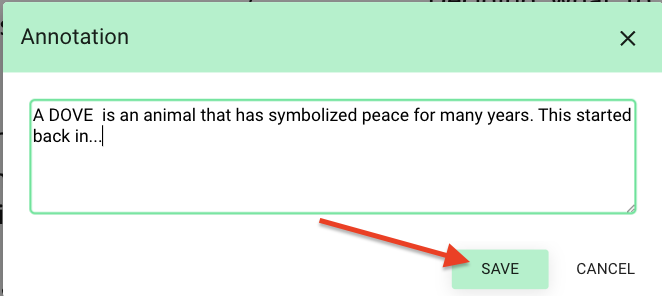
Add an annotation
To add extra information to a reading, click on the “+” button and choose the annotation option. Write directly in the text box and save.

Add a video
To add a video to the pages of your reading, click on the “+” button and choose the “Annotation” option.
Copy the video URL from the source platform and paste it directly into the dialog box. Click save, and the video will be added to the ebook page.

Add enhanced content
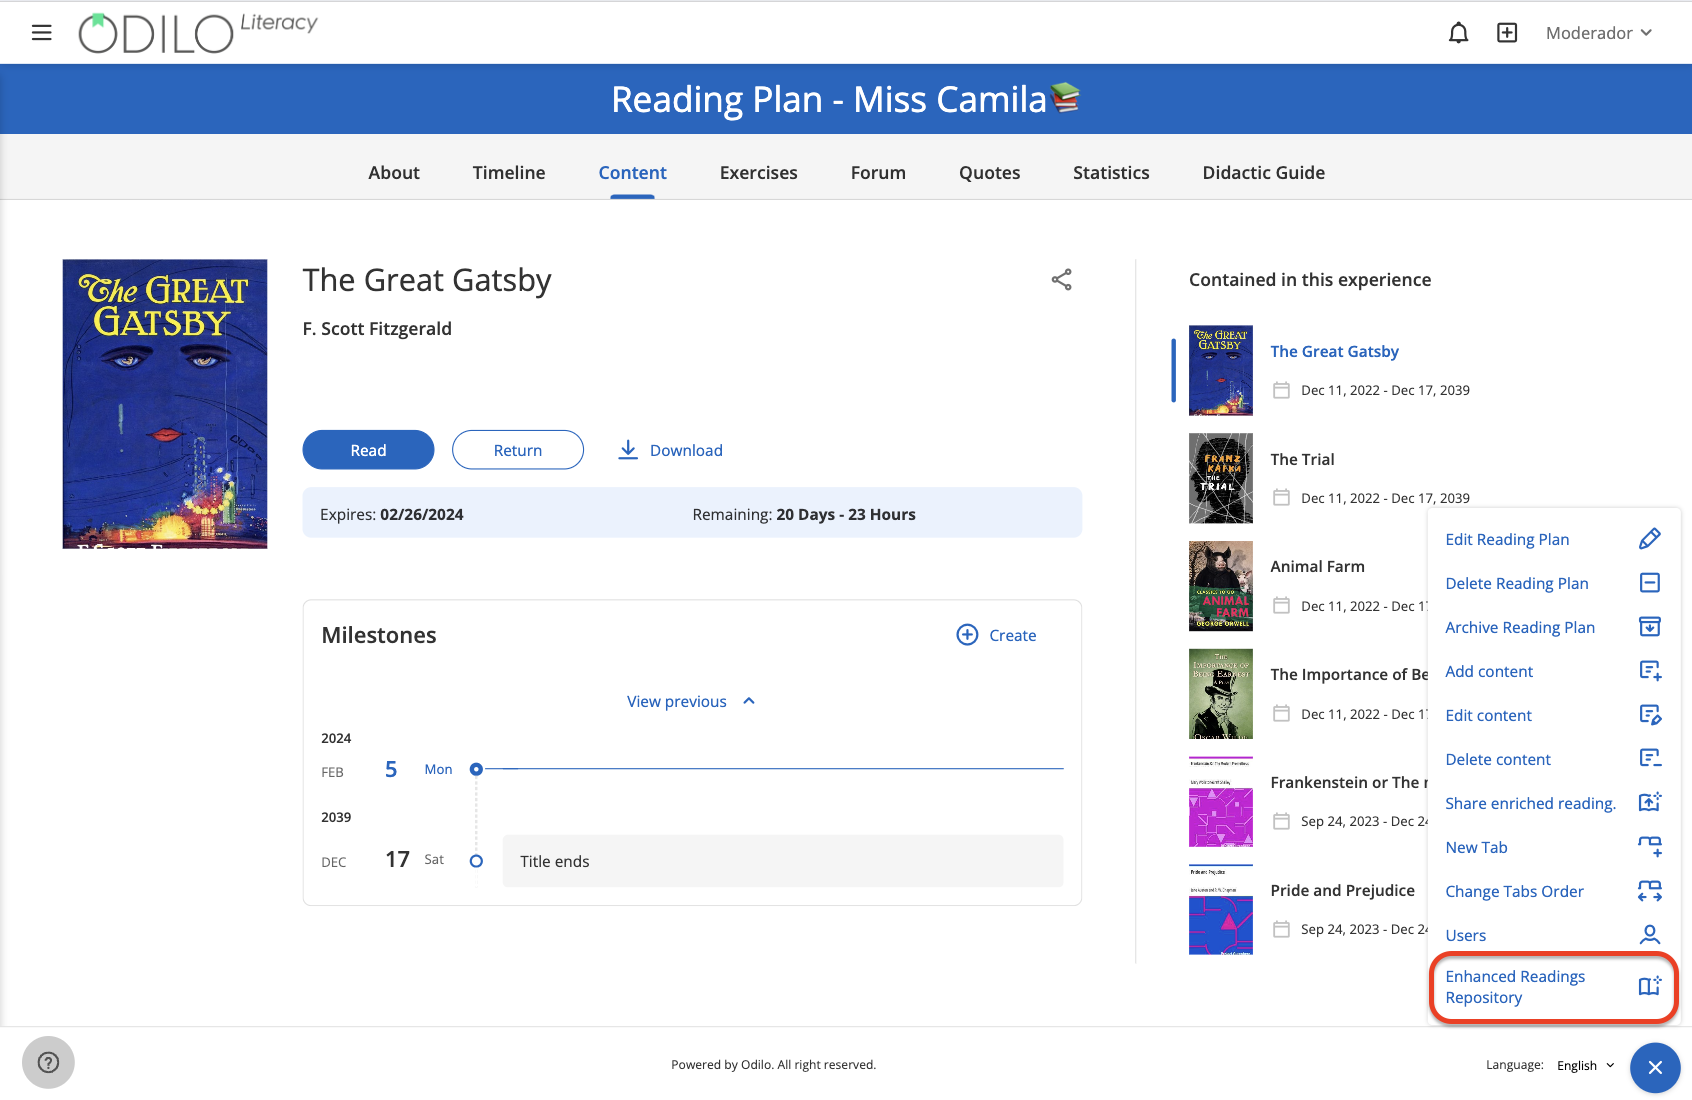
Your Learning Ecosystem may have a repository of readings enriched with different activities. You can add new, already enriched content to your existing Learning Experience. To add content from the existing repository, click on the edit button in the “Content” tab.
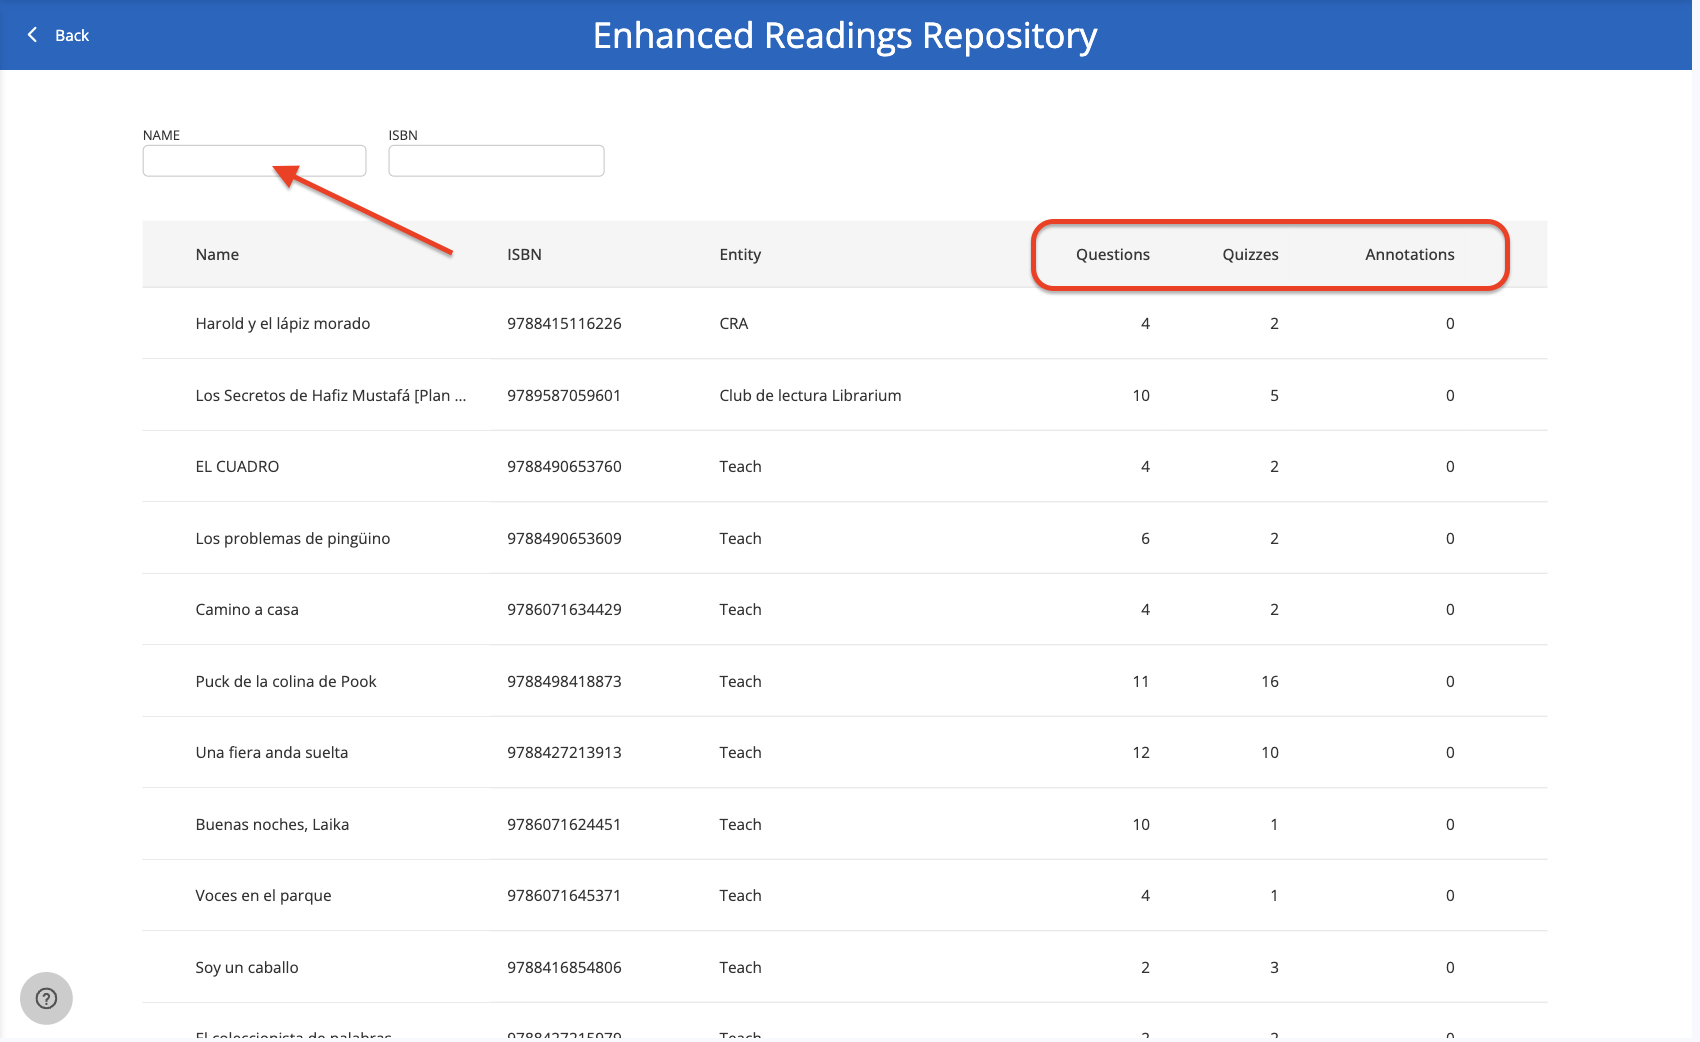
Search the list of readings for the one that interests you. You can also perform a search using the search bar at the top. The top panel will show you the quantity and type of enrichments that each reading contains.
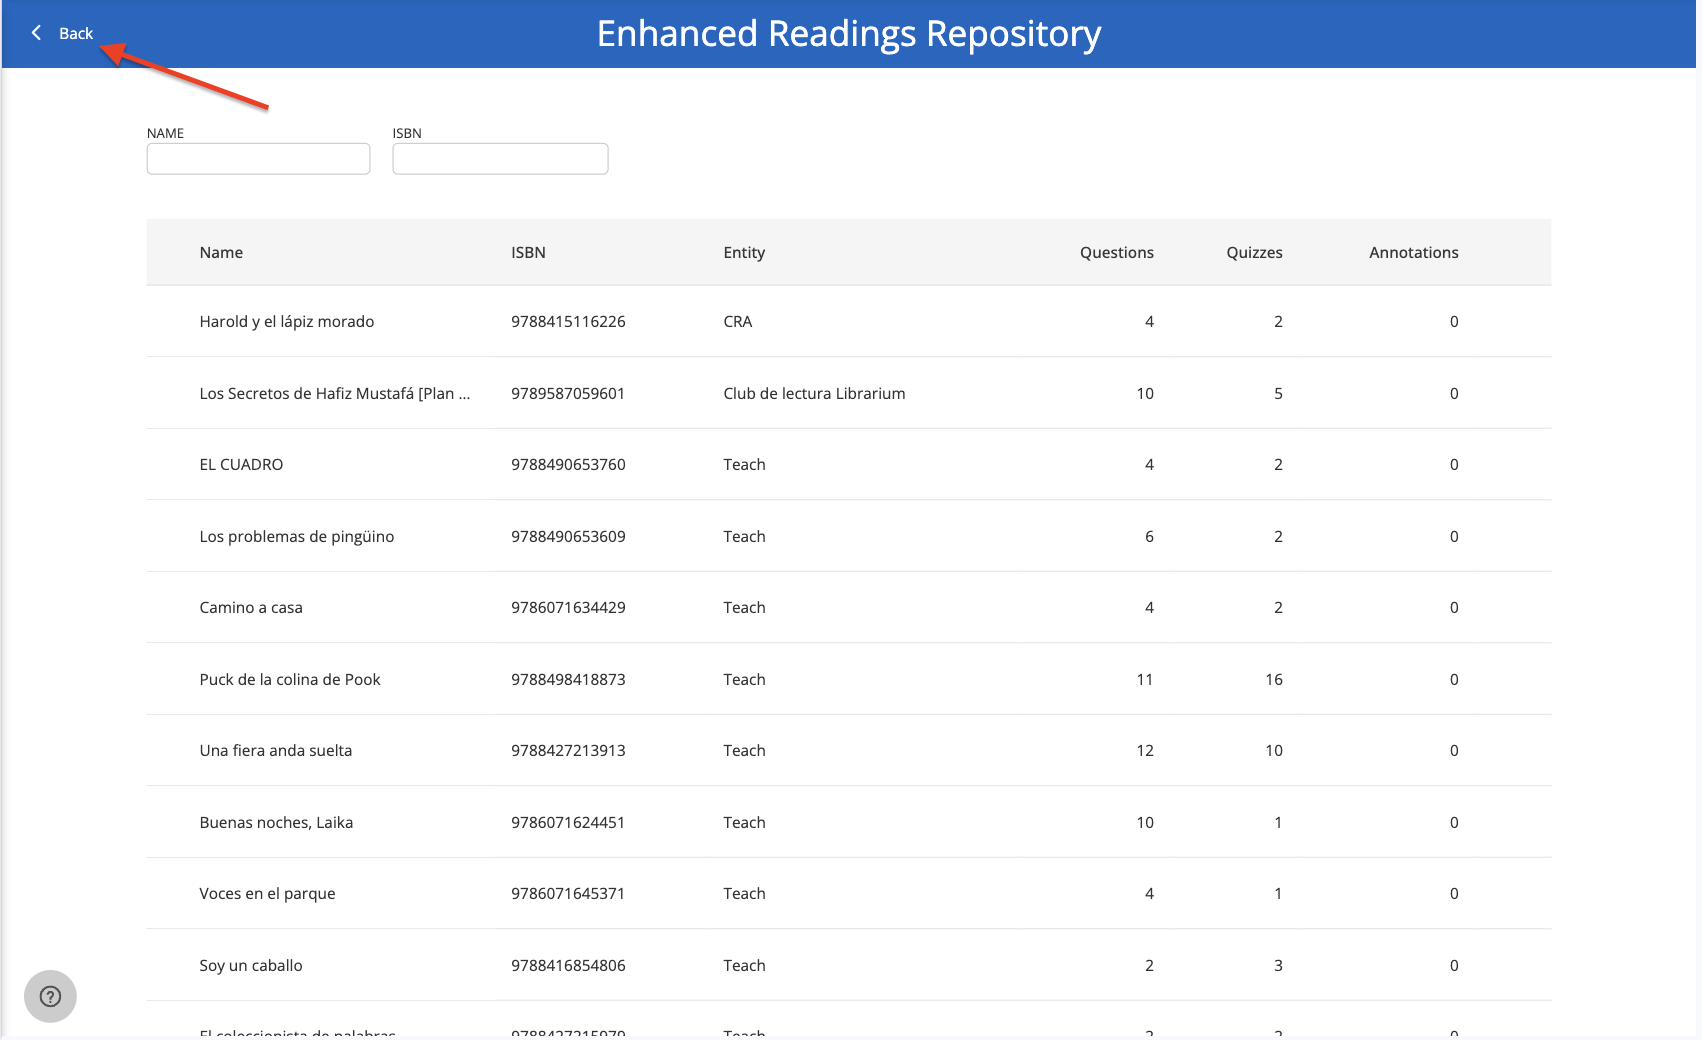
To add it, click on its name and then click “Download.” Add the start and end dates of the content and click “Accept.” This will automatically add the enriched content to your Learning Experience.


Return to your Experience using the “Back” button, and you will see the added content.
Exercises
If the cloned Reading Plan has exercises, you will find them in this section.

To preview them, simply click on the exercise itself.
Enable or disable
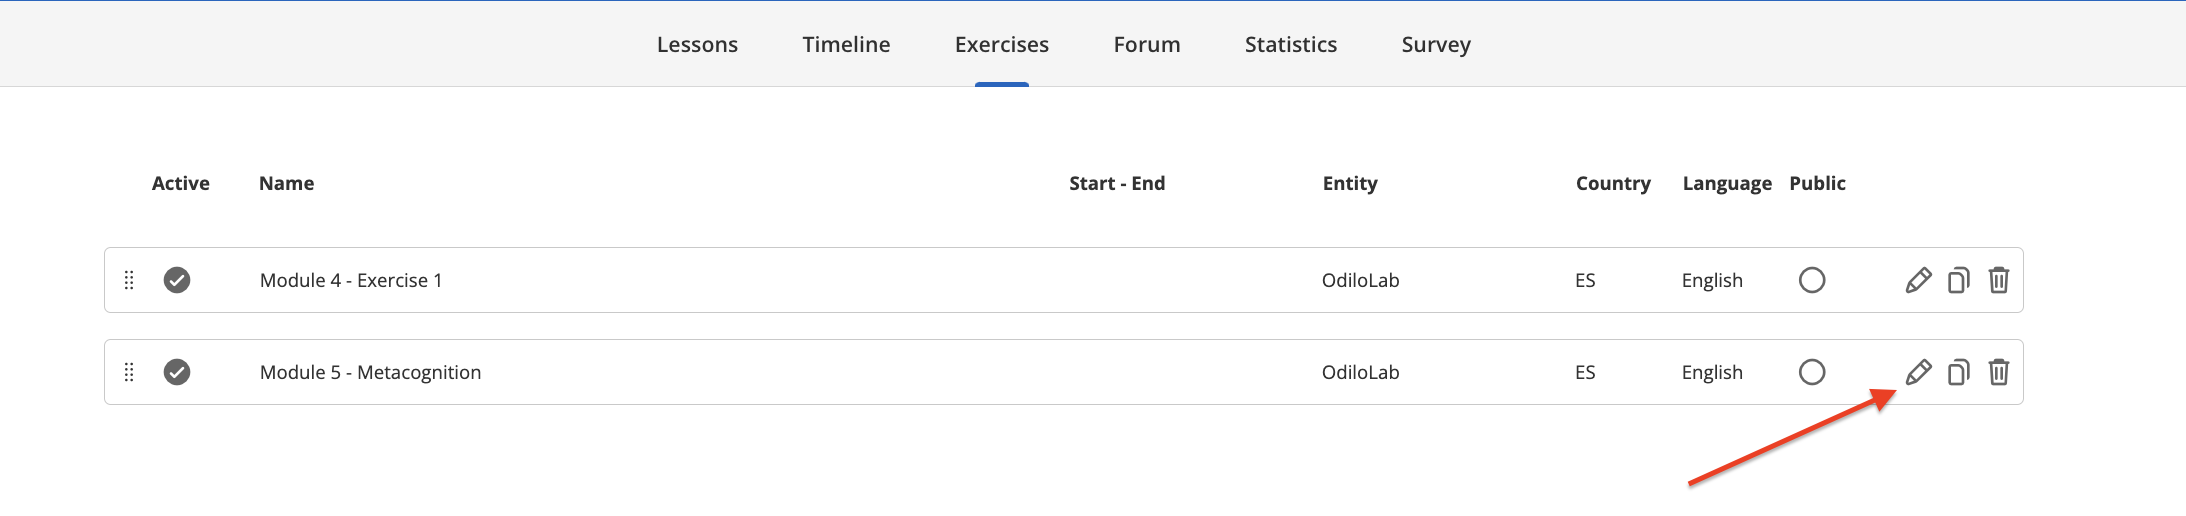
Exercises which display a blue tick under the “Active” column, will be activated and visible to students. You can edit this visualization by clicking on the circle under this column.

Edit settings and questions
If you want to modify the date of the exercise or its content, click on the pencil symbol ![]() .
.
If, on the other hand, you want to delete it, click on the trash can symbol ![]() .
.
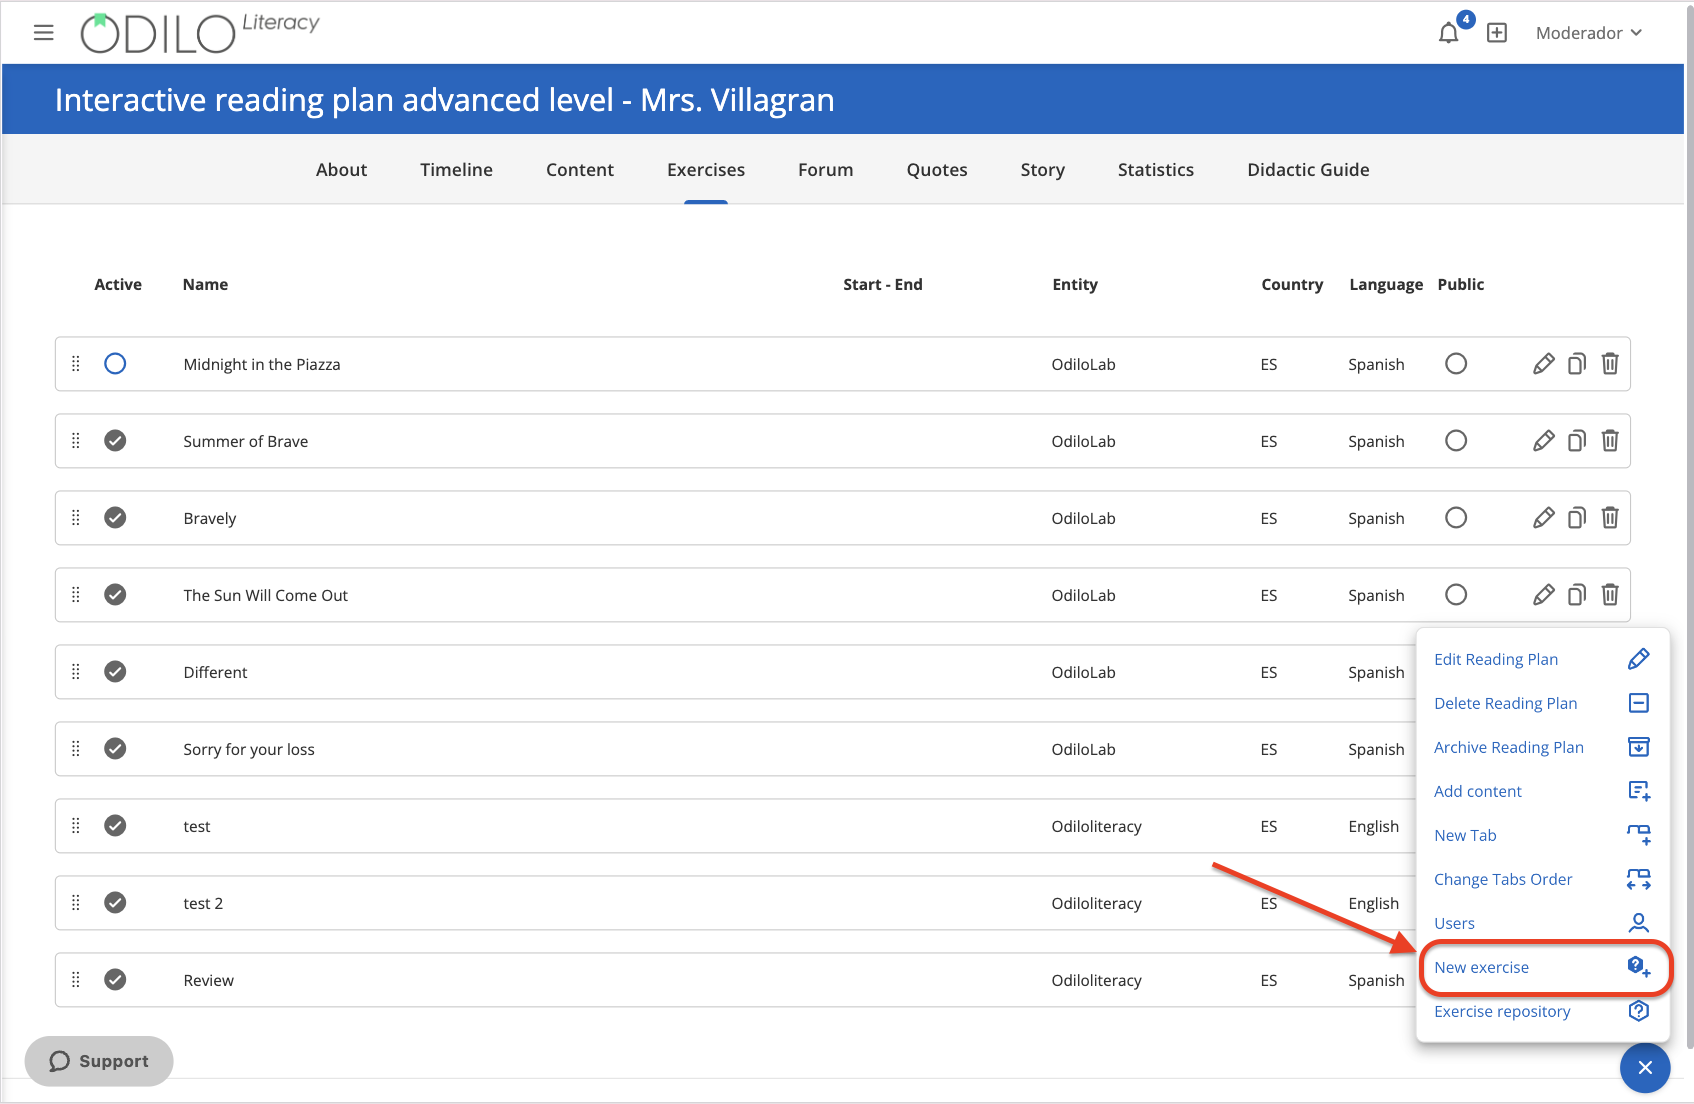
Create new exercises
To create an exercise from scratch, click on the edit button ![]() and select the option “Create new exercise”
and select the option “Create new exercise” ![]() .
.
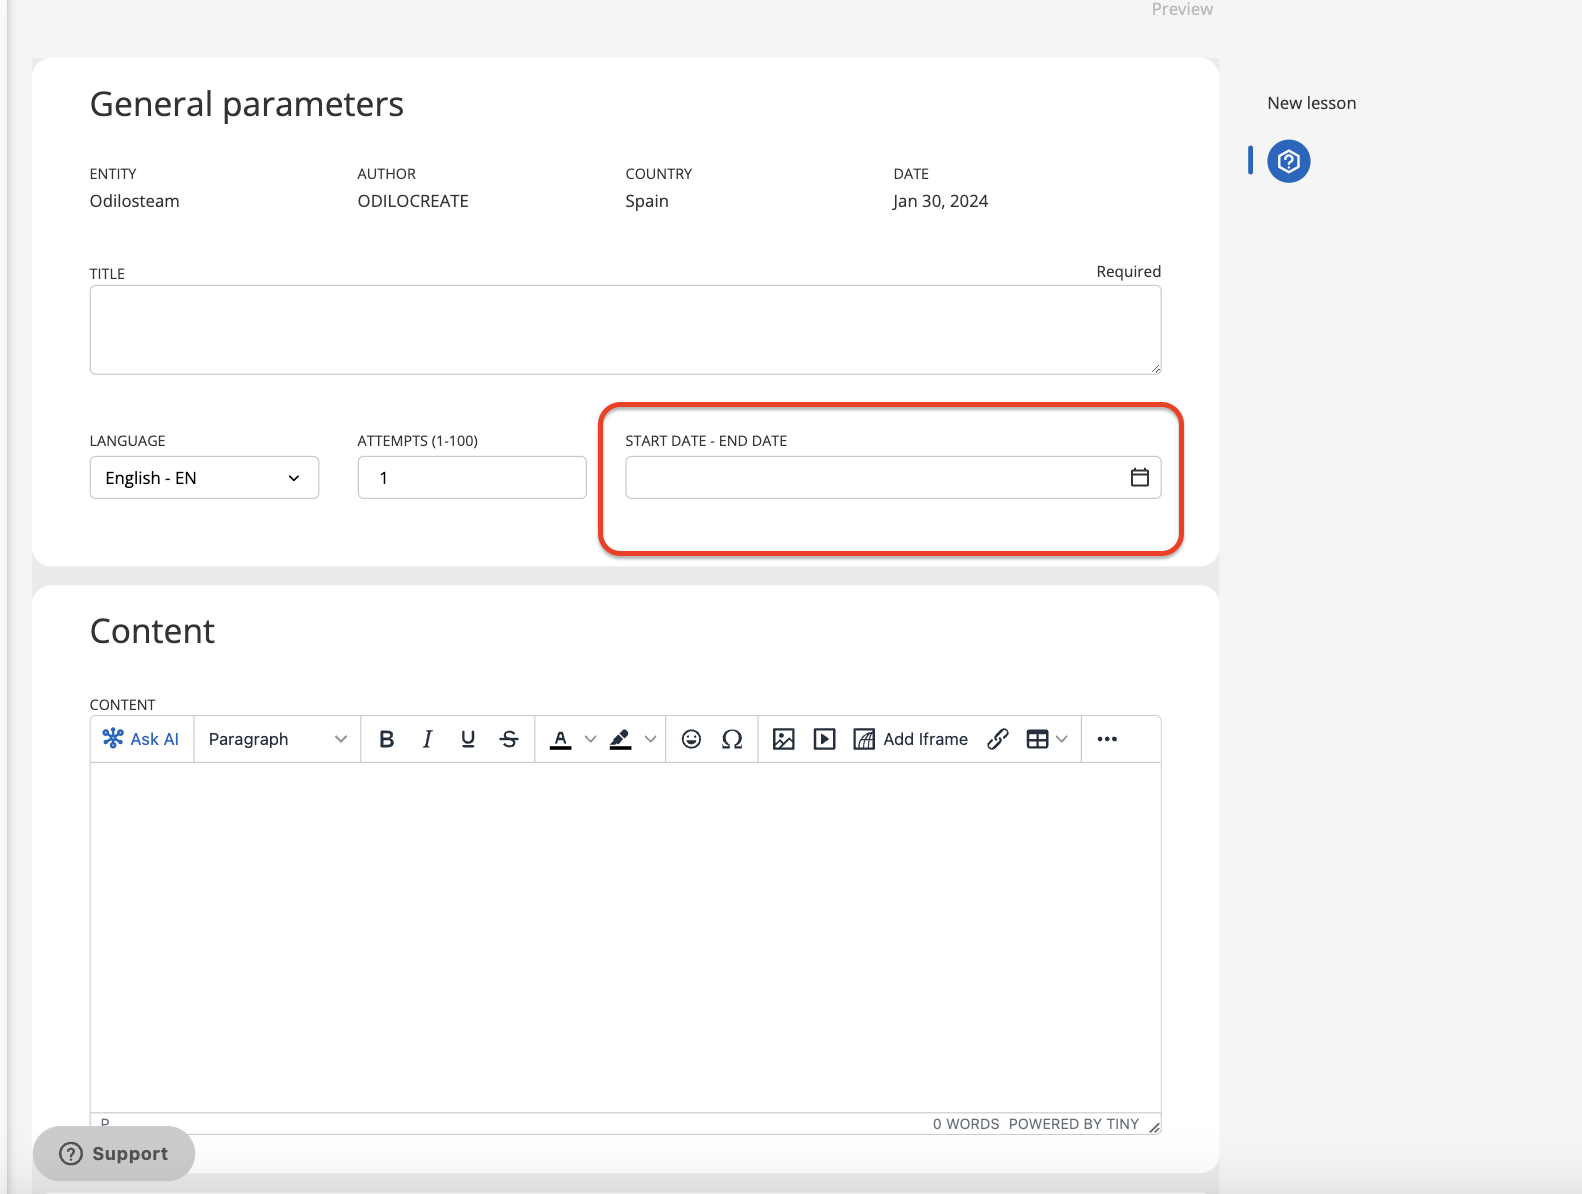
A form will open in which needs to be filled out the requested information.You can configure your exercise from 1 to 100 attempts, so that participants can retry if they do not achieve the expected score. By selecting start and end dates, users will only be able to access and interact with the exercise or task during these dates.
You can also configure a minimum grade, which will allow the student to repeat the exercise until they obtain said grade, otherwise they will not be able to submit their exercise.
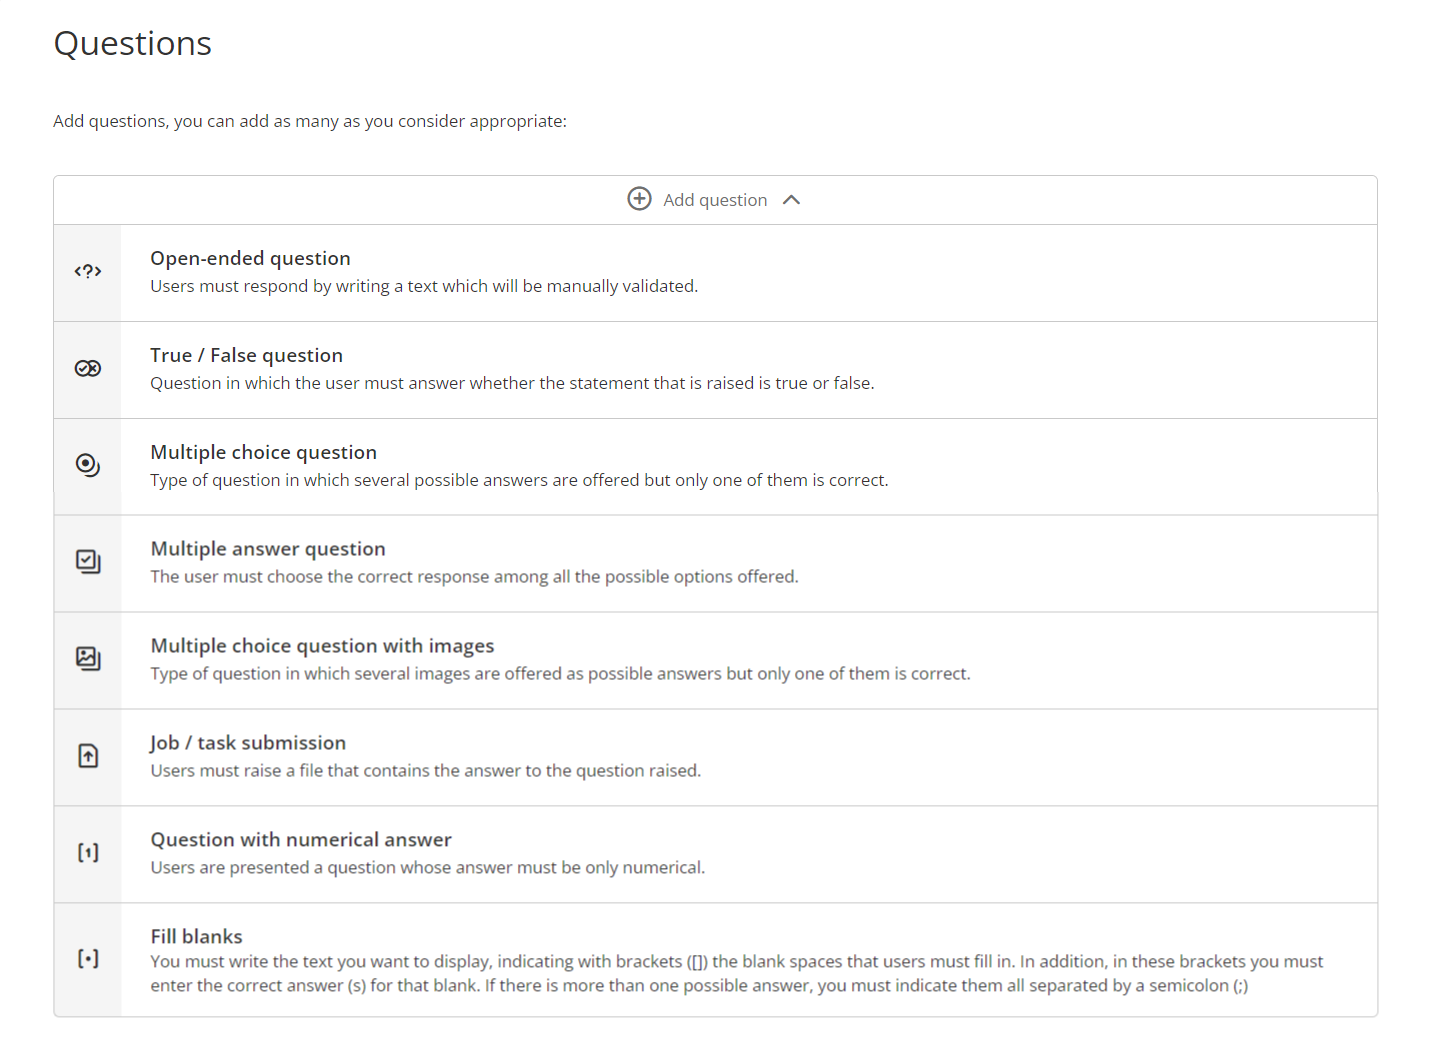
To add a question or task submission activity to the exercise, scroll down to the “Questions” section and select the ones you wish to set up from the the available options on the dropdown menu:

As you add questions, they will appear at the bottom of the page under “Added questions.”
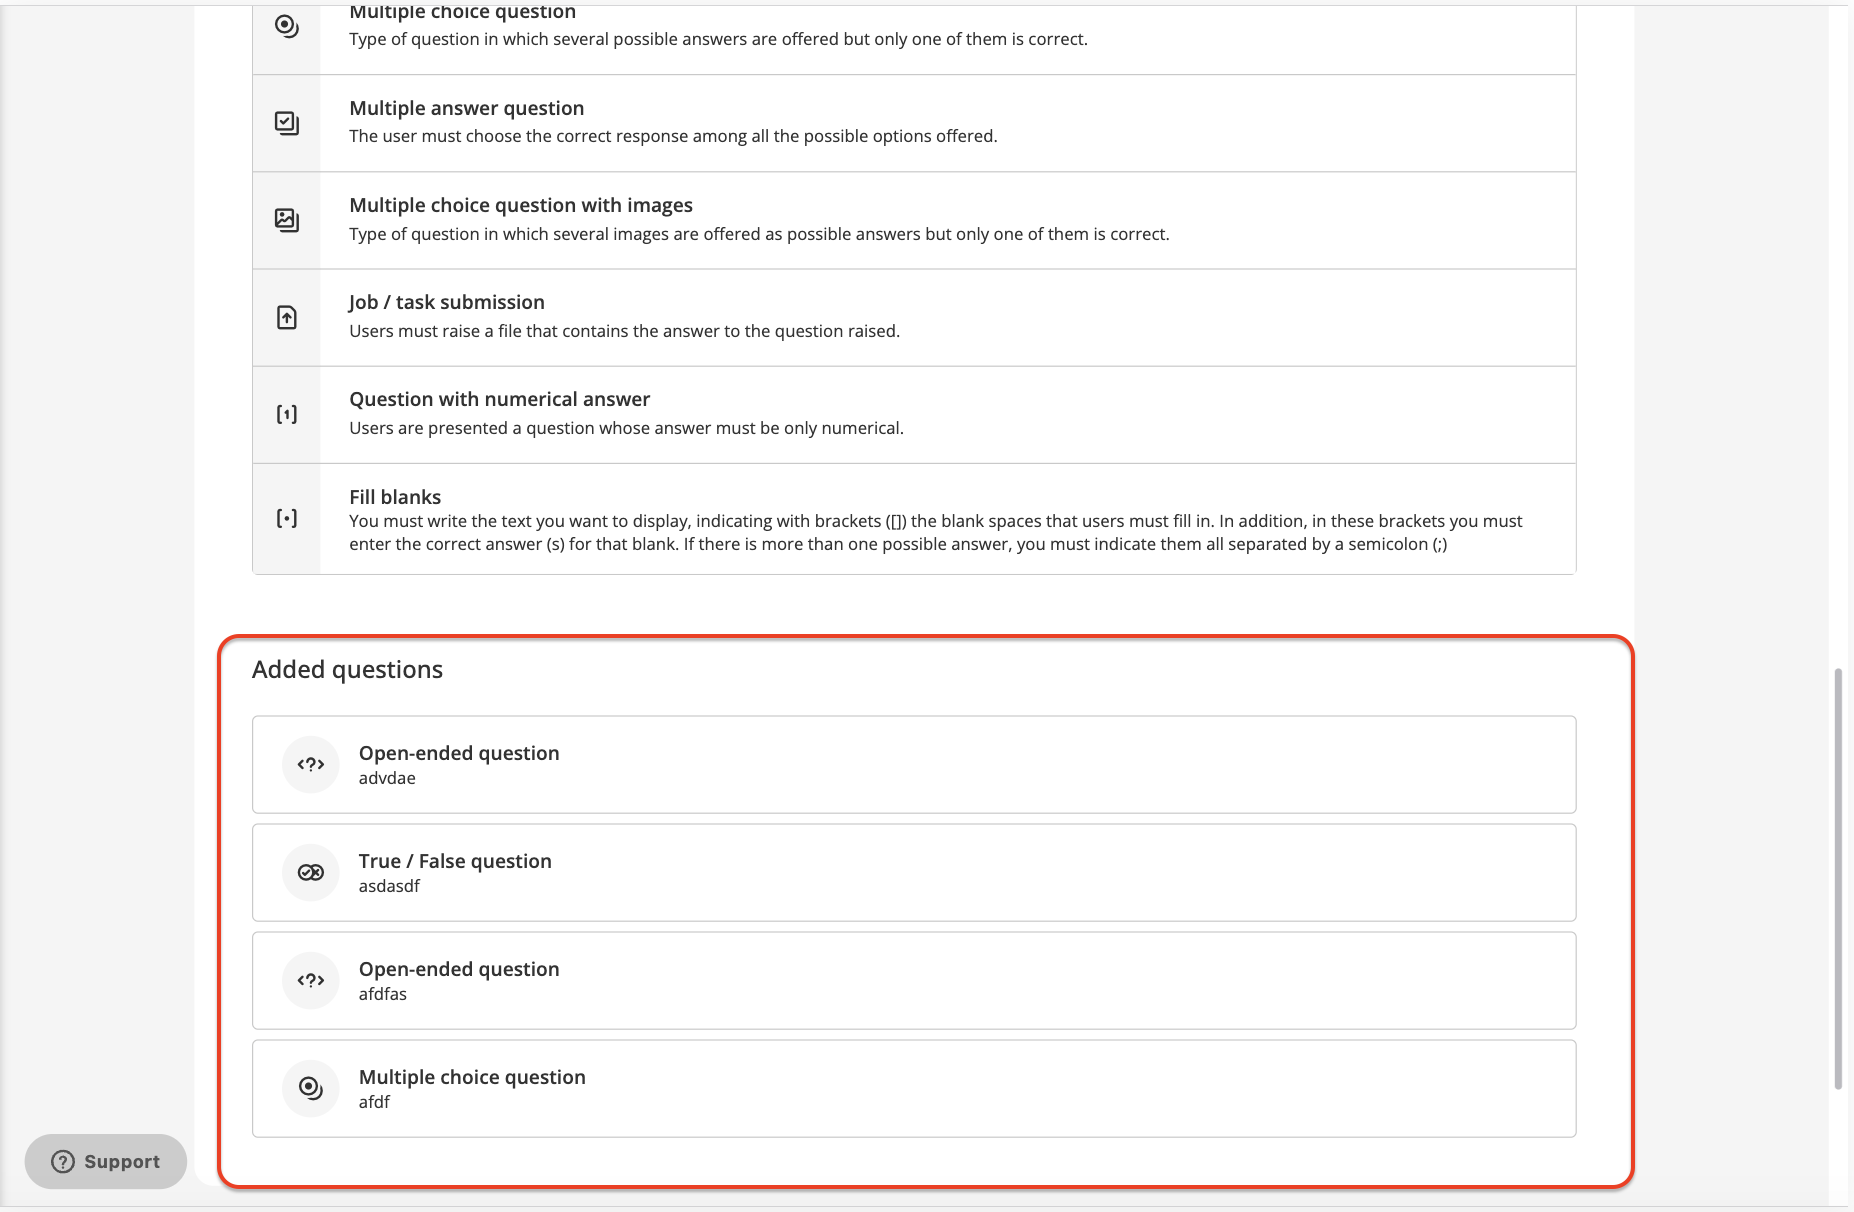
Once the exercise is set up, just click “Save”.
The exercise will appear at the bottom of the exercise list (remember to activate it).
Watch this video to review the route:
Story
Use the intelligent platform to invite participants to engage in a collaborative storytelling activity. This feature enables all members of the experience to collectively craft a short story based on the teacher’s chosen topic, following predefined participation turns.
Once the activity is finished, you can download the result to share with the participants or use it as classroom work material.
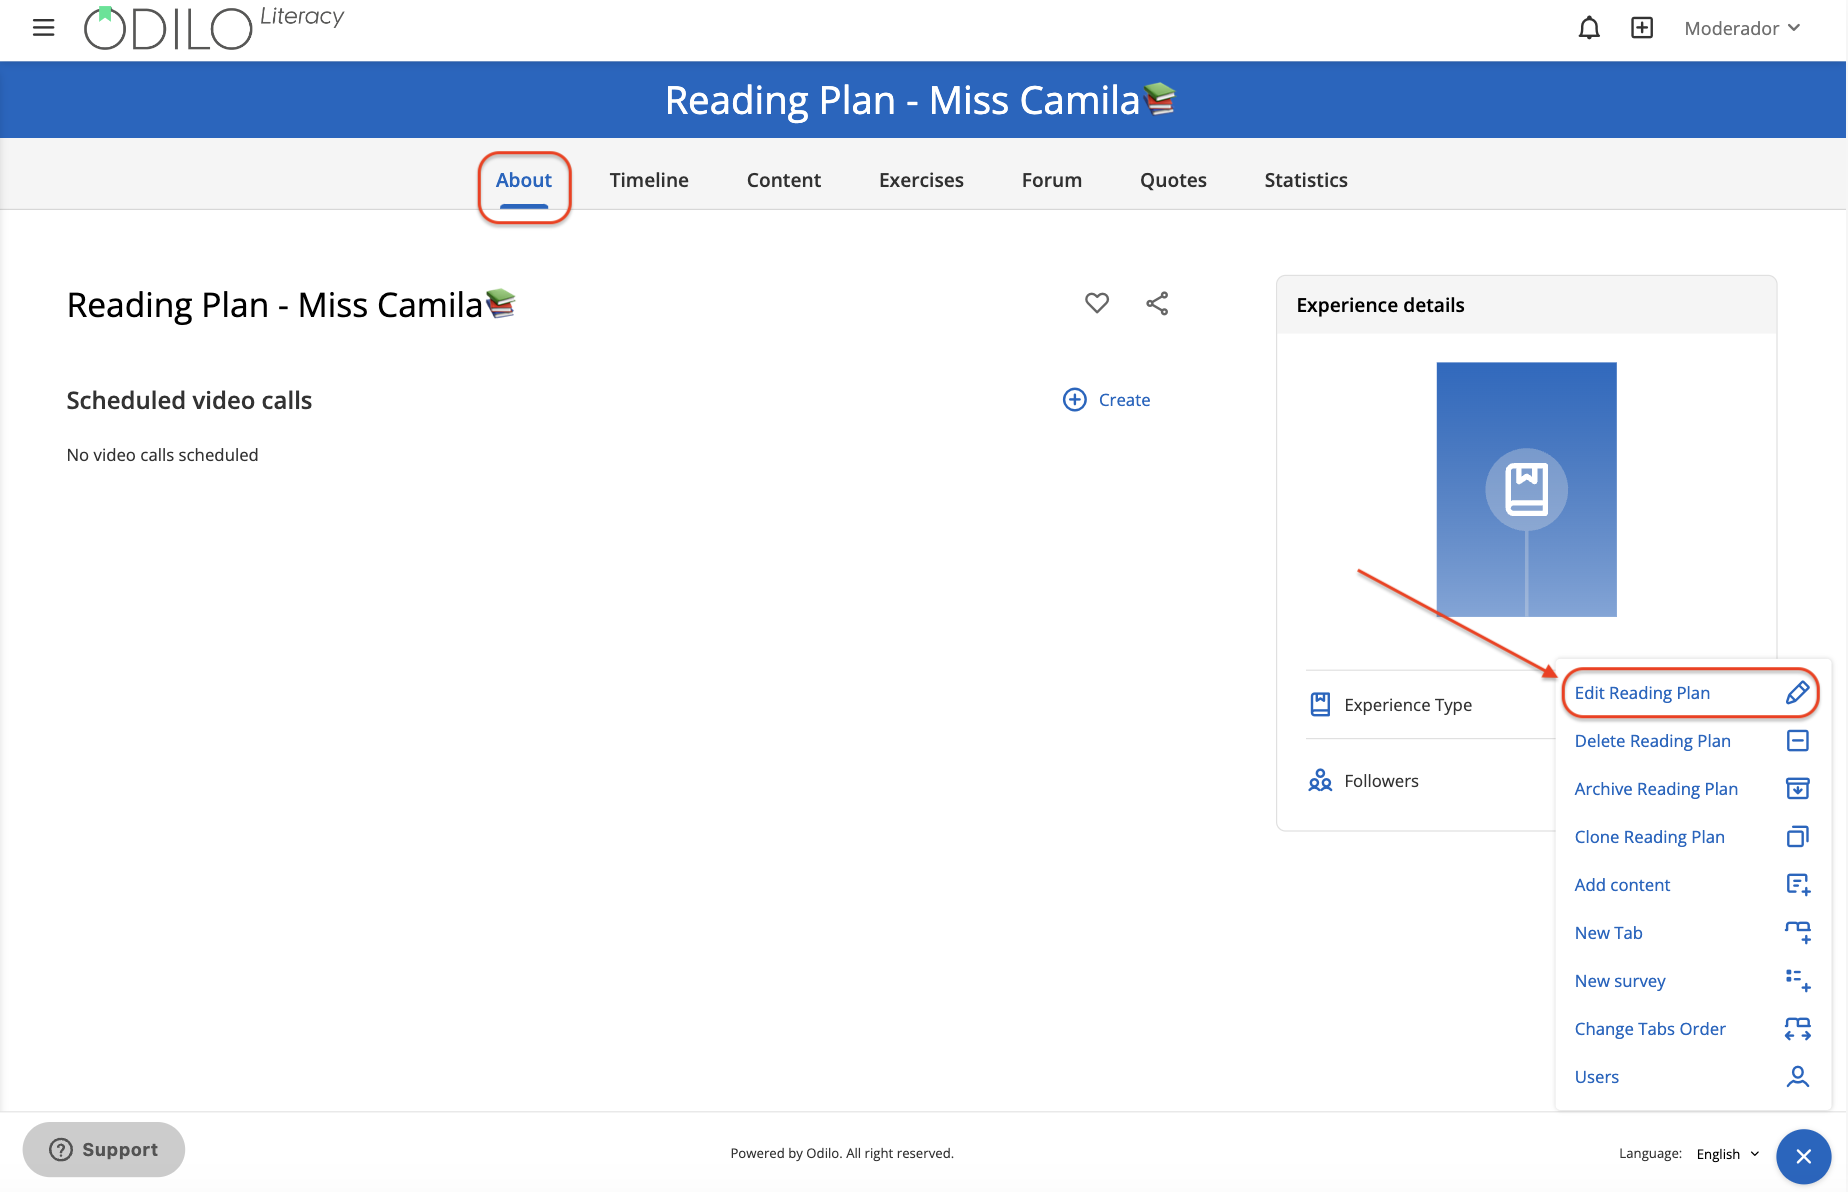
Important: It is recommended to activate this option at the beginning of the construction of the Reading Plan. You can activate it at any time from the “About” tab, by clicking on the “Edit Reading Plan” option from the button at the bottom right corner.

Learn more about this toon in the following video:
Create a story
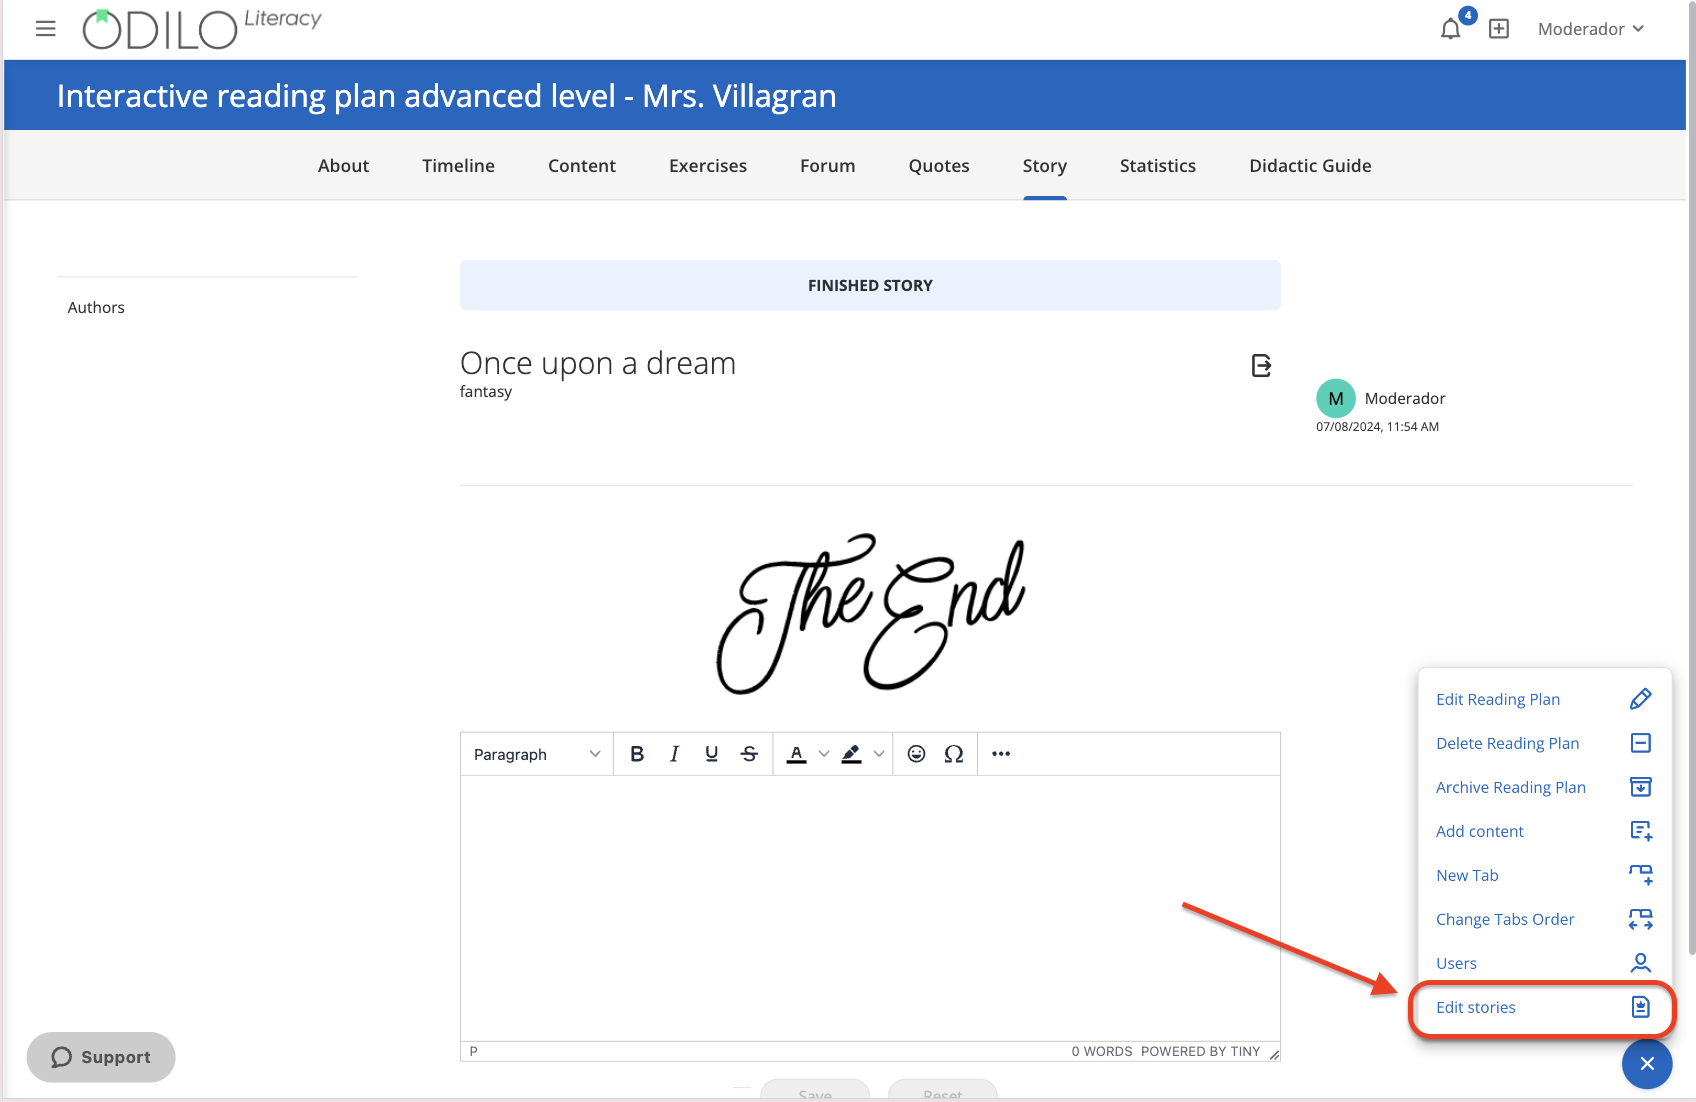
Go to the “Story” tab, click the ![]() button and select the option “Edit stories”.
button and select the option “Edit stories”.
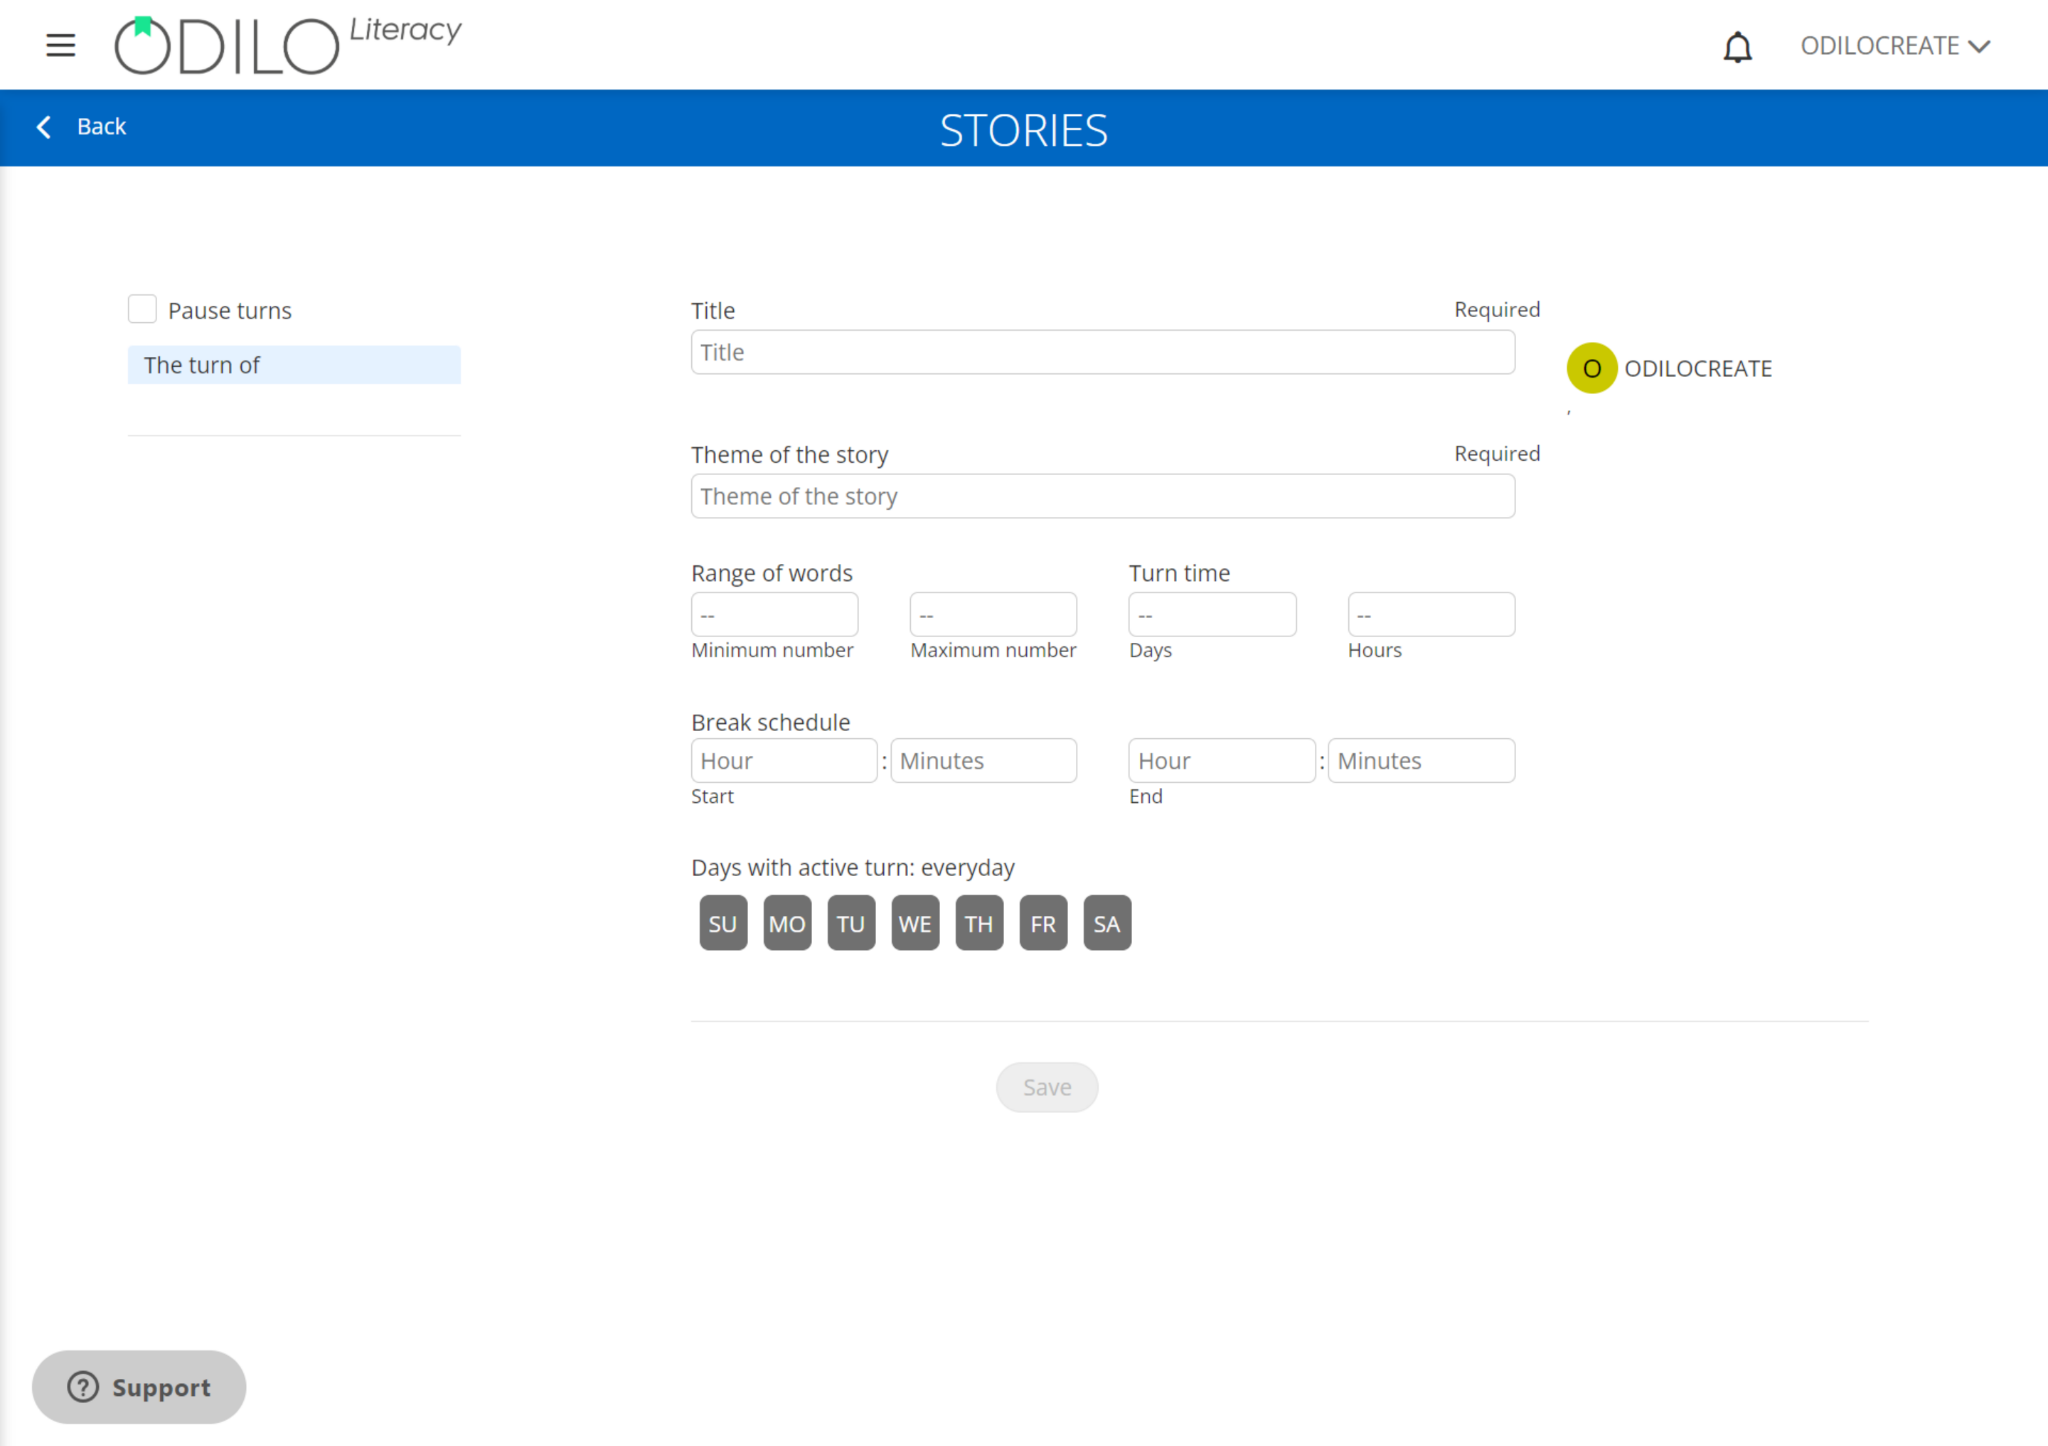
Customize the exercise by completing the following information:
- Title: Write a name for the story.
- Theme of the story: Write the literary genre.
- Range of words: Select the minimum and maximum number of words for each intervention.
- Turn time: Select the time each student is allowed to take to write.
- Days with active turn: Select the days in which you want the activity to be active.
Important: Start this activity when all participants are added to your Reading Plan. Once the story is configured, no more participants can be added.
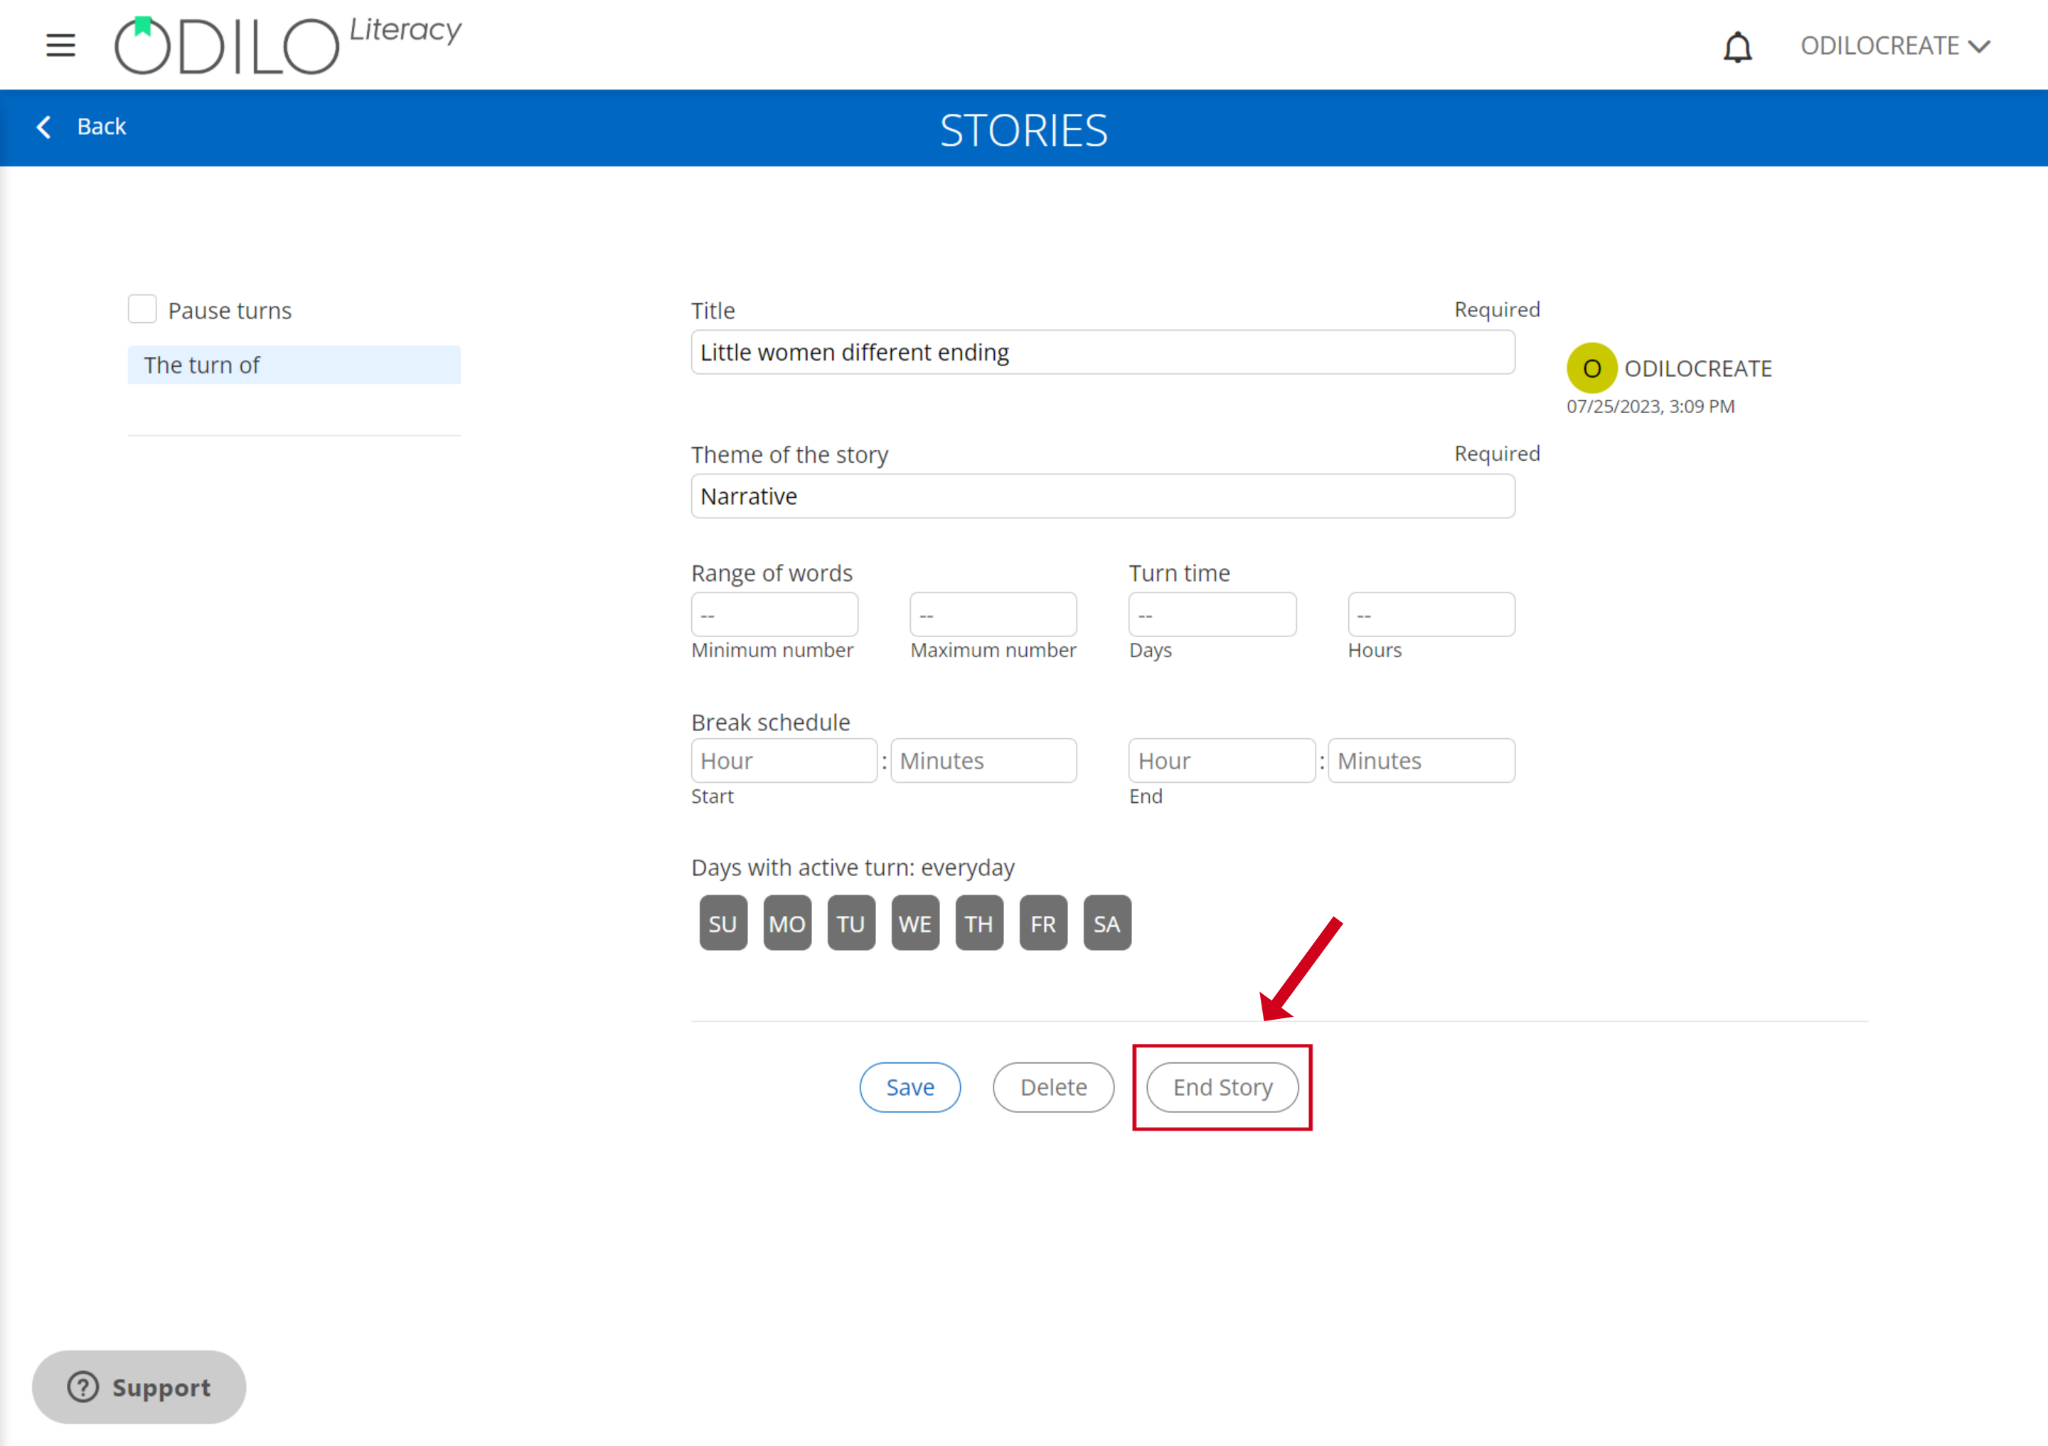
Finish story
After all participants have taken their turns in the collaborative storytelling activity, the moderator should conclude the story through the same window where it was initially configured. If not completed, the turns will persist in advancing.
Edit a “Learning route” Experience
Edit lessons
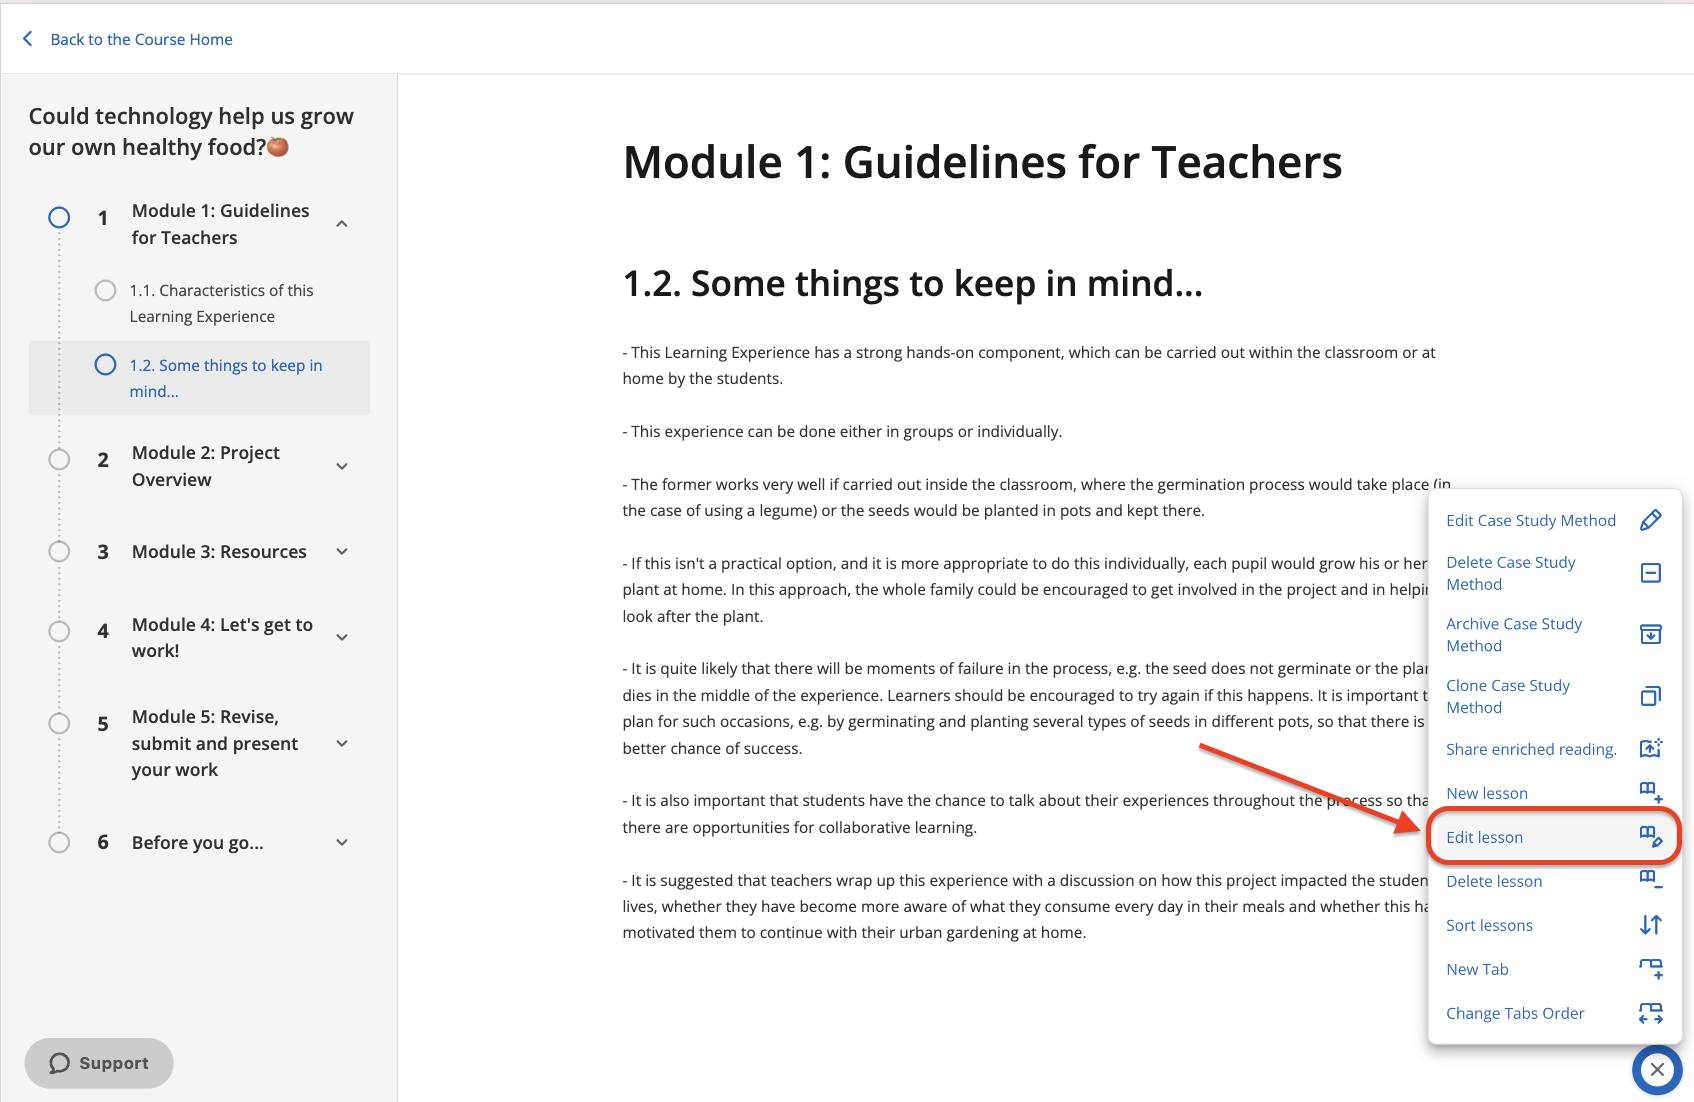
To edit any lesson, click on its name and then click on a section of it, from there, access the option “Edit lesson” from the editing button located in the lower right corner. You will access the editing area, where you can edit it and/or add more sections.
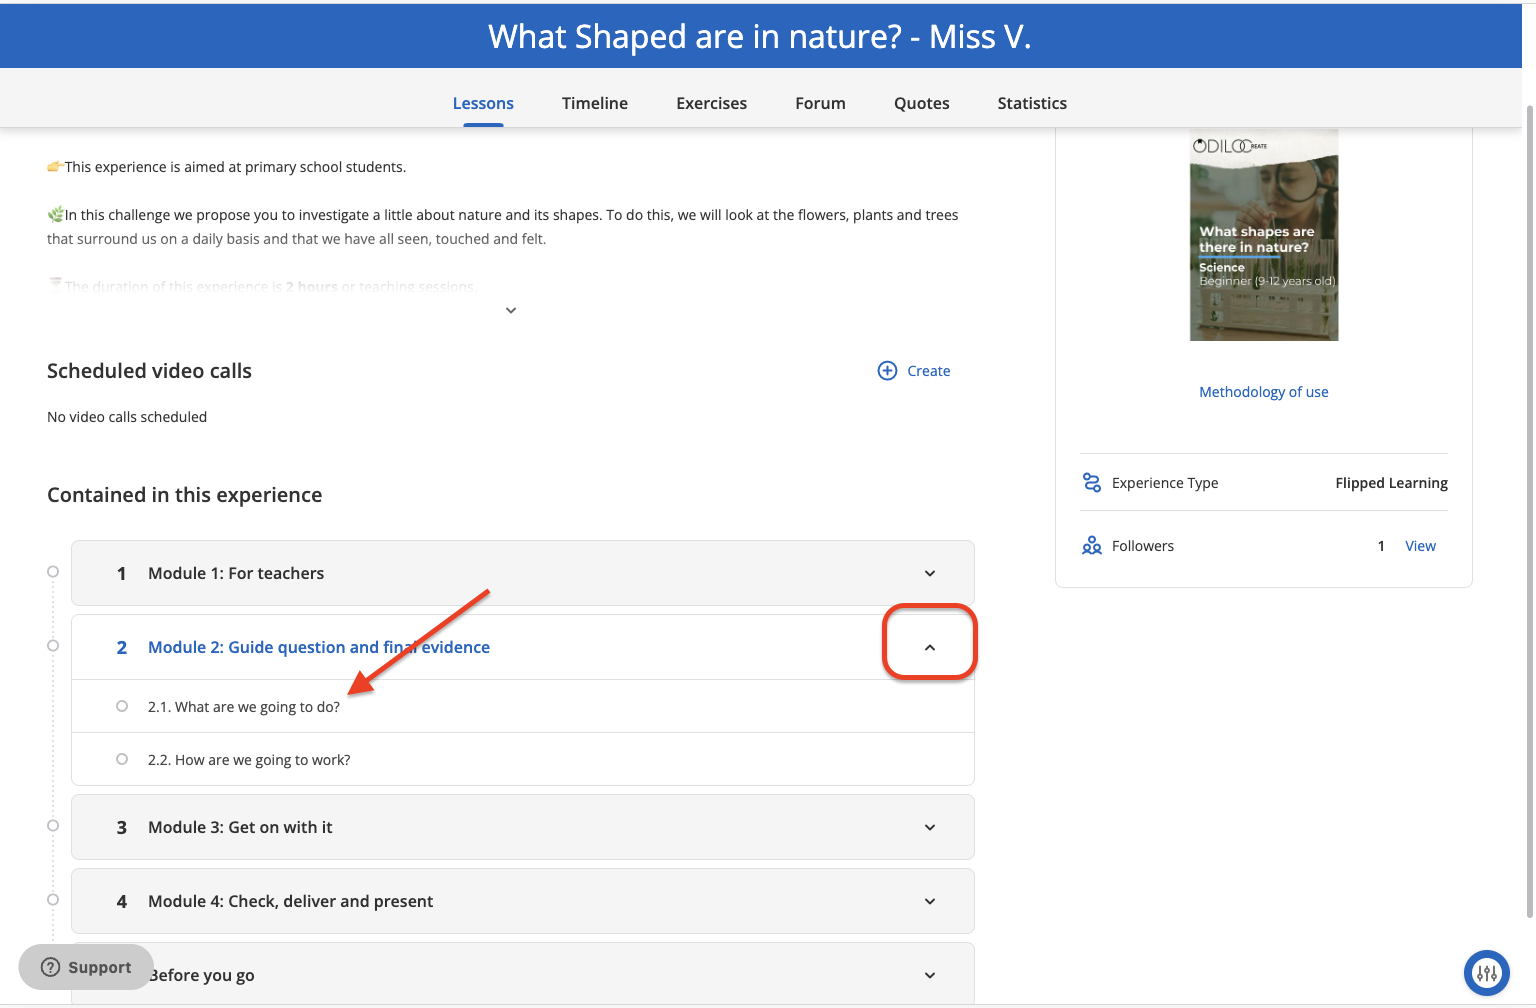
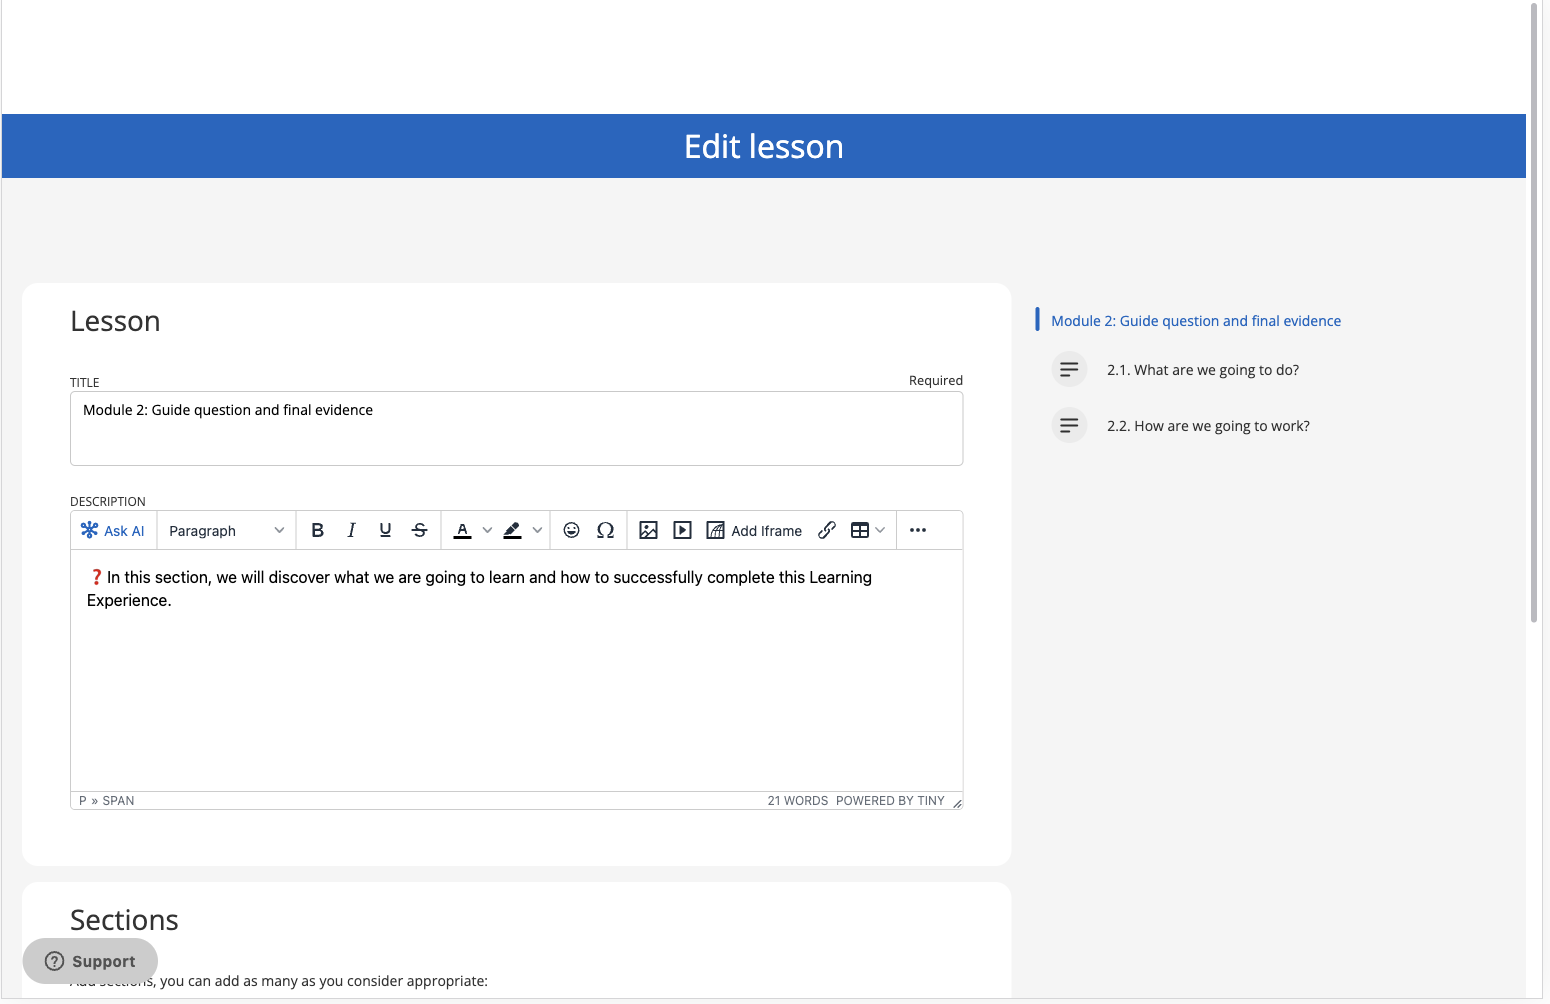
You will enter the complete lesson, select the section to edit from the menu on the right and work directly on it.
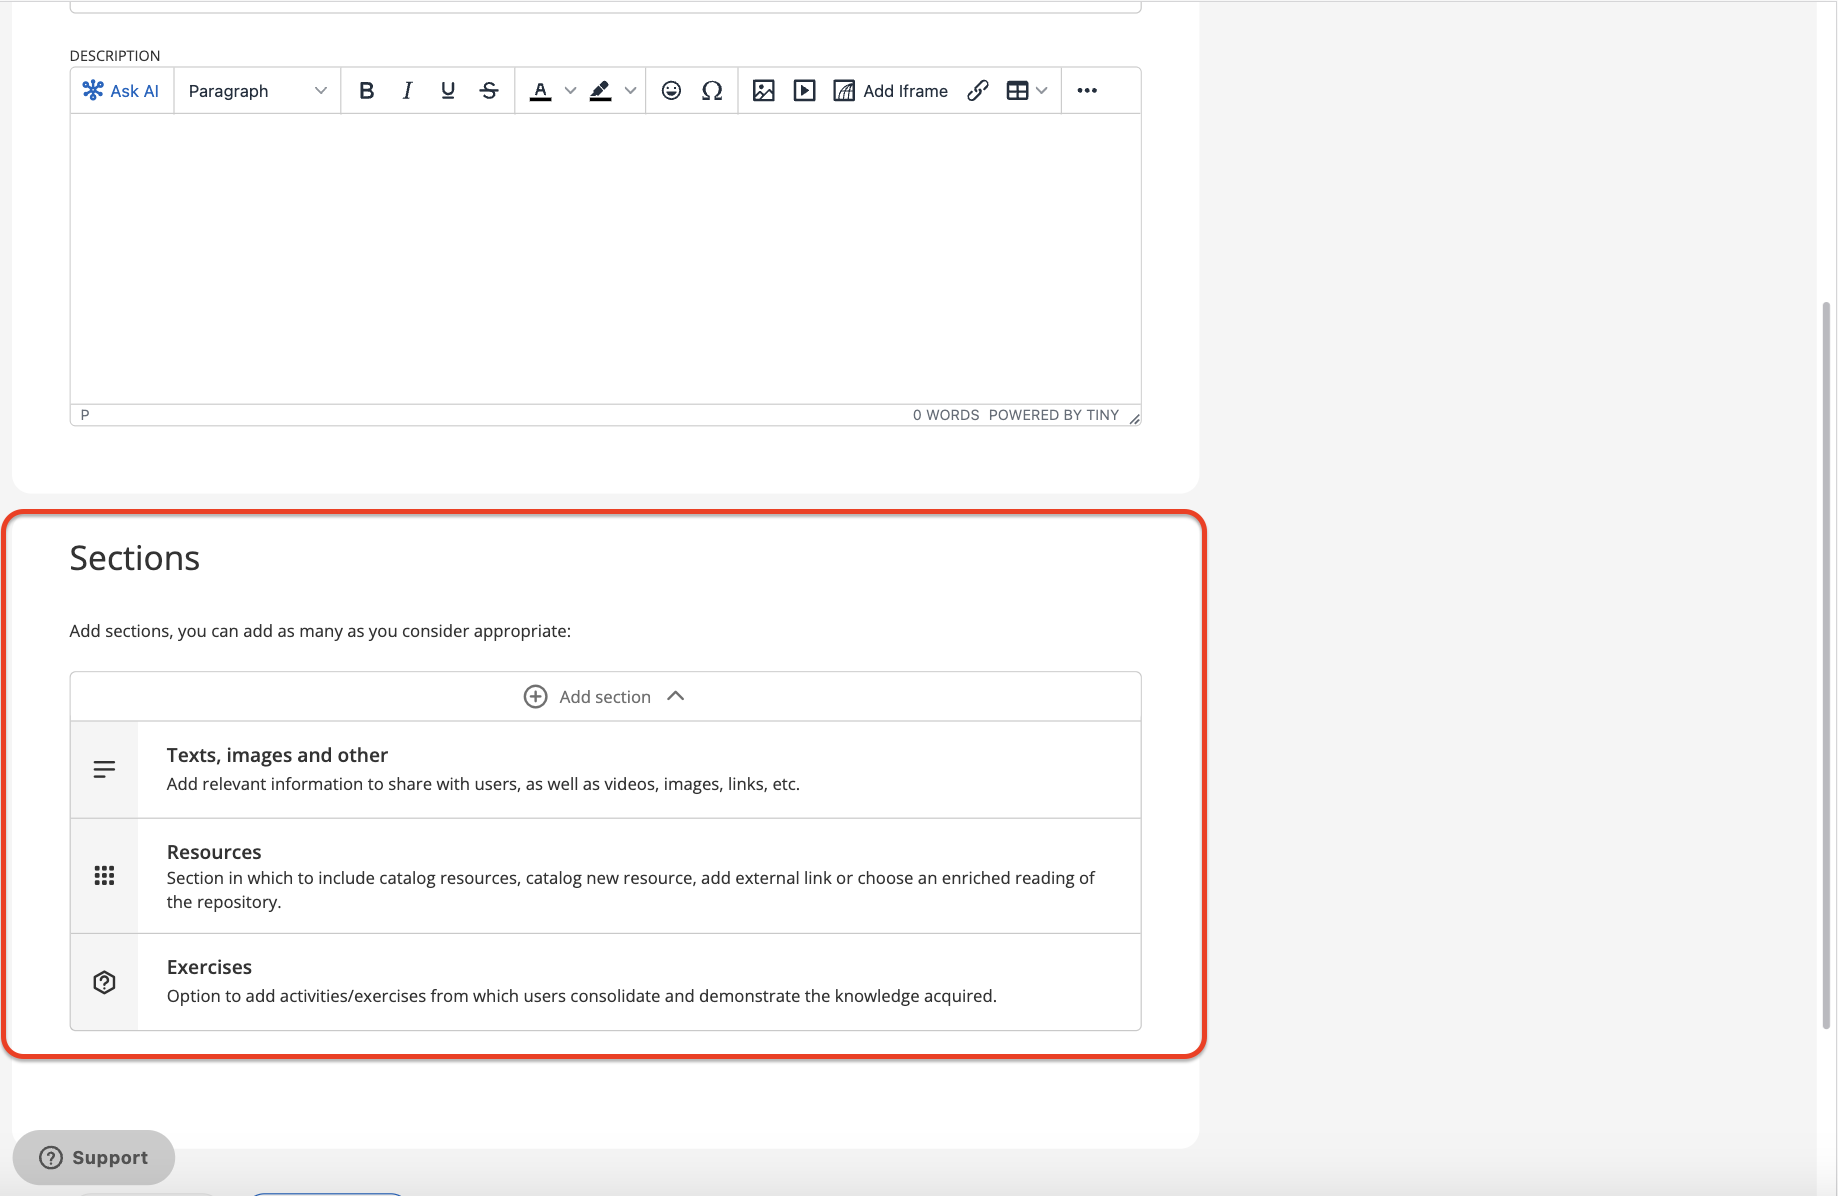
Add new sections to your lesson from the bottom panel, clicking on the desired option.
Edit sections
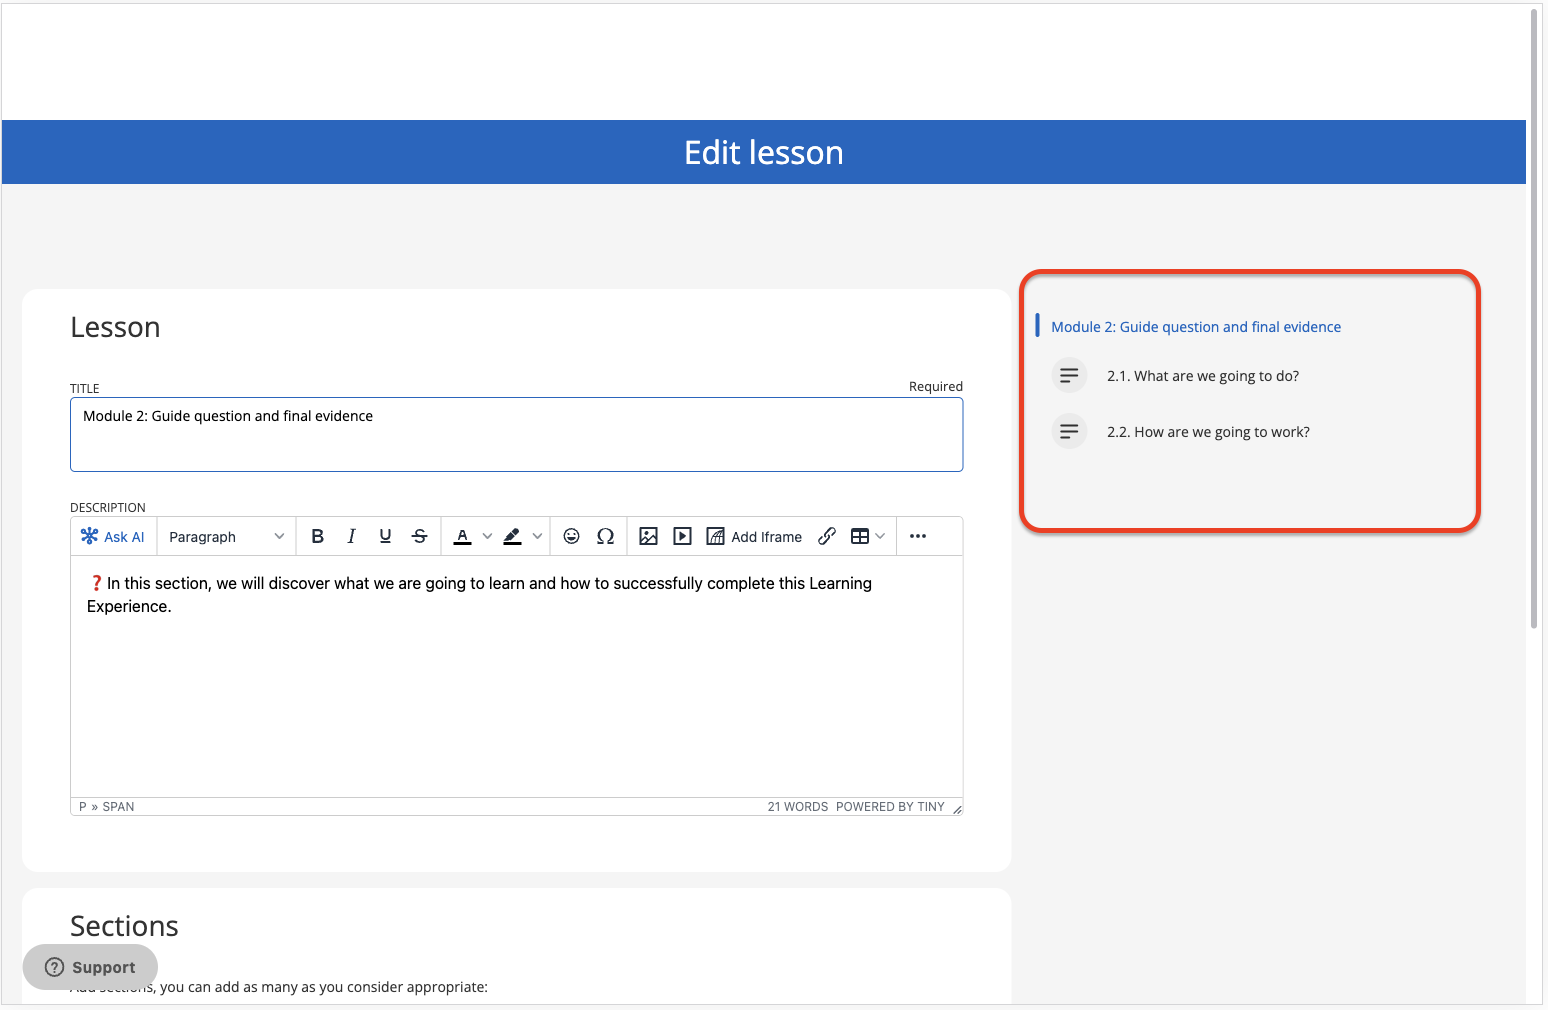
If you want to edit or add sections of a lesson, access “Edit lesson”. From here, you can navigate through its different sections by clicking on them from the panel on the right.
To create a new section, click “Add section”, select the type of section to include and save your changes with the button“Save” from the bottom.

Edit exercises
If you want to edit the exercises that your Learning Experience contains, go to the “Exercises” tab and click the edit button for the exercise you want to edit.
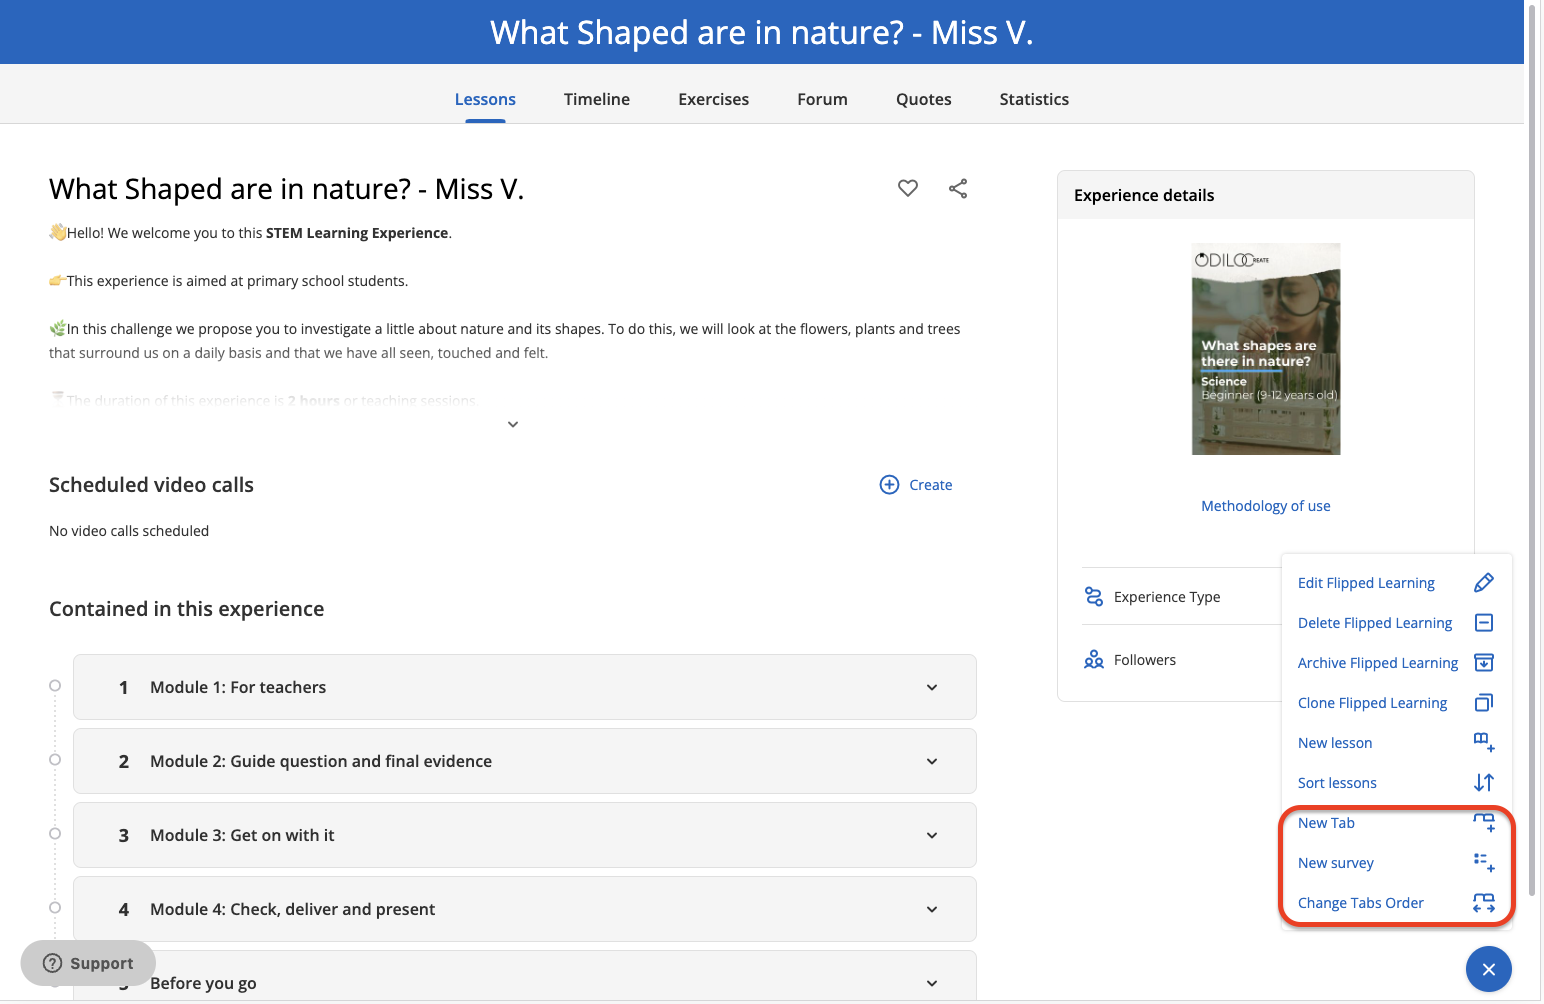
Add and reorder tabs
You can add tabs to your experience or reorder existing ones from the editing button.
Gamify your Learning Experiences
An experience, since it can be completely edited, has dialog boxes in different sections. Each of these boxes has a panel that will allow you to easily and quickly add activities from online gamification platforms such as: Kahoot, Genially, or any Google tool such as forms, surveys, presentations, and more.This will give you the possibility of create dynamic activities without participants having to leave the experience to other pages, but rather they will be able to do it directly from the areas you want to gamify.
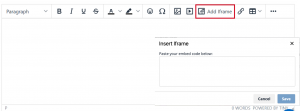
What is an iframe?
It is a link that allows you to insert media within any page to interact with it directly.
Click on the option“Add iframe” and from there you can include the embed code provided by gamification platforms and that’s it! You will now have a gamified experience by incorporating activities into your text boxes.
Learn more about how to dinamize your Learning Experiences with the following video:
Collaborative learning
All Learning Experiences have 2 specific tools to work collaboratively: the forum, quotes and the chat.
Learn more about the forum on the following video:
Forum
In the forum section you can raise debates or questions to develop joint communicative activities with the content. Each forum is independent, and will group opinion threads for each content.
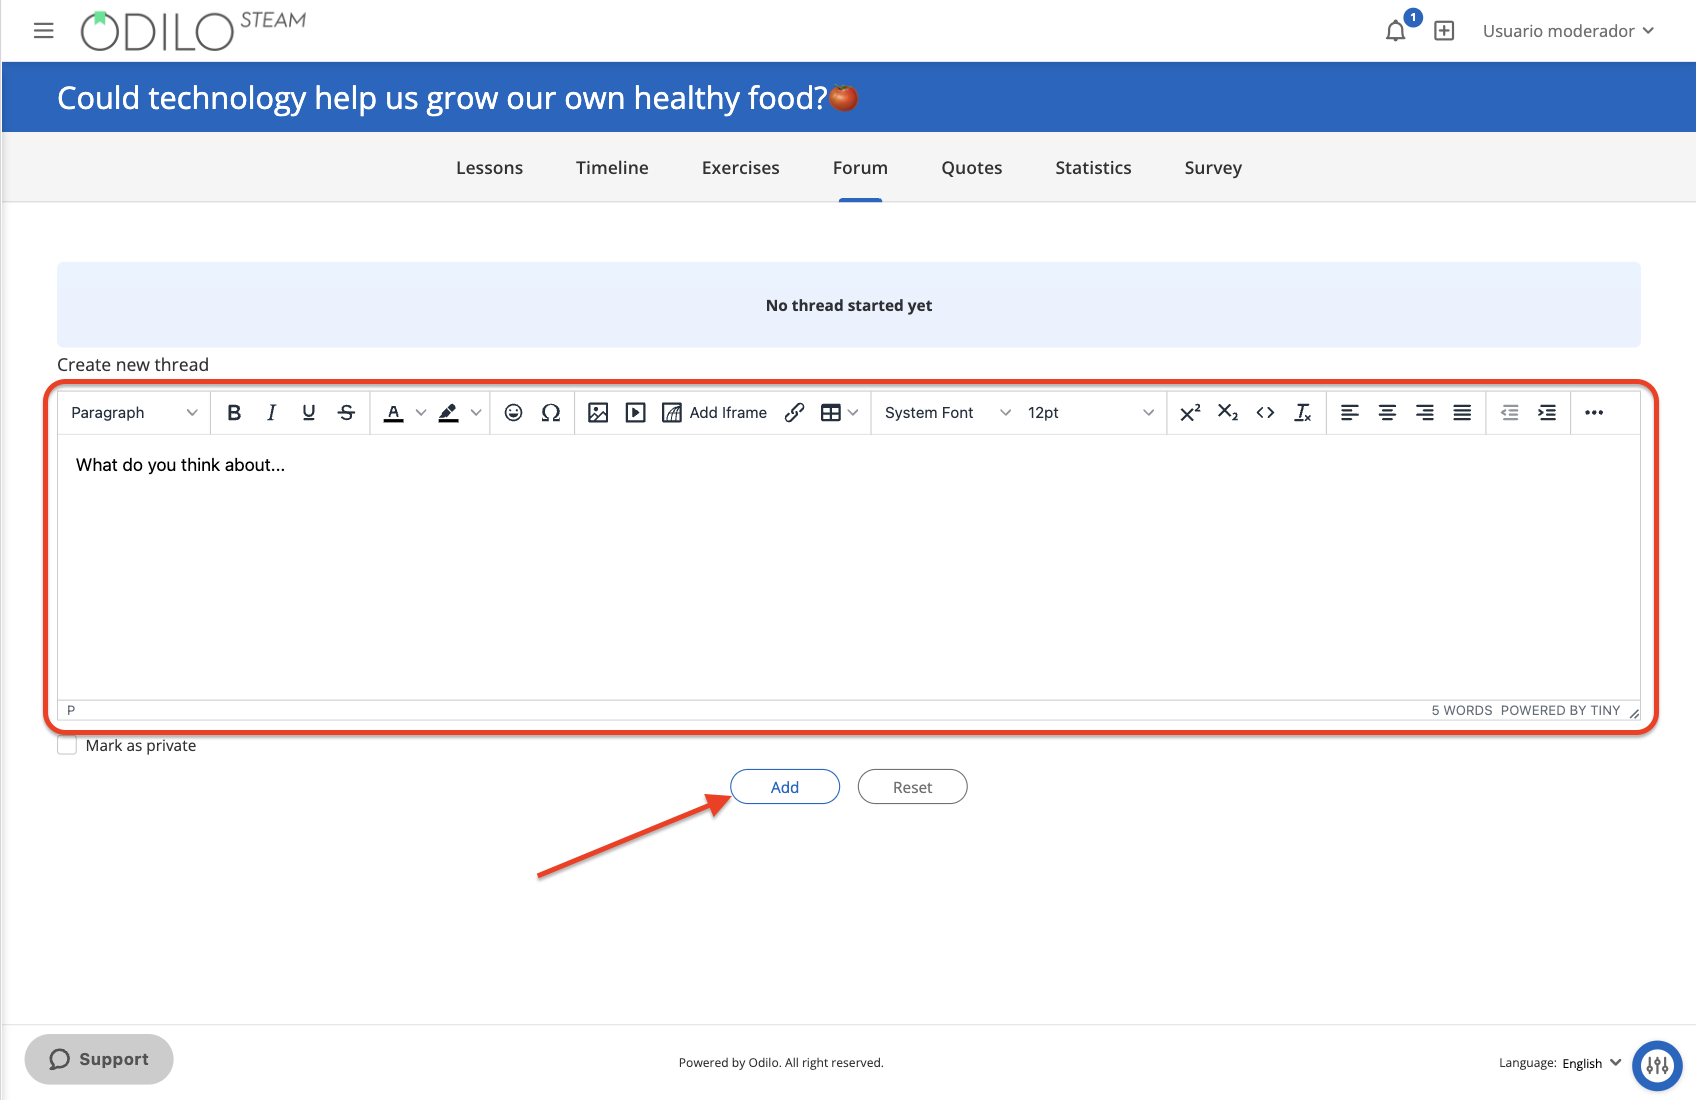
Create a question and start a discussion thread
Click on the forum tab. Next, choose the title under which you want to start a forum, you can write a question or create a new conversation thread in the text box. Once you have established the question, you just have to click on “Add”.
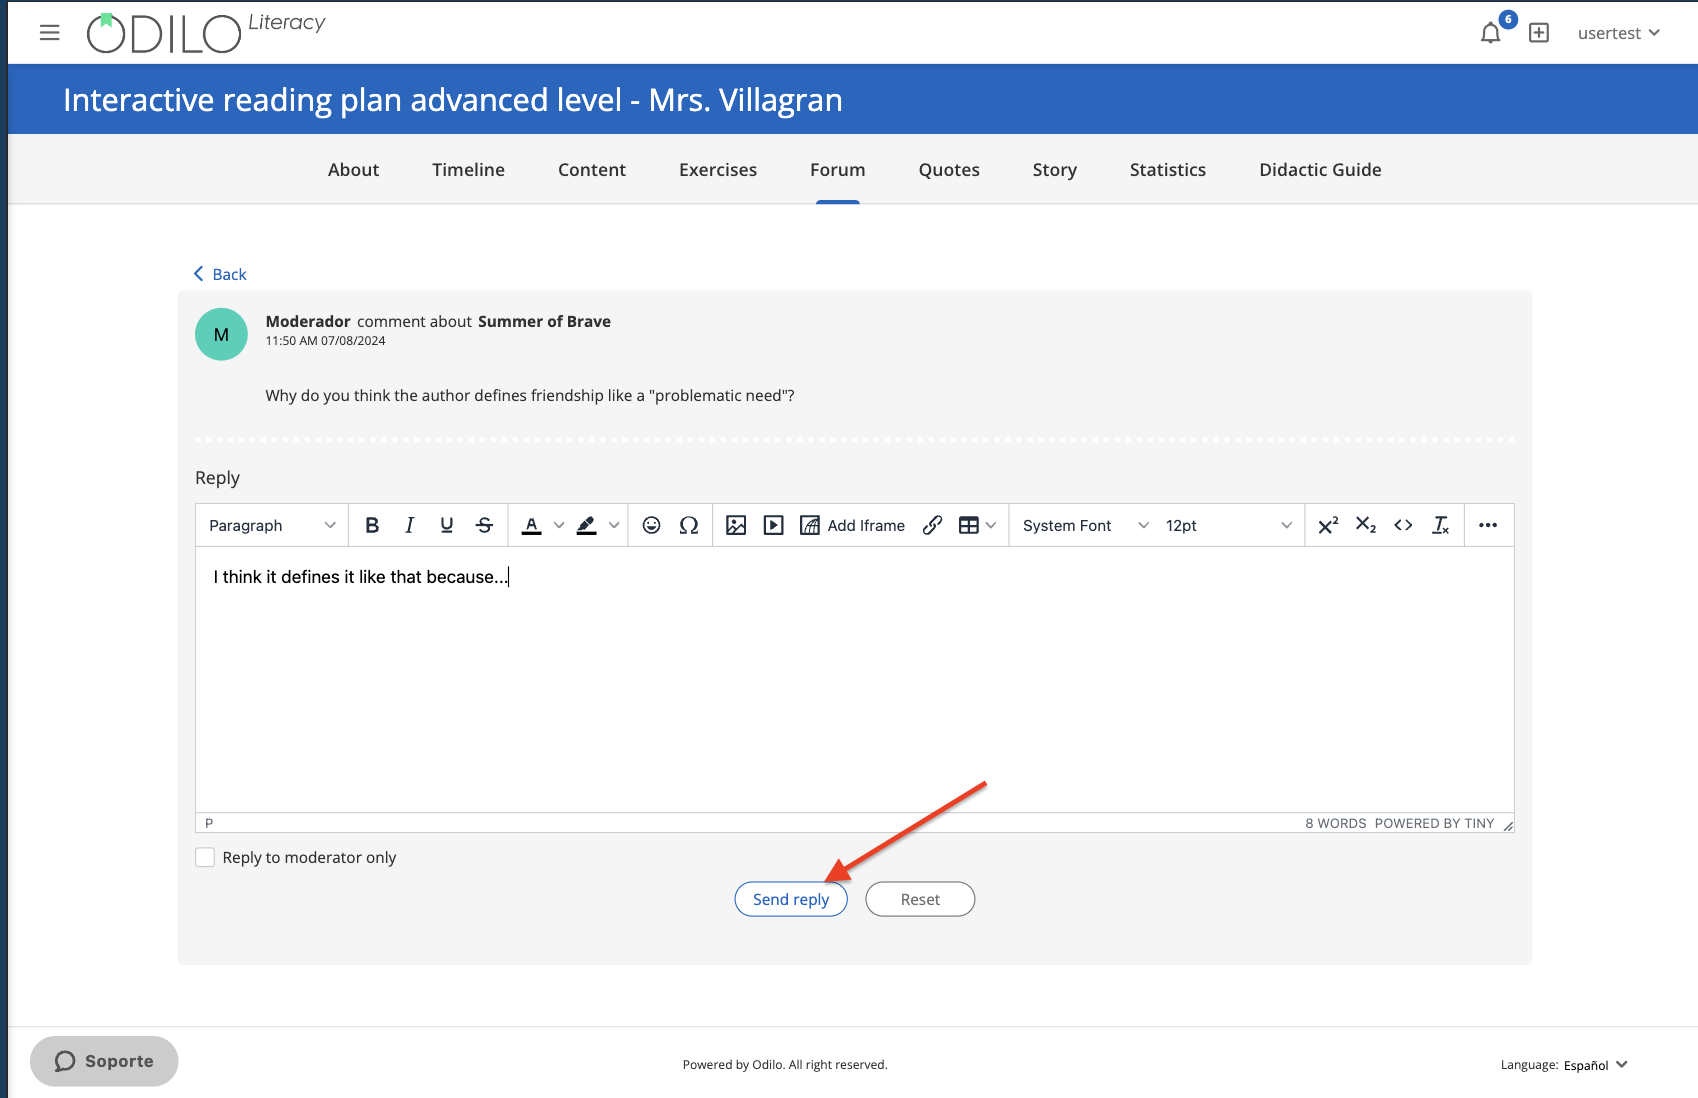
To participate in the discussion thread, both moderators and participants can click on the dialogue icon ![]() and enter the forum for that particular question. To answer the question you just have to write in the answer section and click on “Send reply”.
and enter the forum for that particular question. To answer the question you just have to write in the answer section and click on “Send reply”.
Quotes
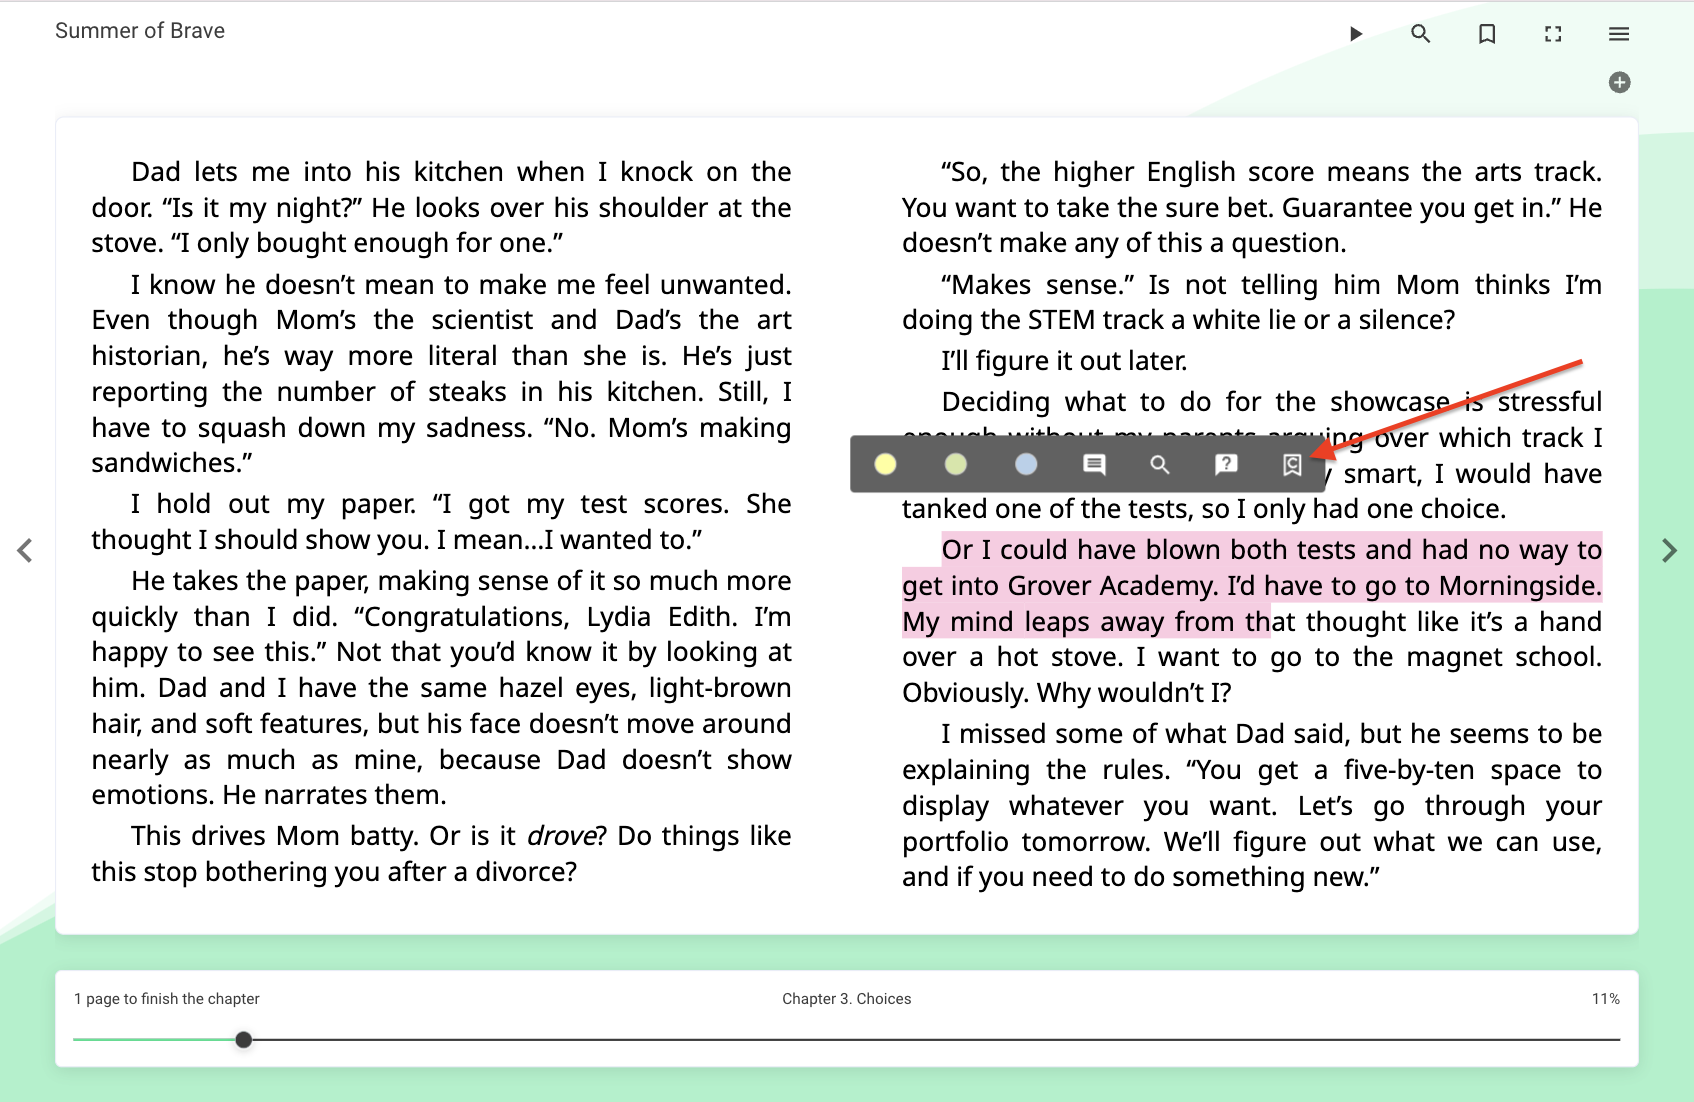
If you want to create discussion threads connected to a specific area of the text, you can share these areas in the “Quotes” tab.
Access the reading and select the area of text you want to share. Then click on the “C” symbol and add a question or comment for your students.
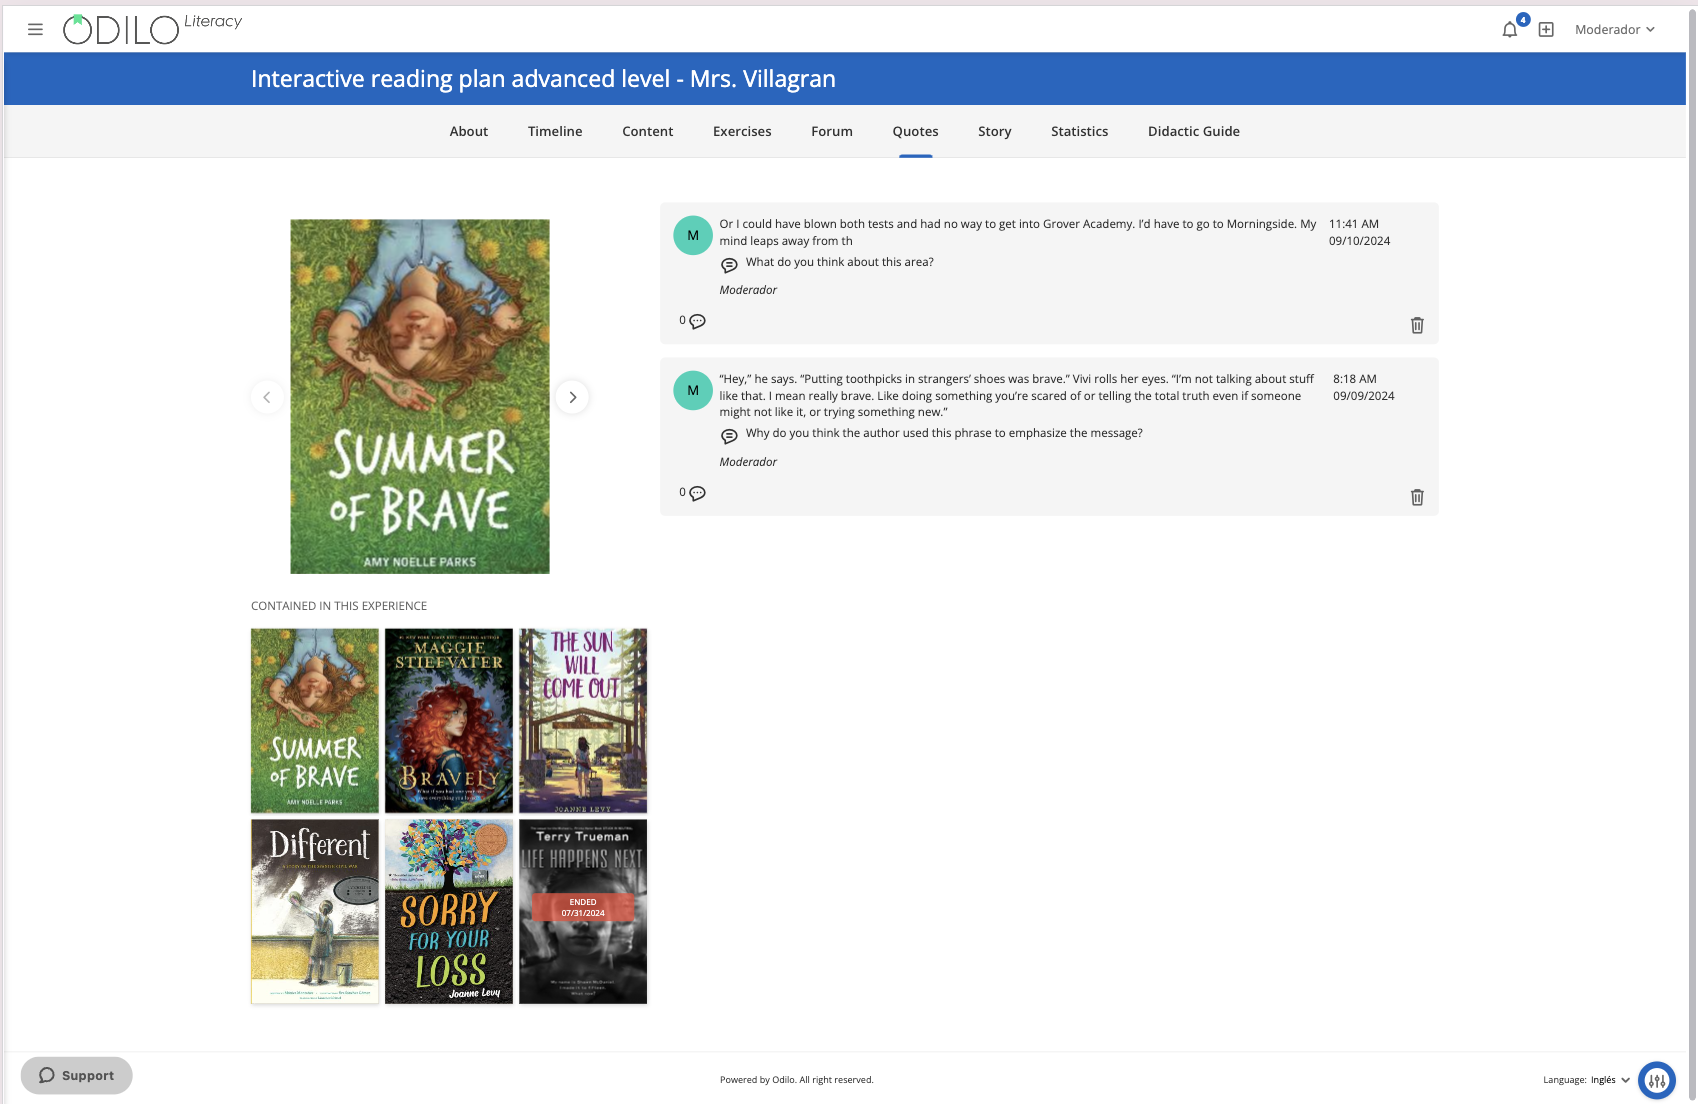
Once you have saved, you will be able to review the quote and your comment in the “Quotes” tab, and students will be able to participate in discussion threads as well as in the forum area.
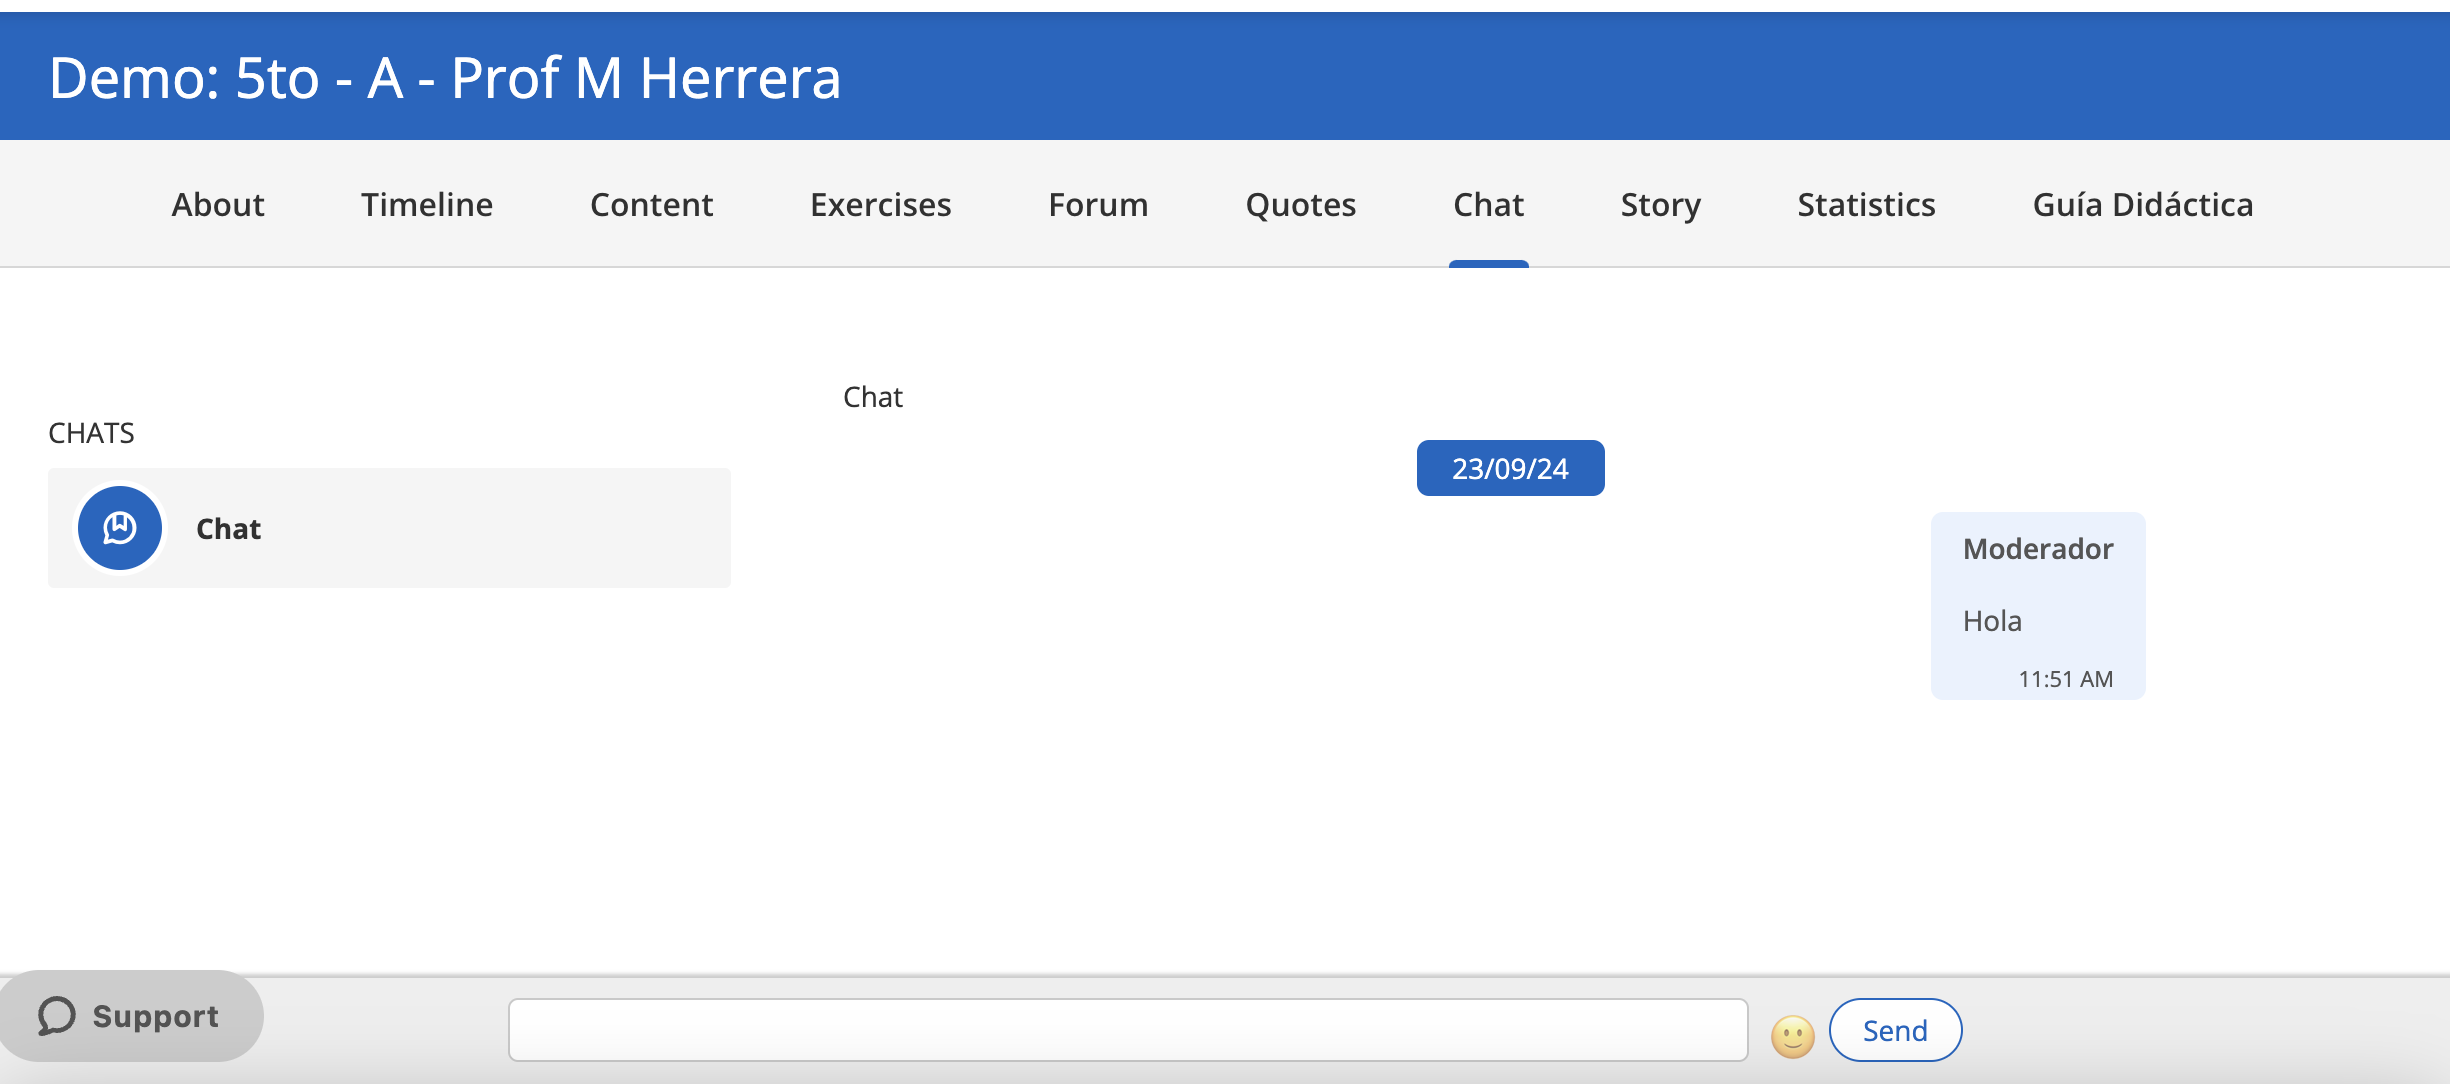
Chat
In the Chat section, you can chat with participants in real time.
To send a message you just have to go to the bar that appears at the bottom of the screen, write a message, and click on “Send”.