Create your own Learning Experience
Quick access to sections
Create a quick literacy experience
Create a literacy experience from scratch
Create “Learning route” Experience quickly
Create “Learning route” Experience from scratch
To create your own Learning Experiences you will have two options: cloning or duplicating ready-made experiences, already designed by experts to launch and work with participants, or creating one completely from scratch. Both options give you the opportunity to customize and modify them as you wish.
Create a quick literacy experience
If you wish to review the complete video of the route, access the following link:
To clone any Experience, click on the “Create Learning Experience” button, which is located under the first carousel.
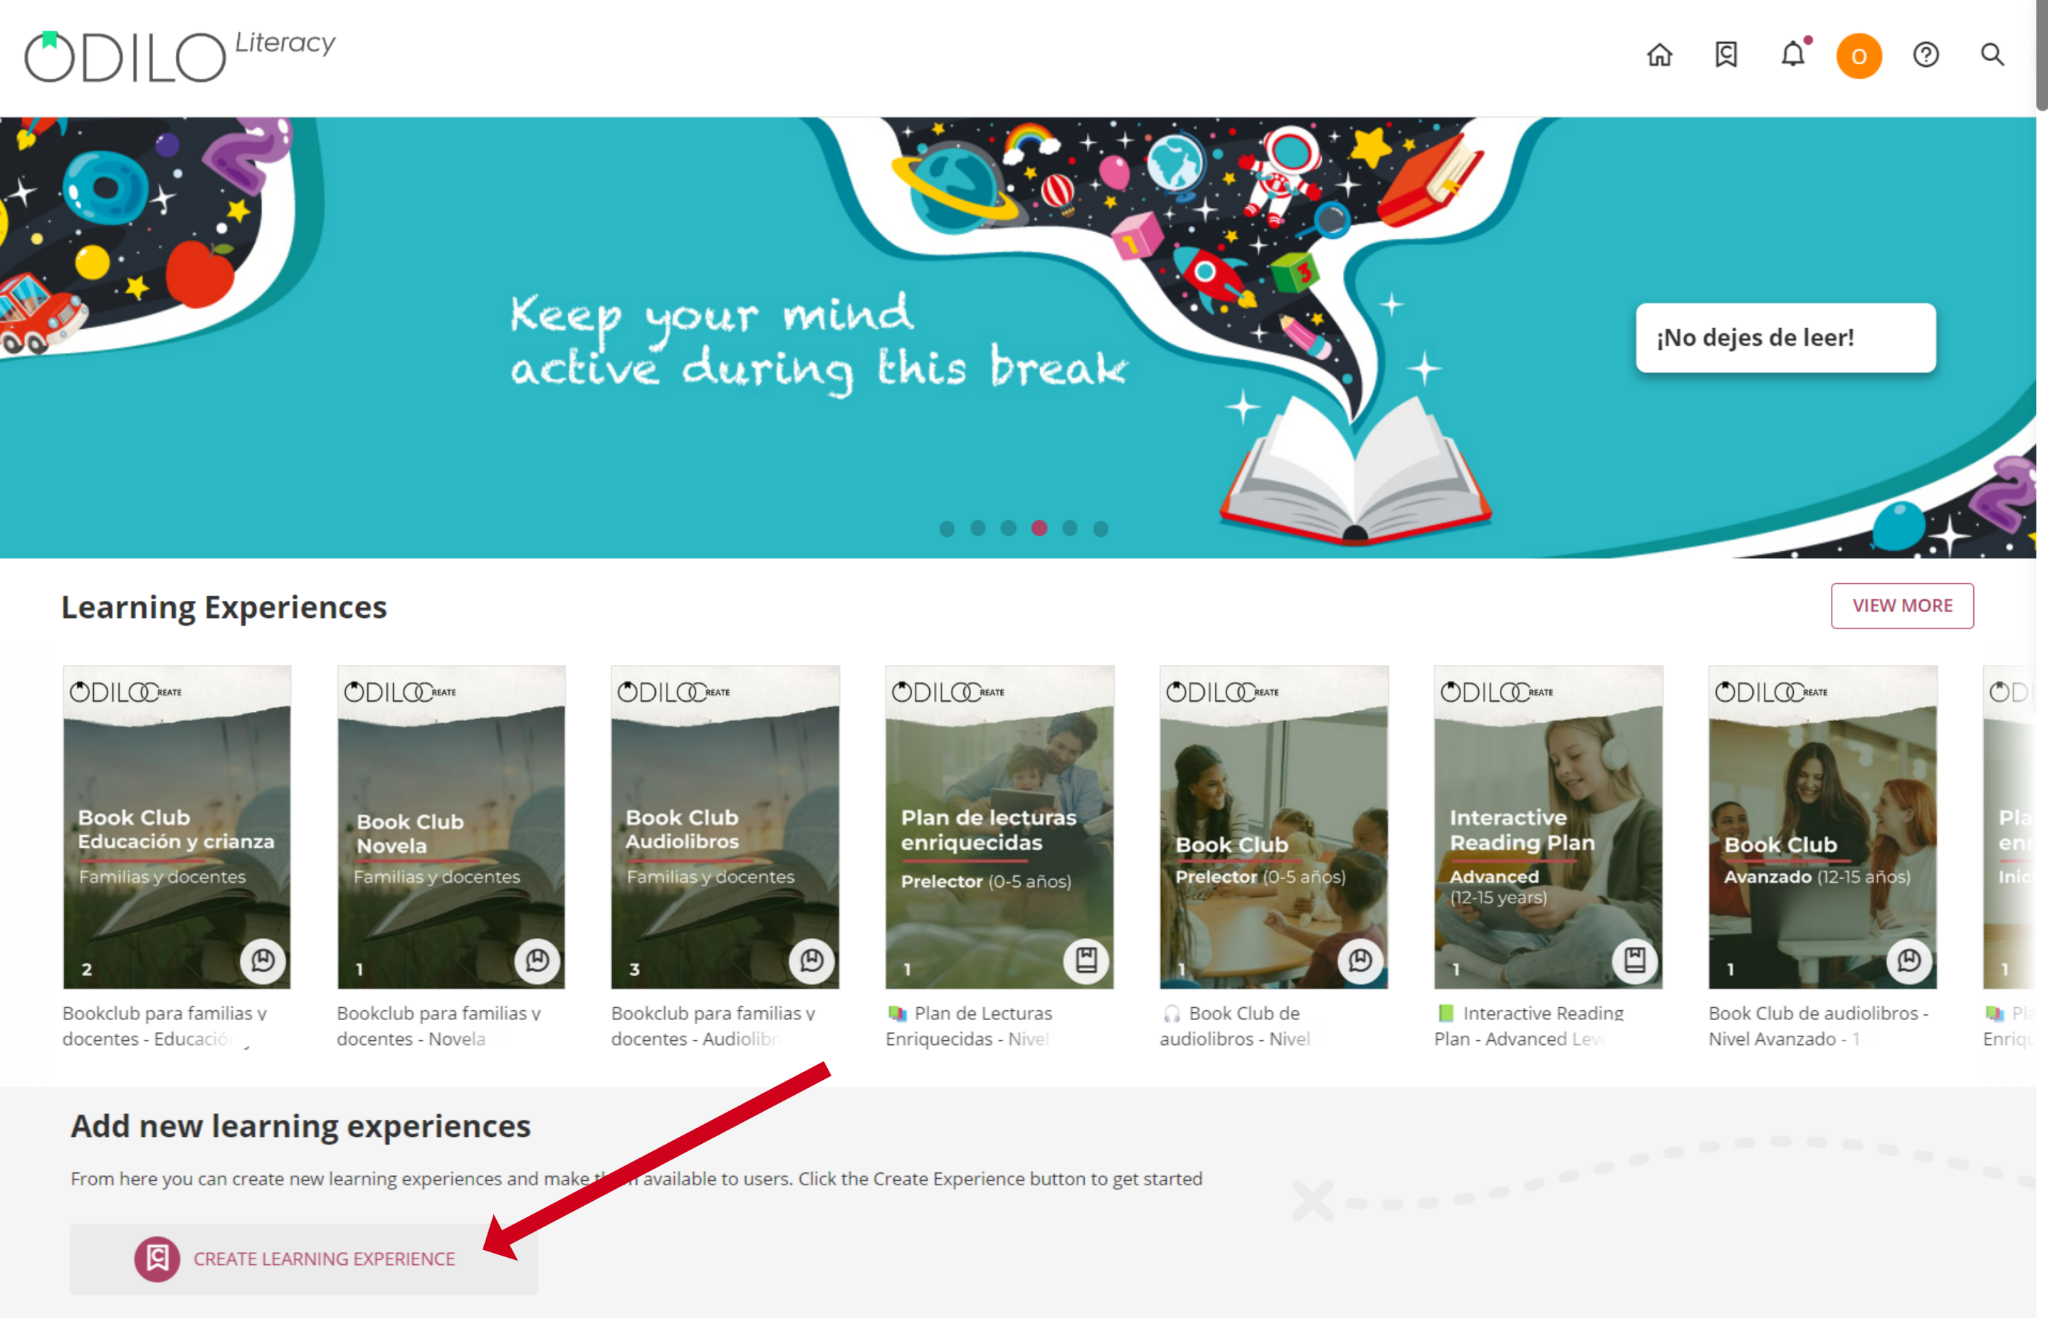
* If you do not see the button, go to “Go to learning experiences” and re-enter your ecosystem.
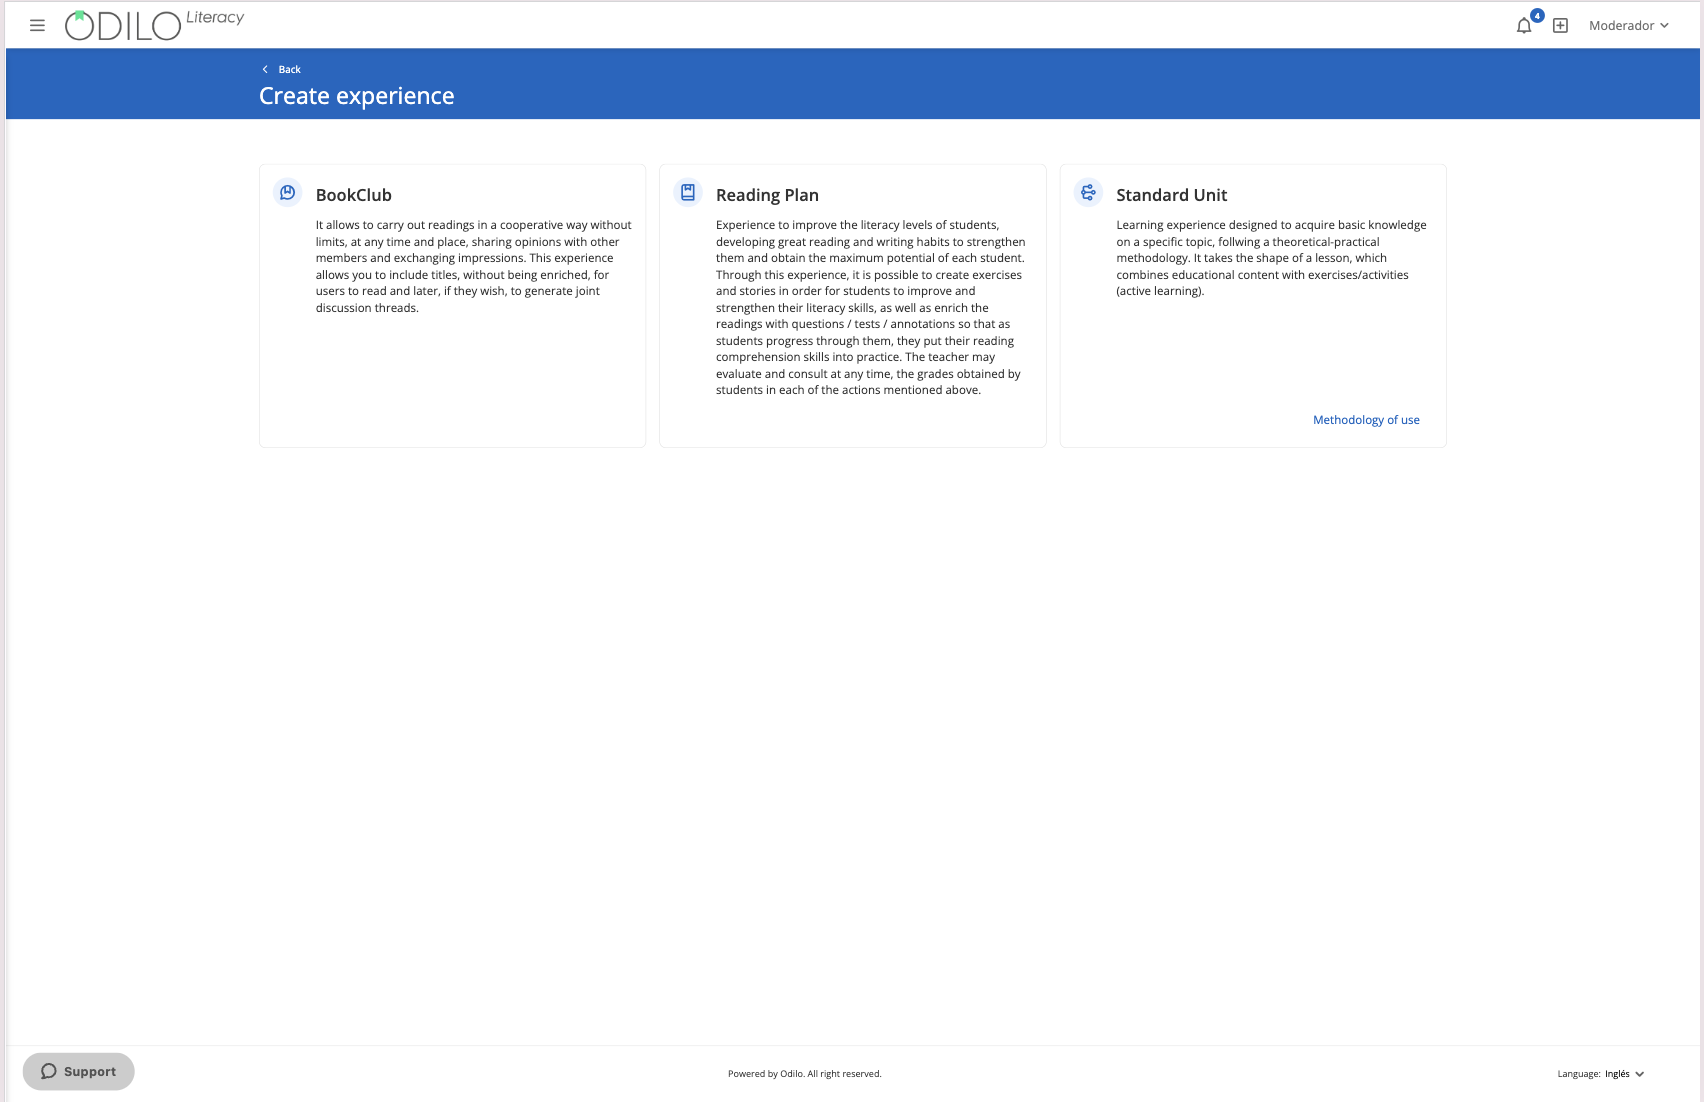
Choose Book Club or Reading Plan by clicking on any of them.
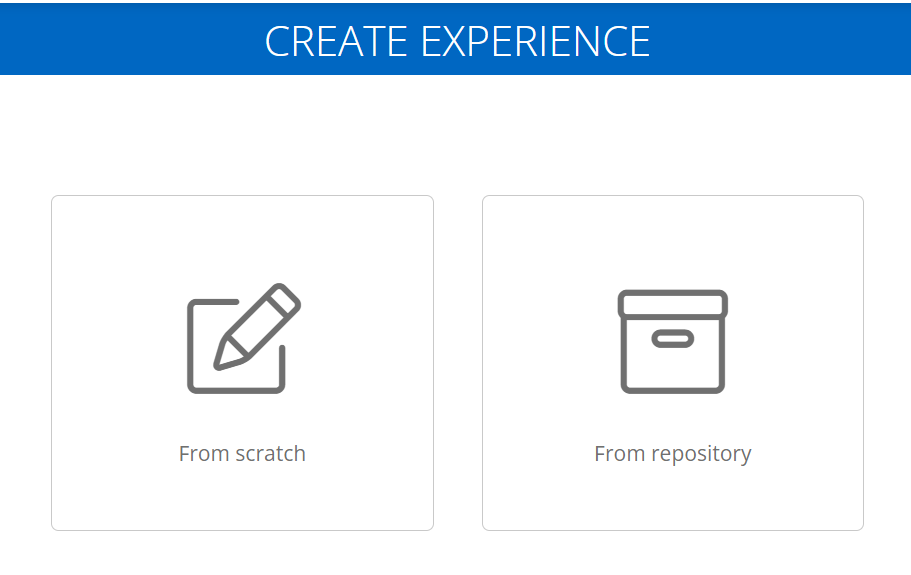
Select the option:“From repository”.
From this option all the experiences that exist for cloning will be shown, depending on the type of format selected.

Perform a more precise search using the filter button at the top right.

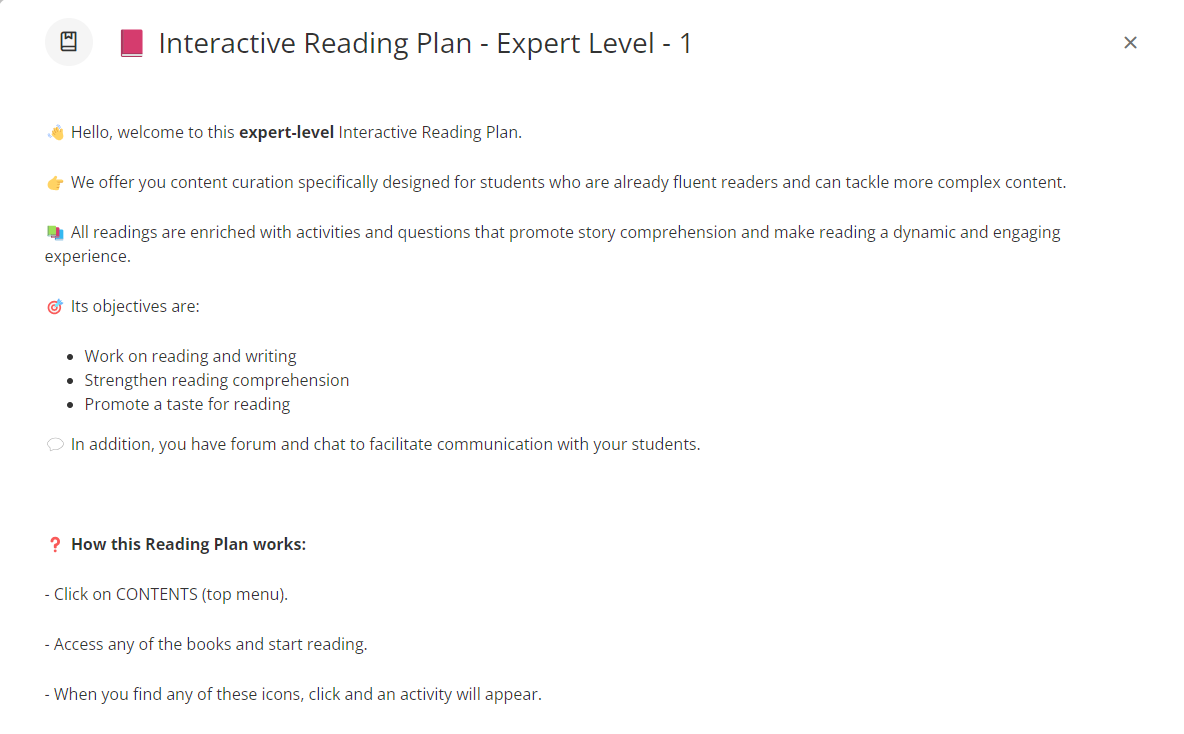
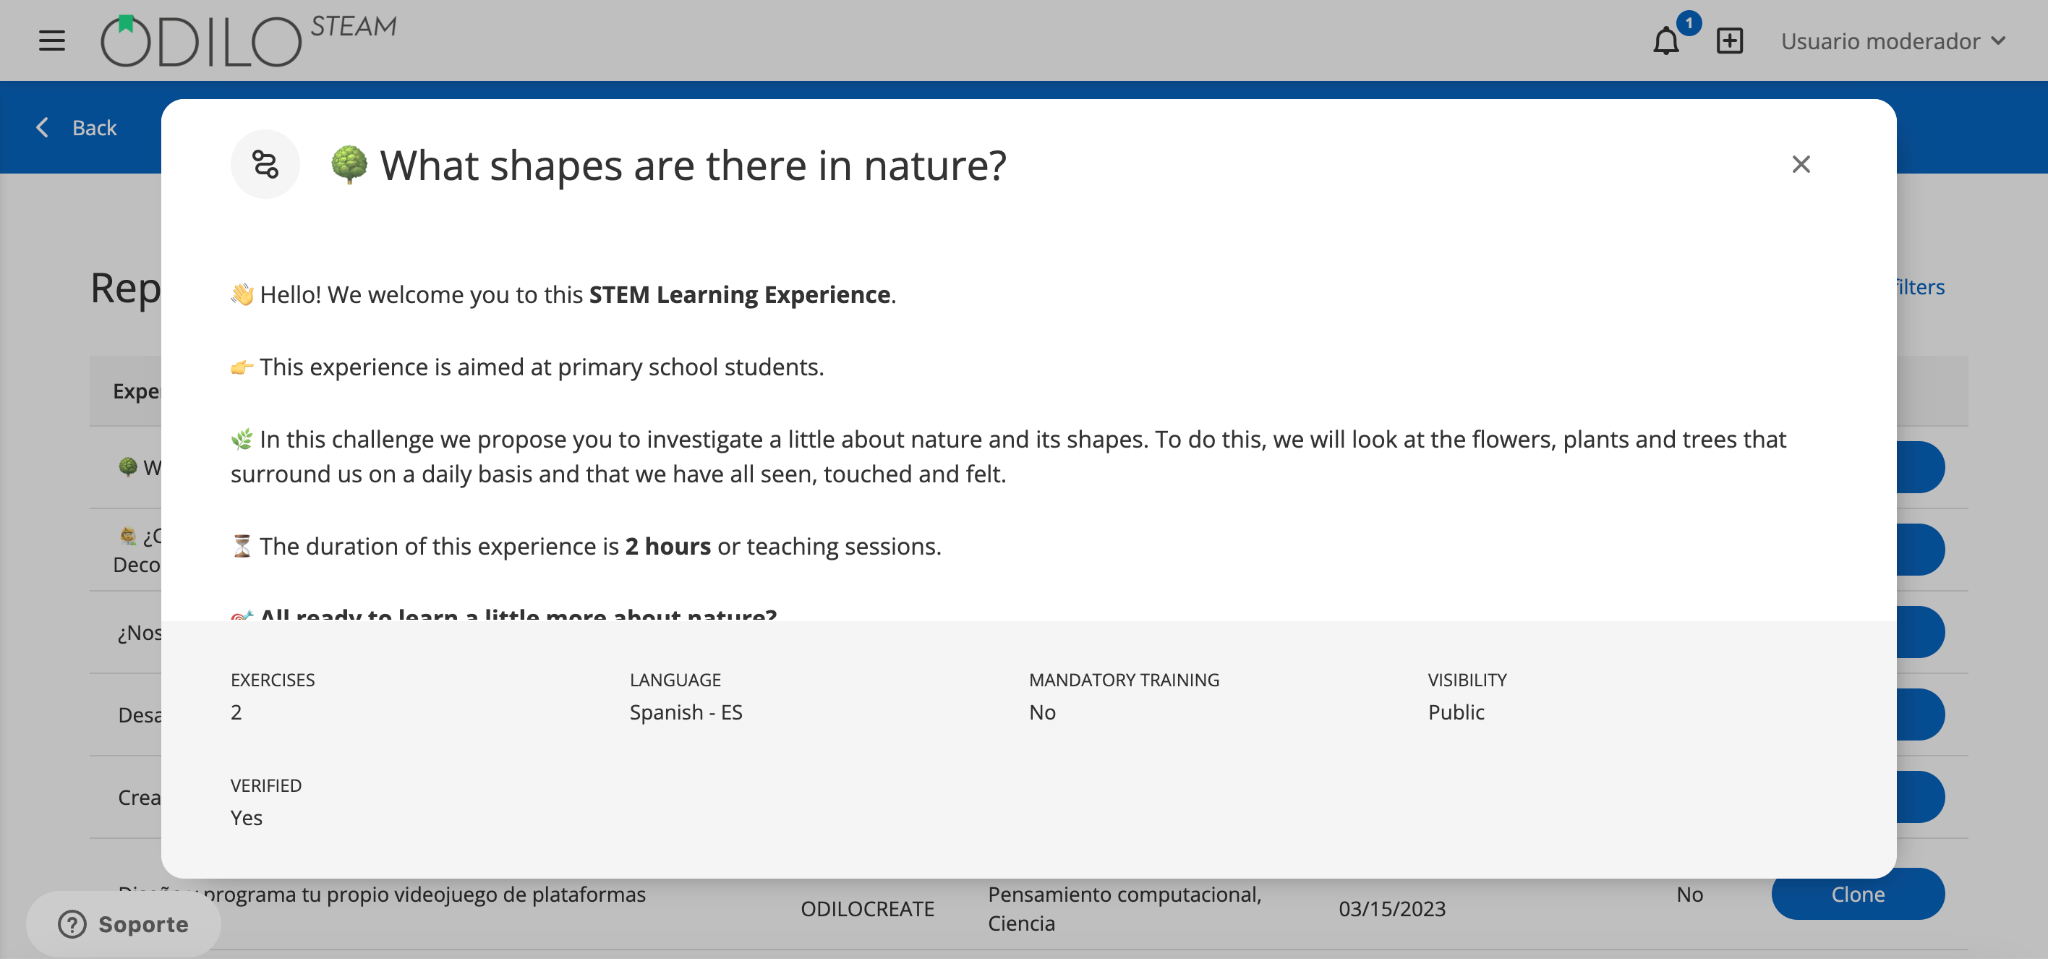
If you want to know which contents can be found within the Reading Plan or Book Club and how many enhancement activities it contains, click on its name to preview the content.
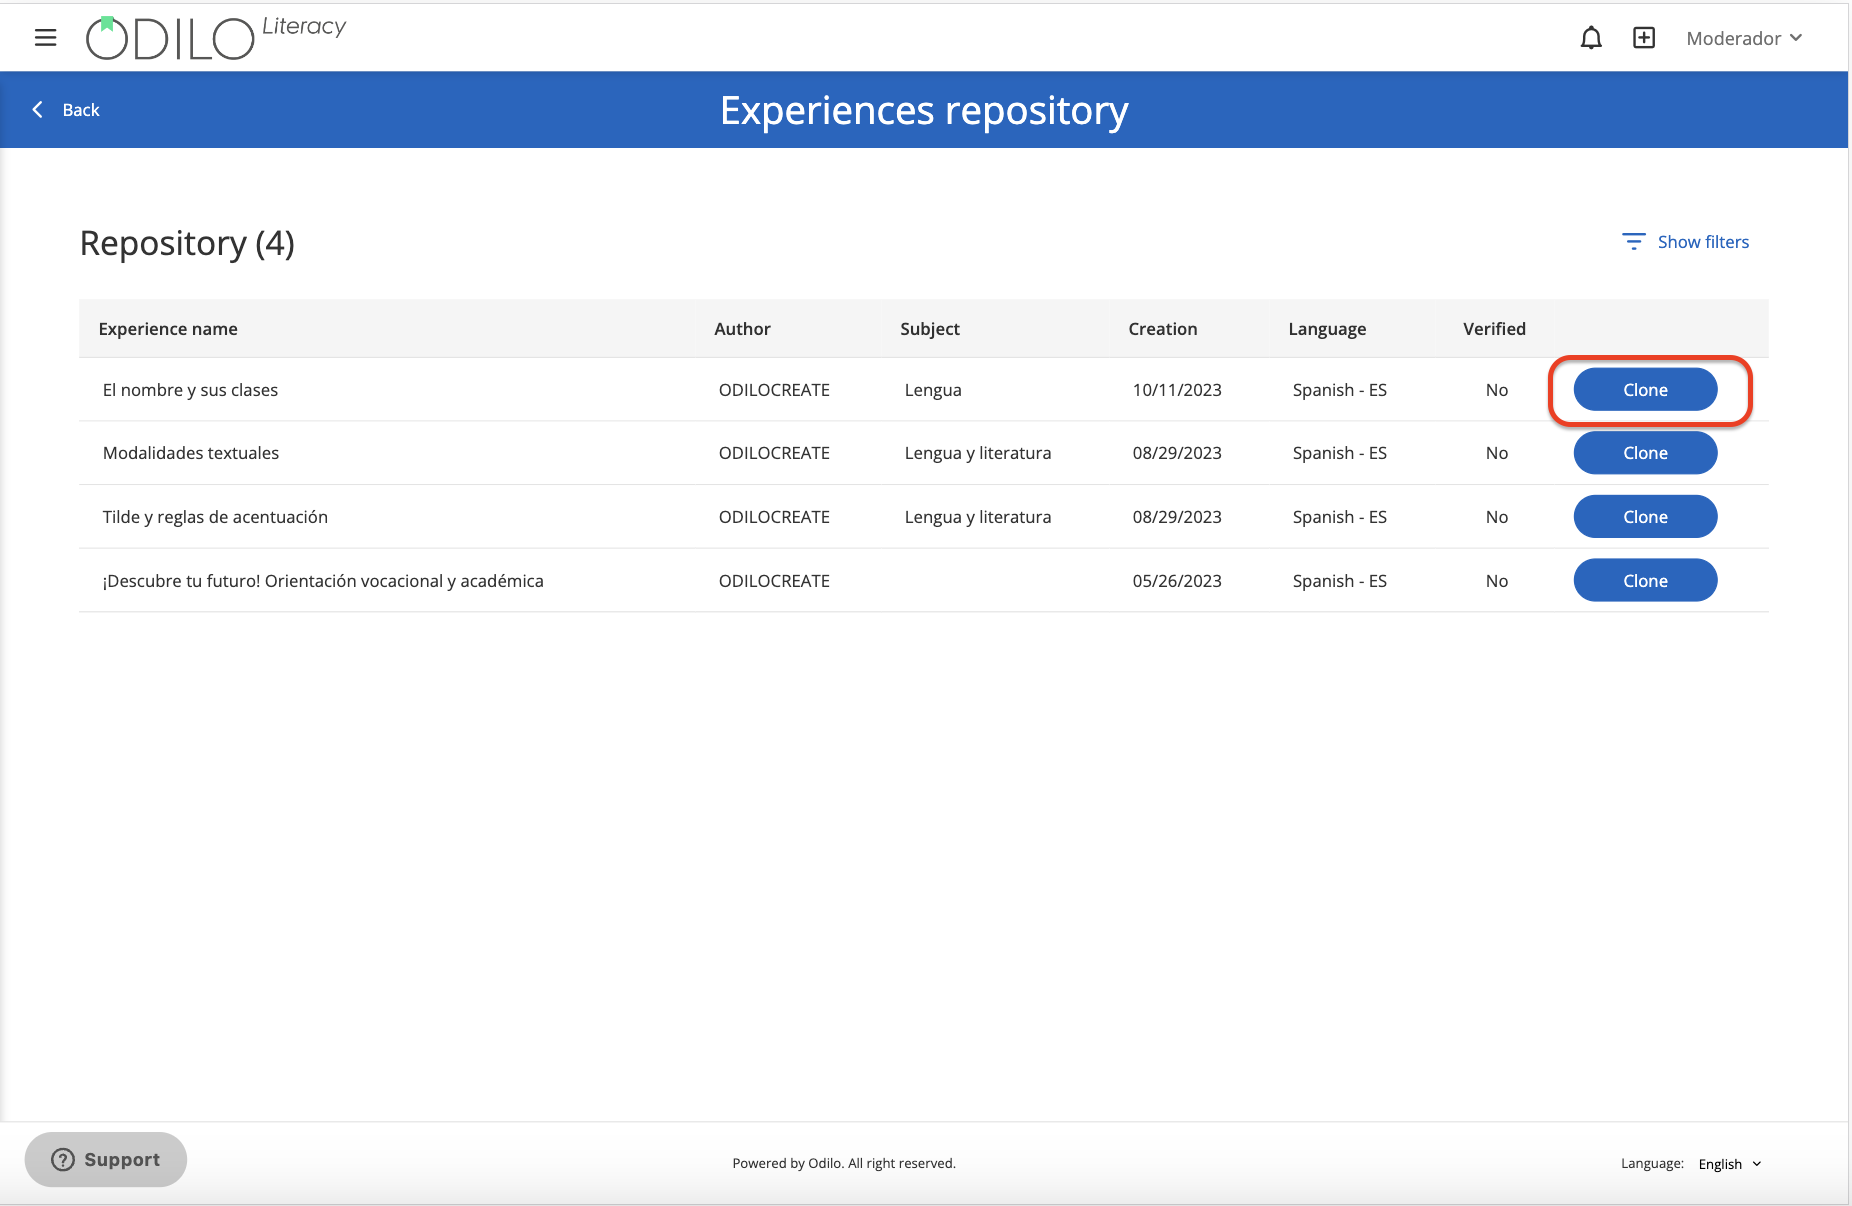
To clone, click the “Clone” button from the right column and follow the steps:
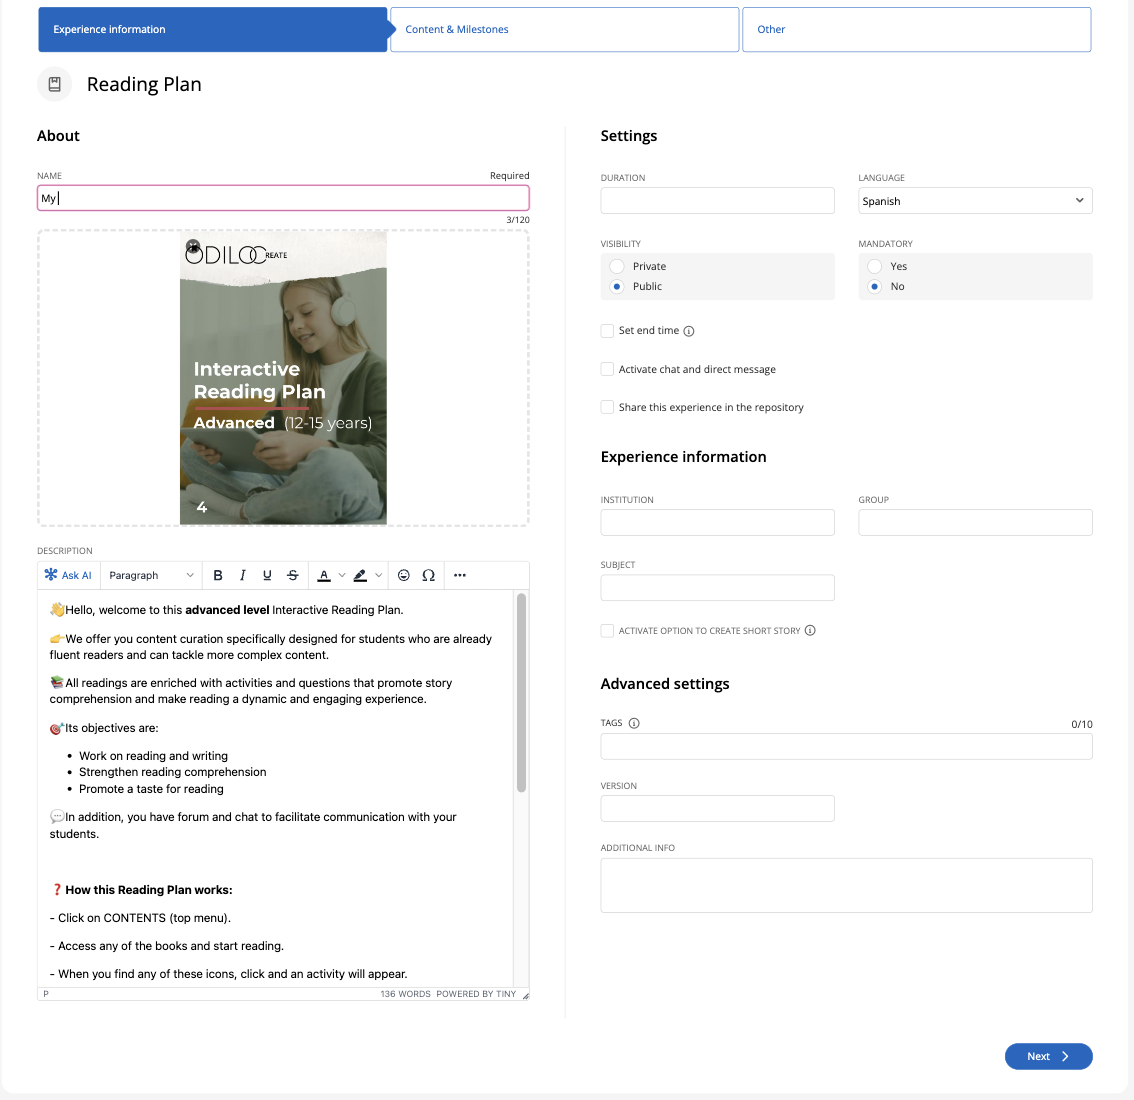
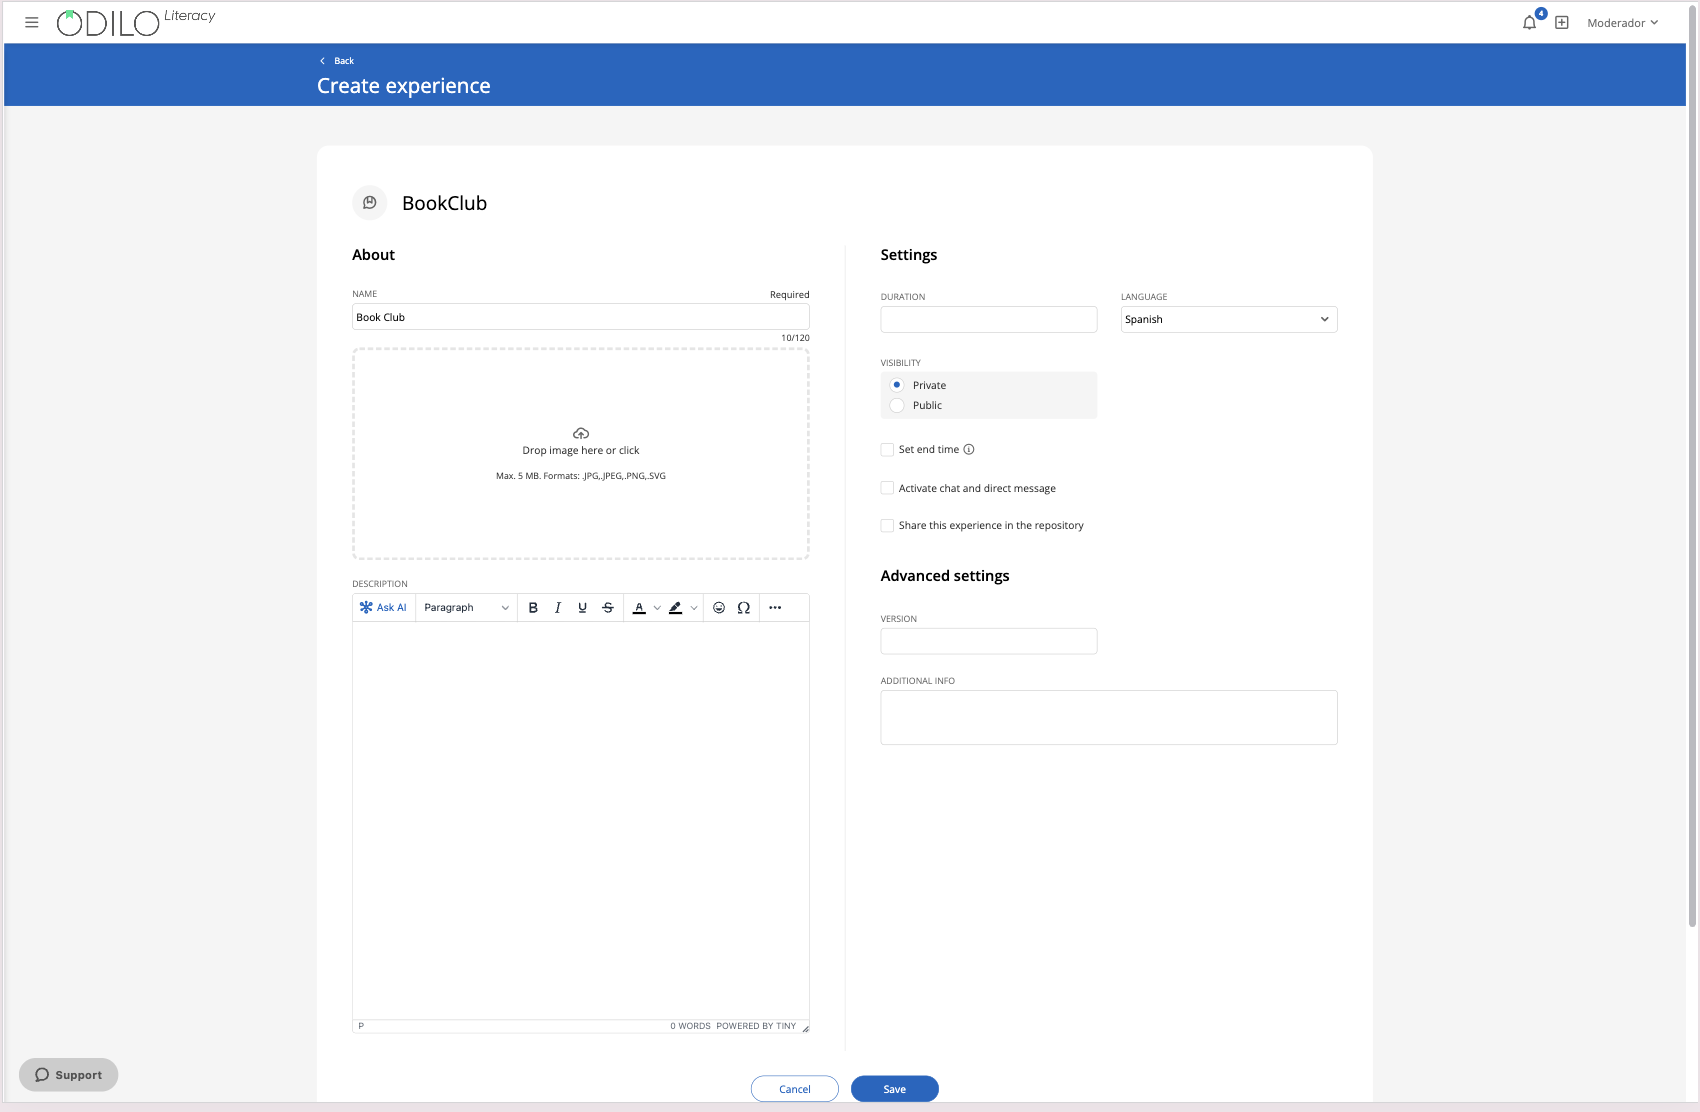
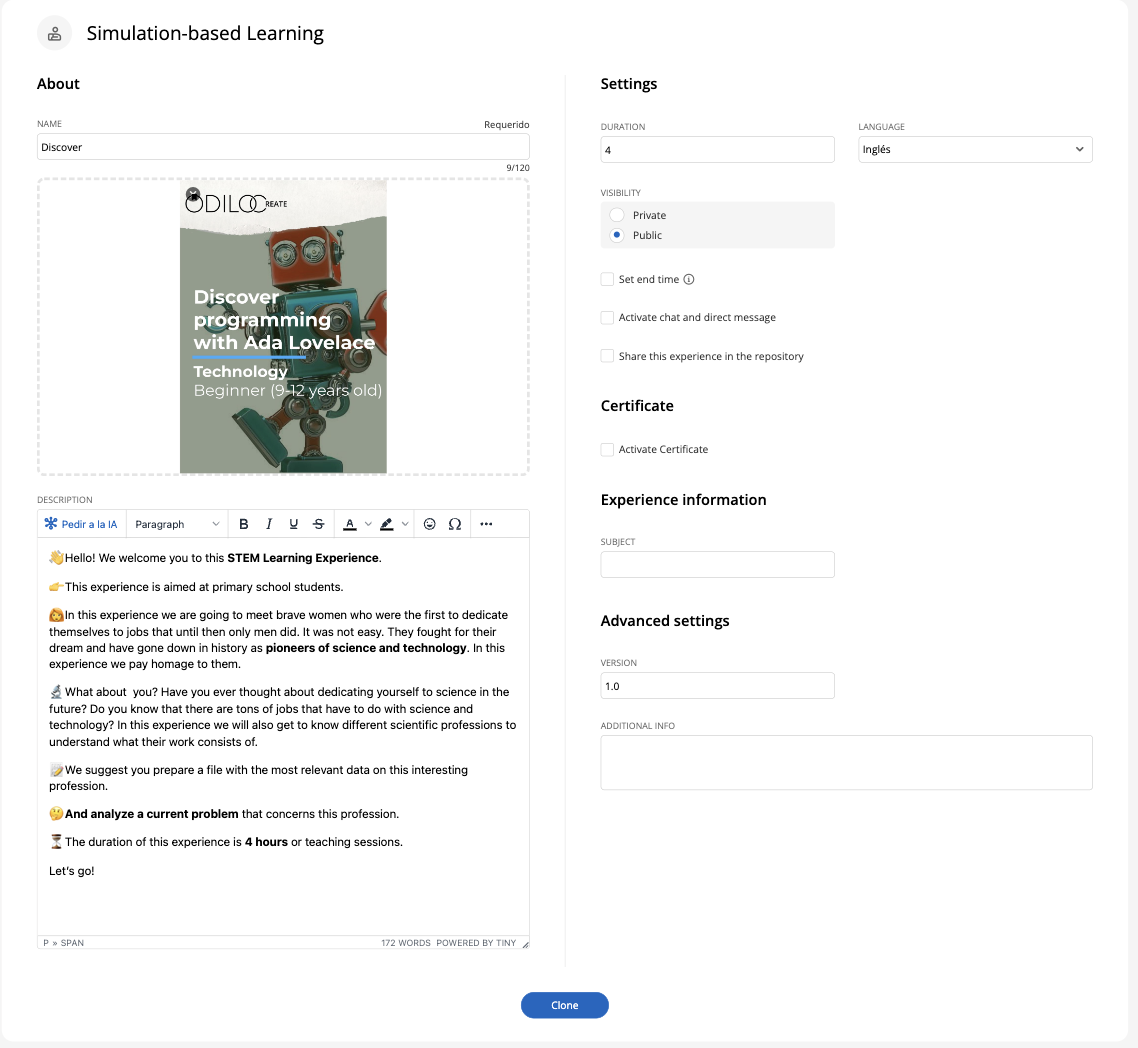
1. Information and settings
Complete the required fields to advance and clone.
Name: It is recommended to name the experience precisely to be able to locate it quickly, for example Topic and/or subject, level and the name of the moderator/teacher, “Earth Day – Science 5th – Professor Mari Herrera”.
Cover: You can edit or add a cover image.
Description:You will be able to edit and add the information you want, as well as images, tables, videos or embedded gamification activities. In this section you can activate prior knowledge that helps participants in the process.
Duration: estimated time to carry out the experience.
Language: Select the language in which the experience is made.
Visibility: In private experiences, participants will need an invitation to access and statistics will be generated for only the group you want; In public ones, everyone will be able to follow and access it.
Mandatory: When designated mandatory, the student has to complete each section and its exercises in order.
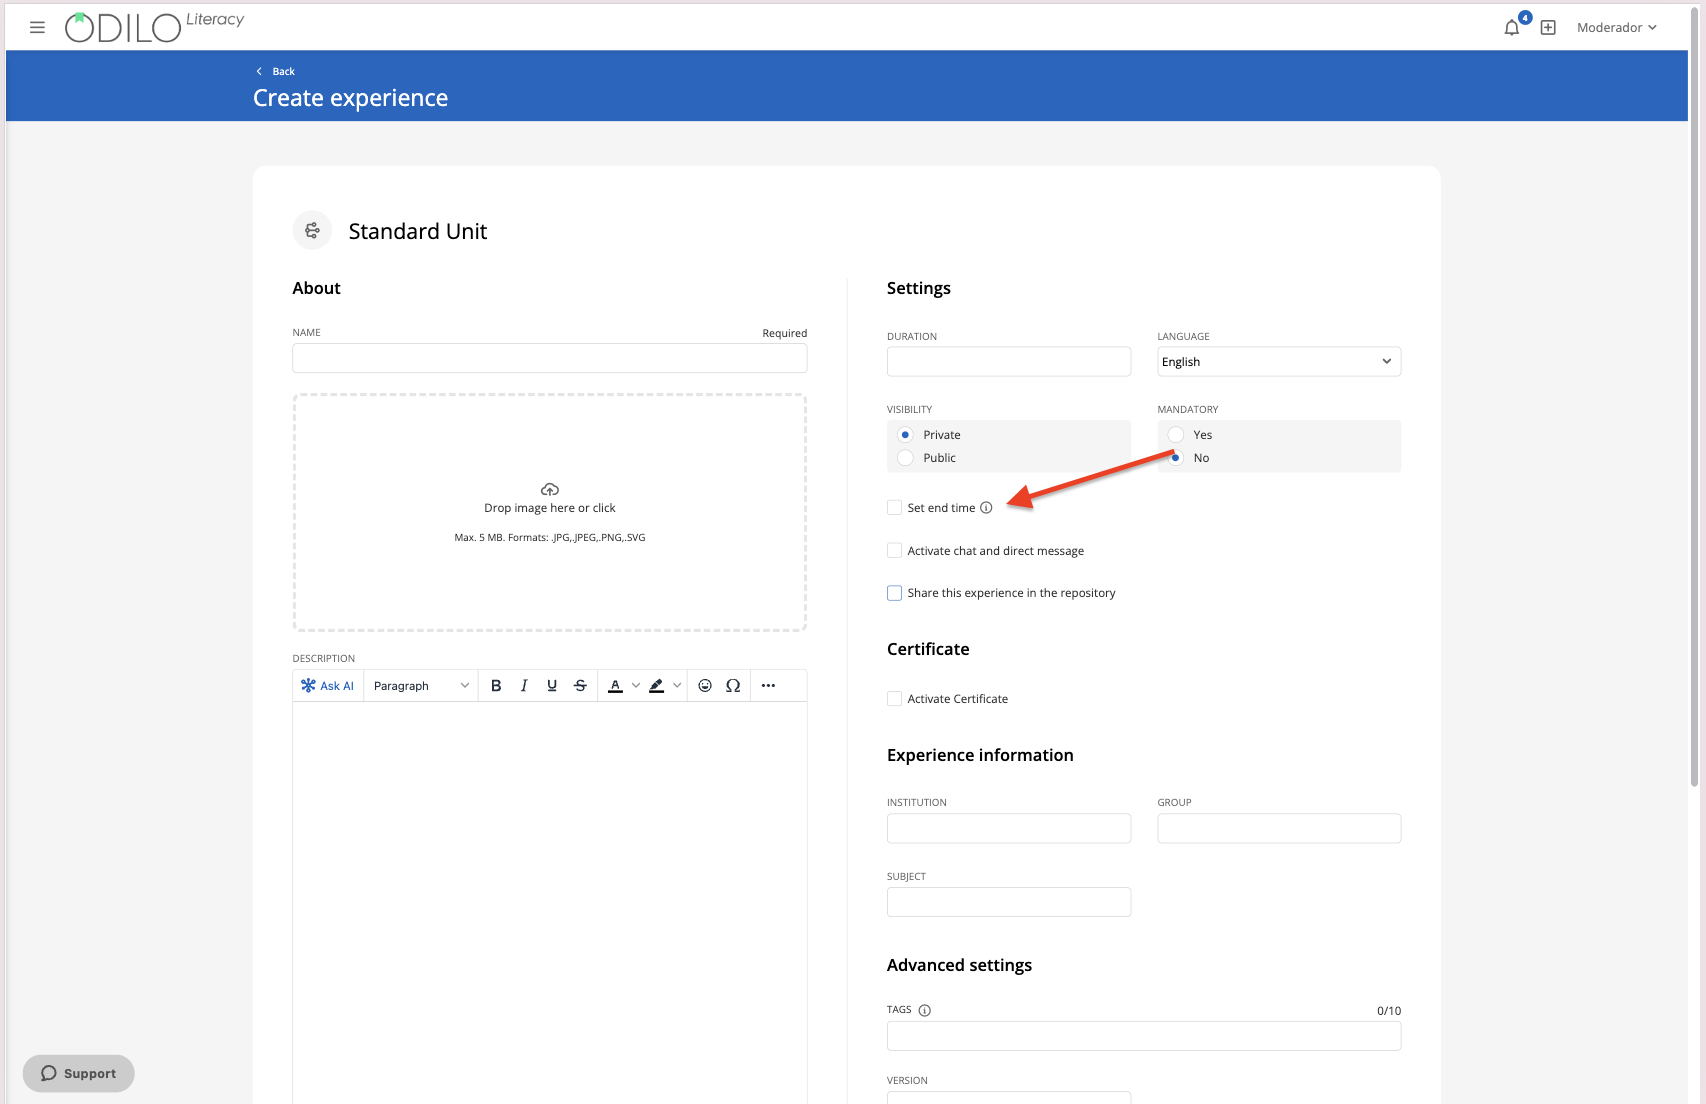
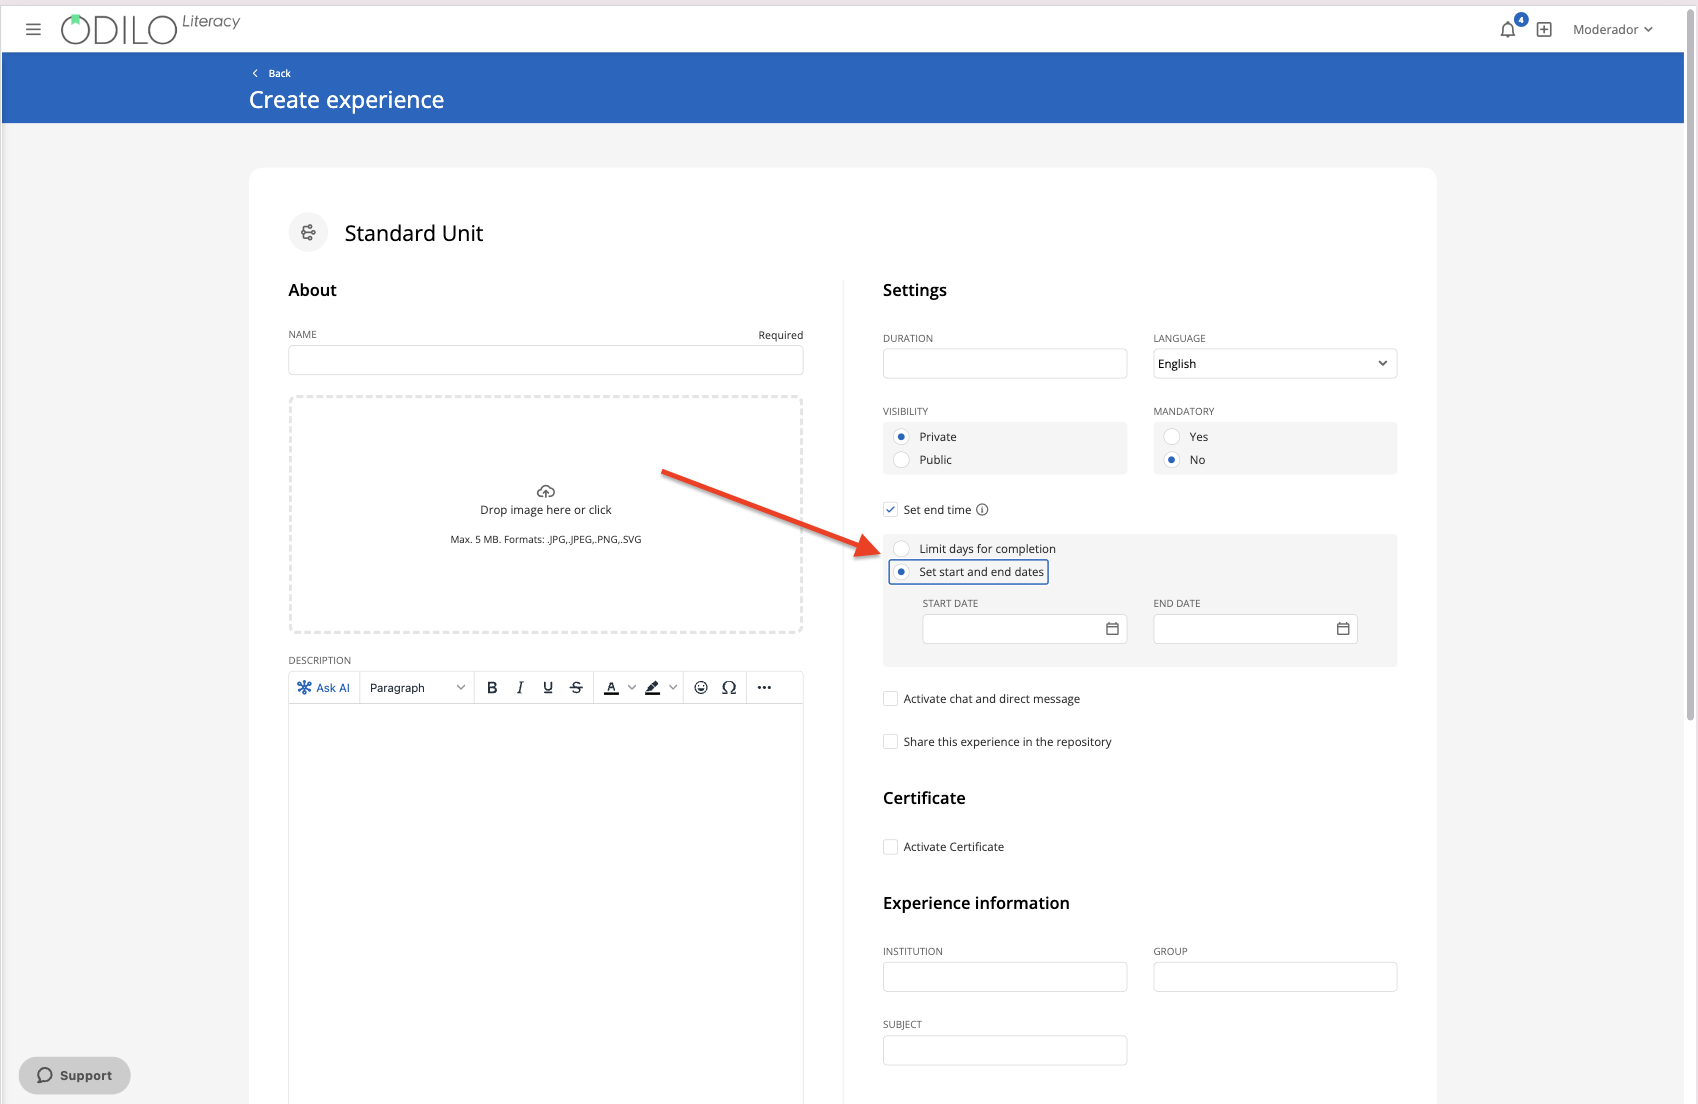
Set end date: Enabling this option allows you to set start and end dates to limit access to participants before or after the date you set.
Chat: As a moderator you can activate or deactivate this tab whenever you want.
Share in repository: Activating this option will allow other moderators to clone your experience.
Experience Information Fields: optional extra data.
Short story (Exclusive Reading Plan): Activating this section allows all members of the experience, together, to create a short story according to the topic chosen by the teacher, following established participation turns.
Important: All fields are editable once the experience is cloned.
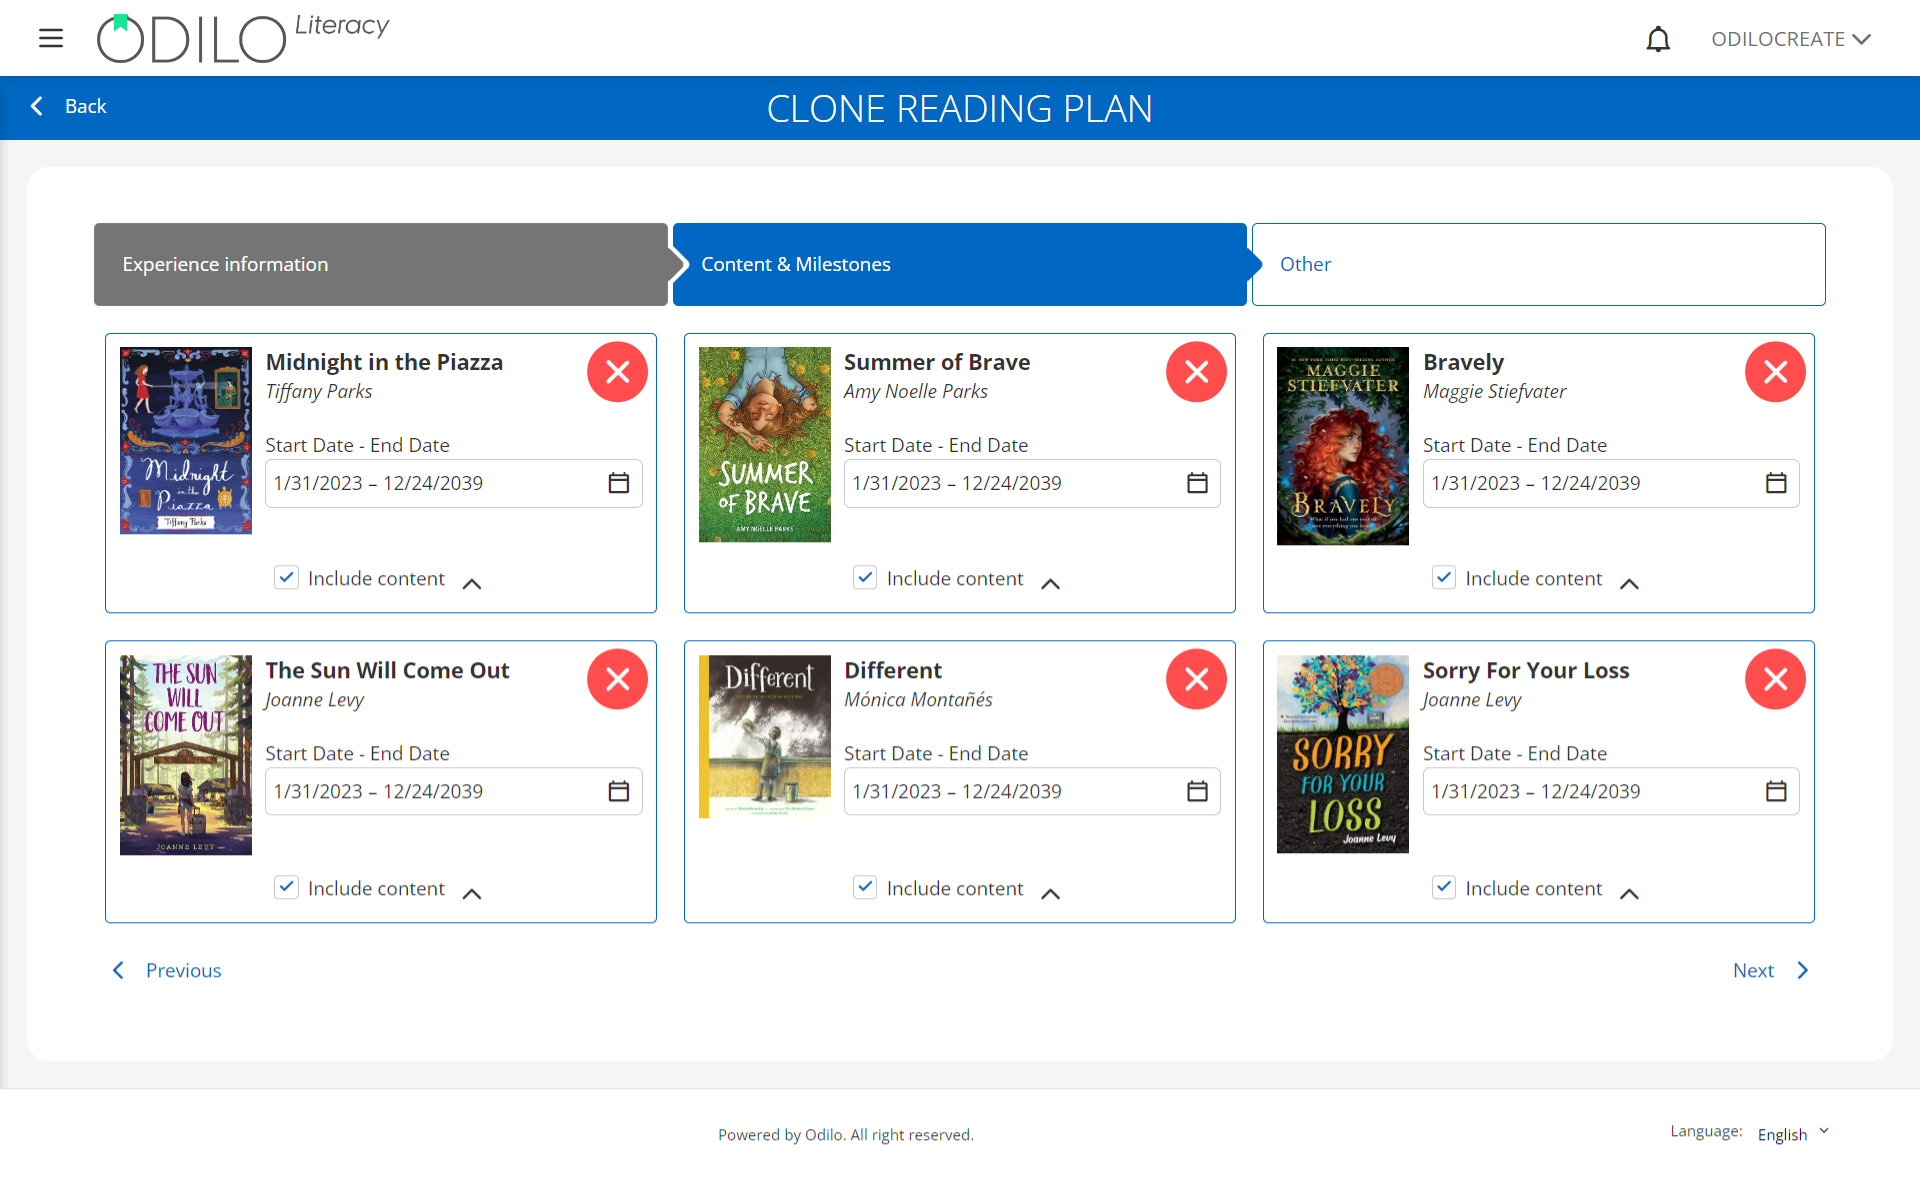
2. Content & Milestones
The next thing will be to decide if you include all the content that comes within the experience or if you decide to eliminate any of them. If you want to remove content, you just have to click on the red cross button. At this point, you can assign a start and end date for each content.
Important: The contents and selected dates are editable once the experience is cloned.
3. Others
The next step will be to clone the exercises and the extra tabs that your experience brings. If you want to remove them, you can do so from the red cross. Remember that everything can be edited once the experience is cloned.
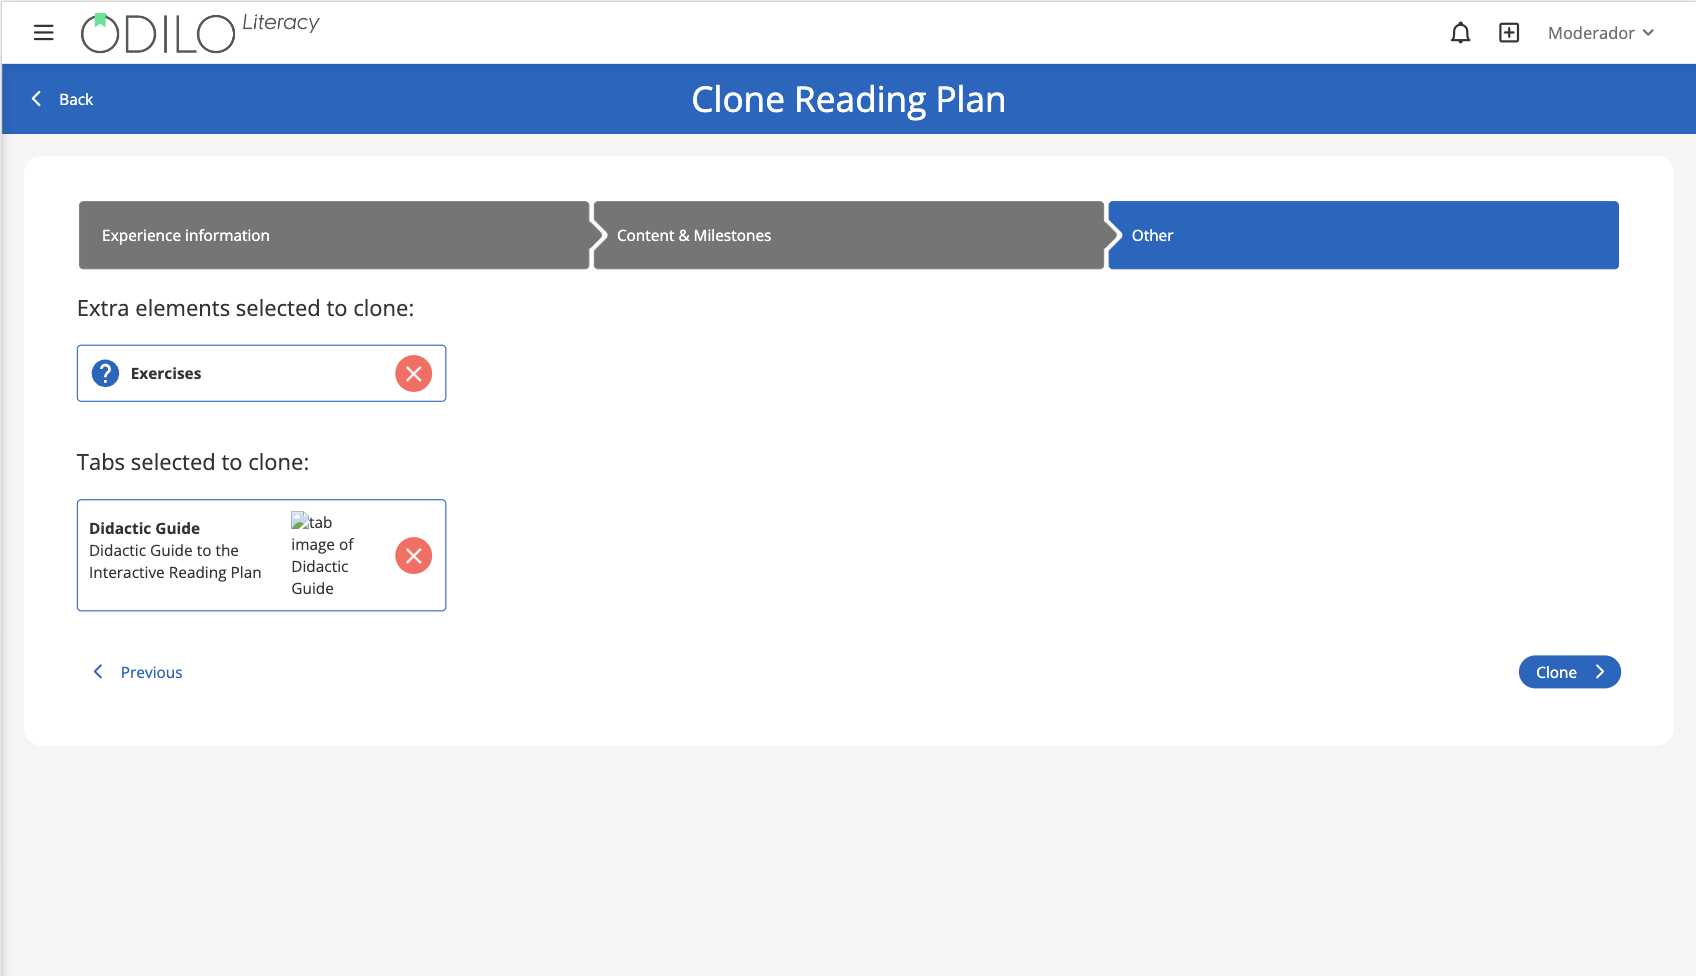
Finally, click “Clone”.
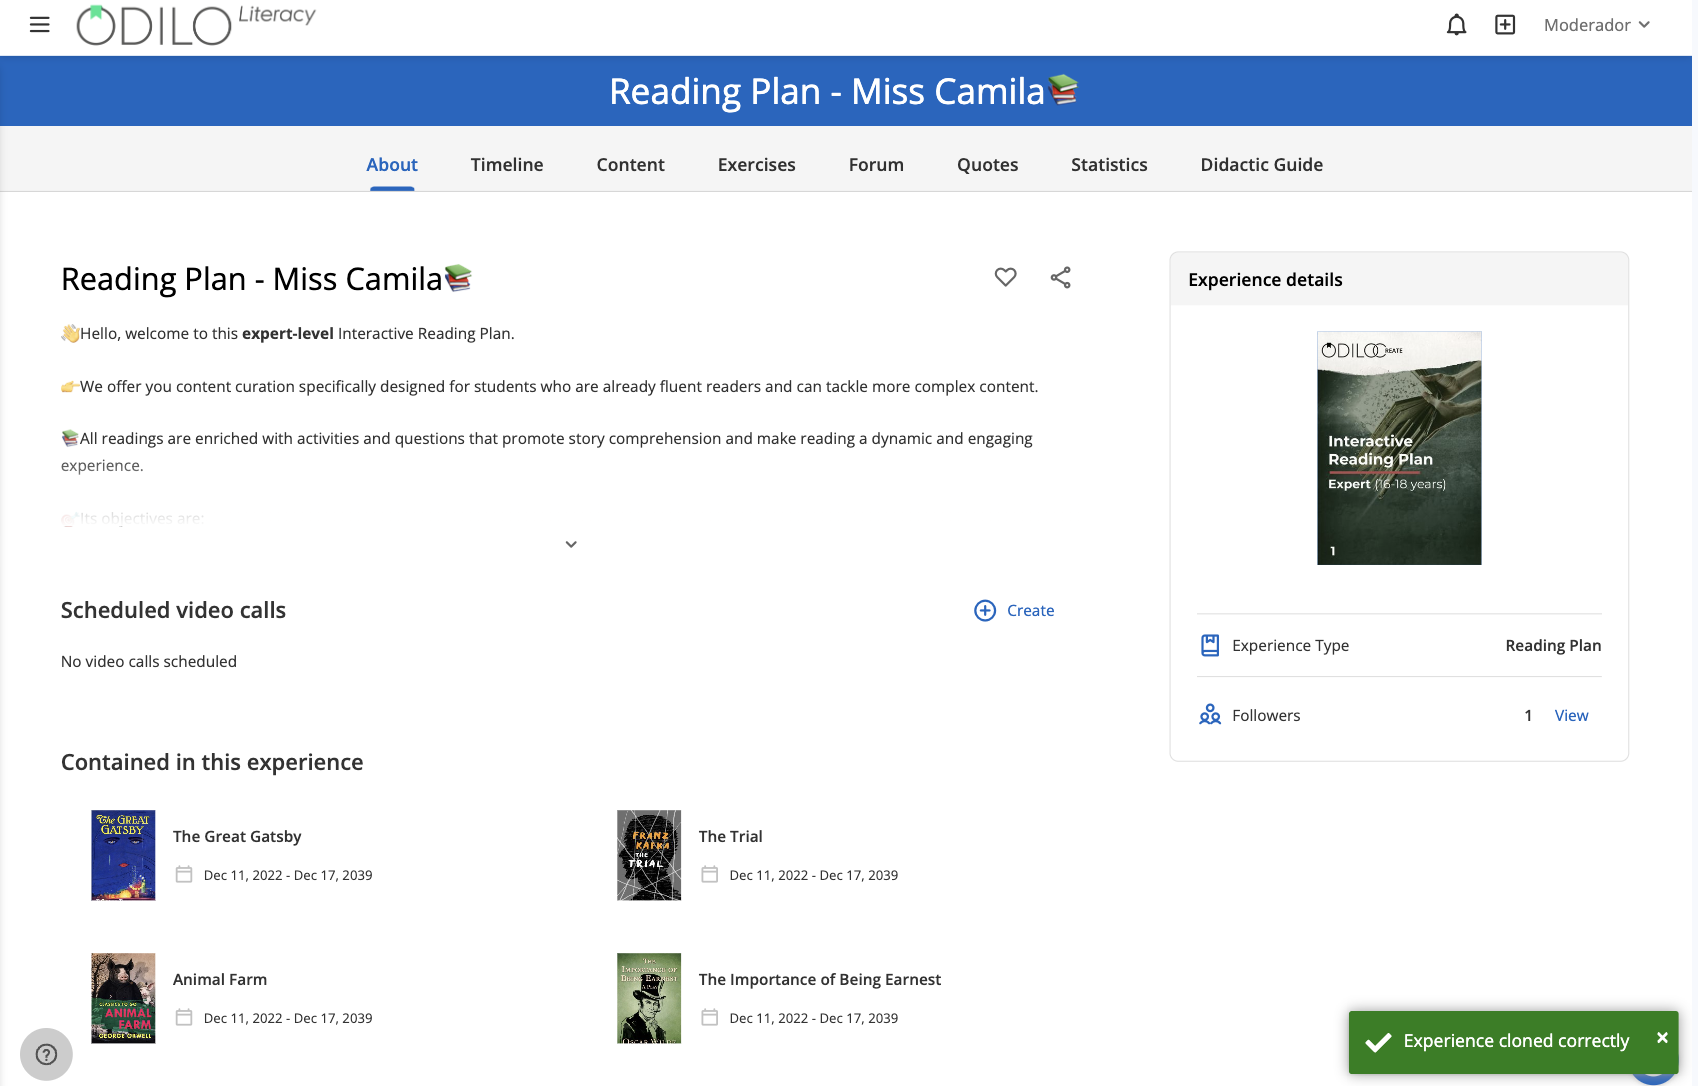
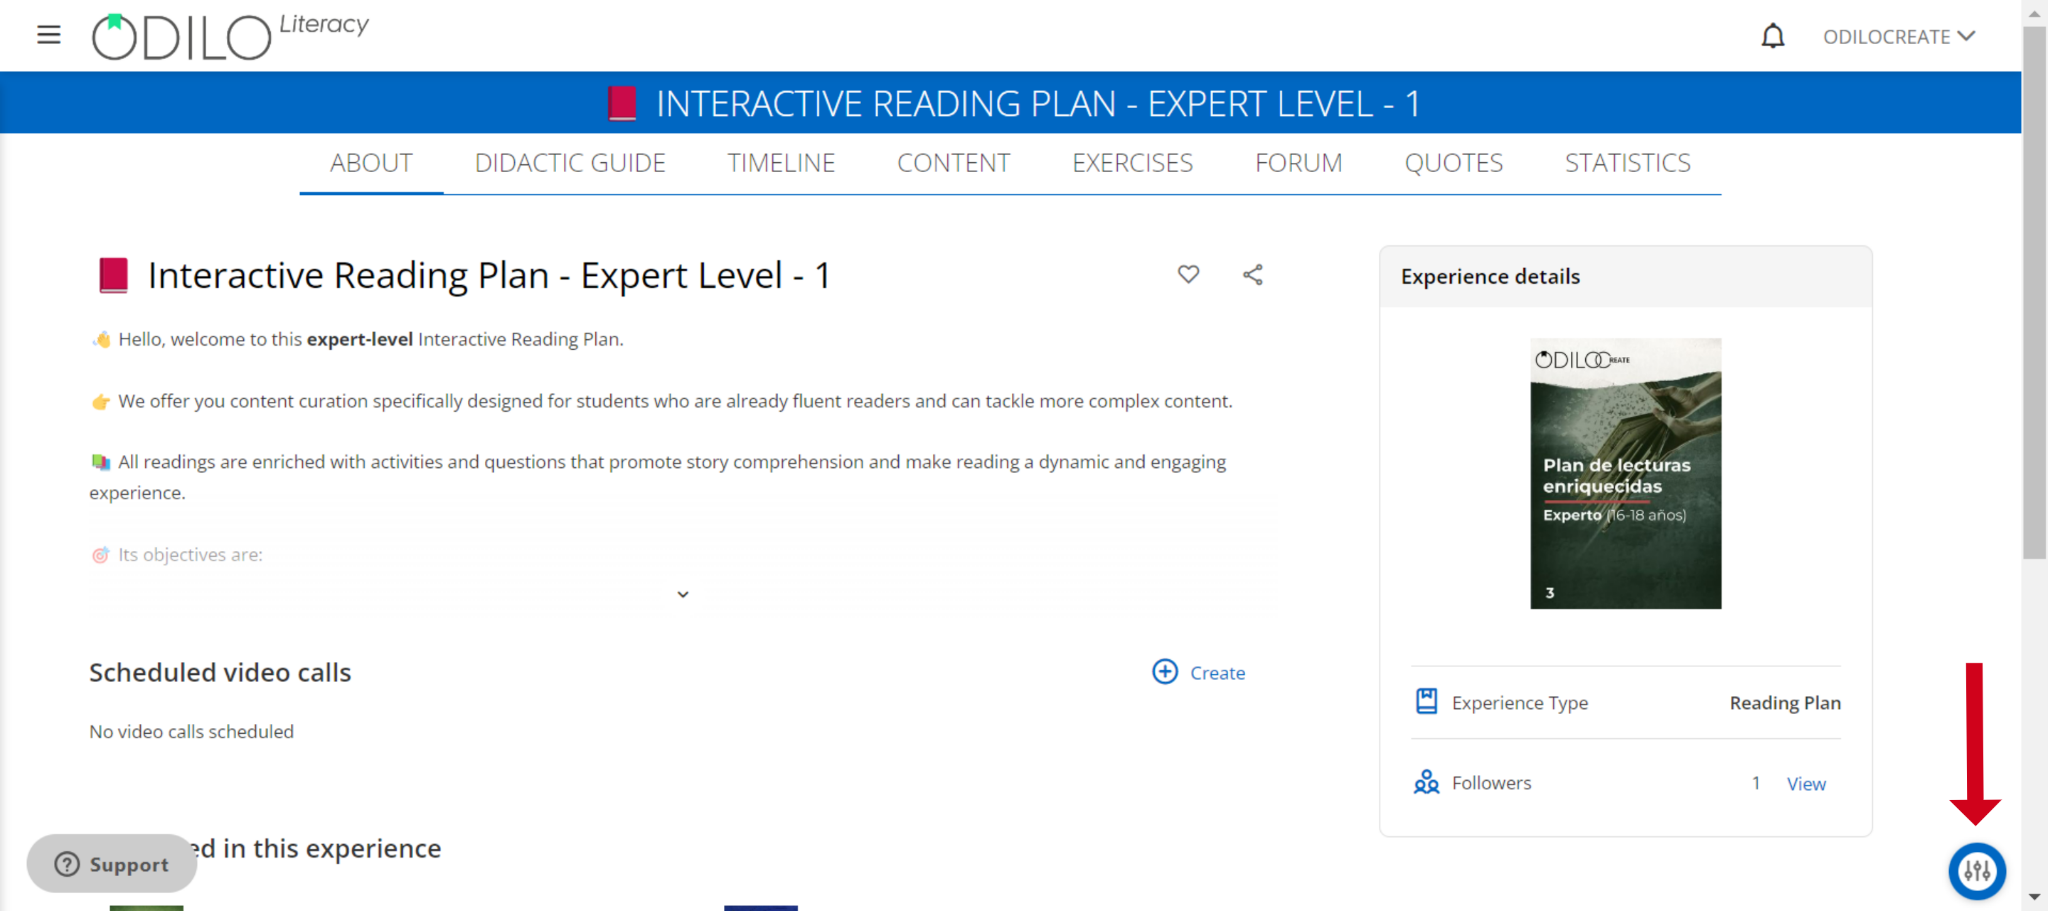
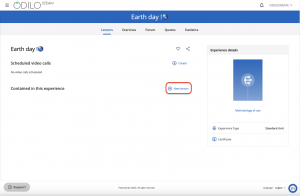
Important: If you want to edit the content of any of the tabs of your experience, go to the button located at the bottom right.
Create a literacy experience from scratch
Before you start
When choosing the content that you will use with the participants, keep 2 important aspects in mind:
1. Review the contents through the option “Preview” and avoid borrowing the content. This will help you not use your maximum loans in a short period of time.

2. Consider using resources that contain the “Simultaneous use” tag. This will allow this resource to be accessed by multiple users at the same time and will make the work of the participants easier.
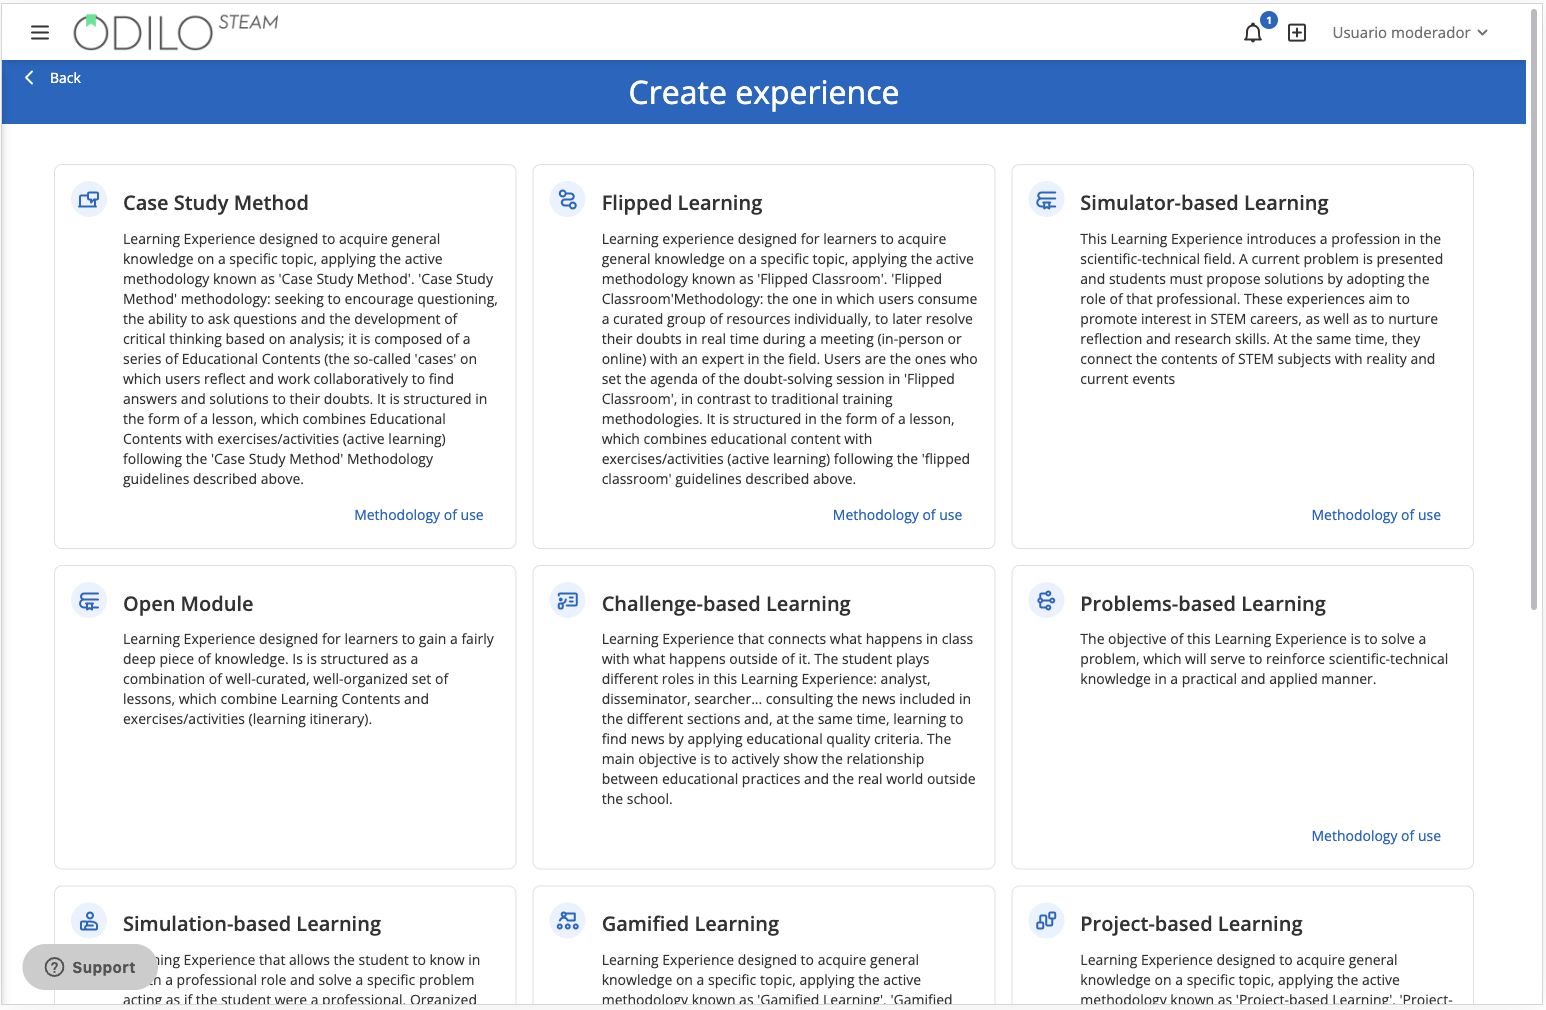
Click on “Create Learning Experience”, under the first carousel.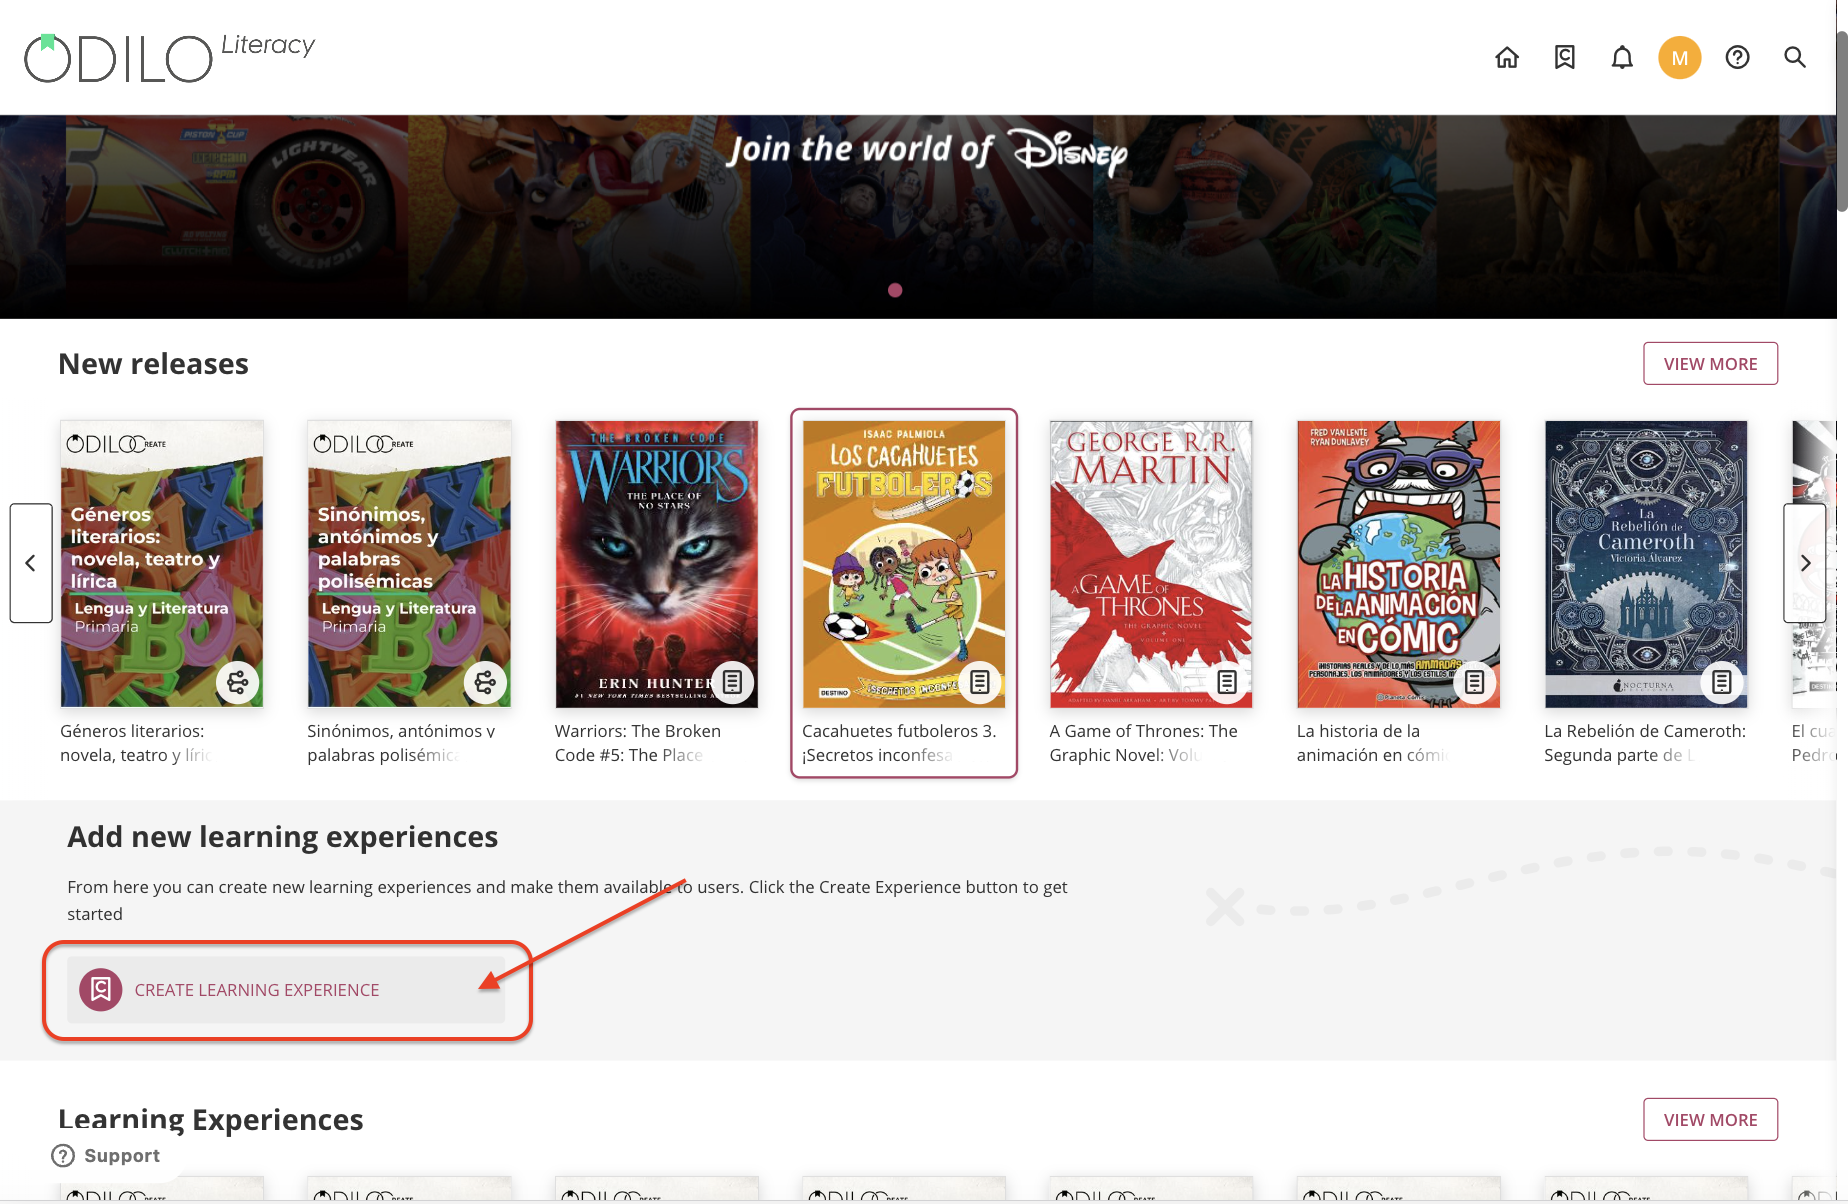
From here, choose the type of experience you want to create.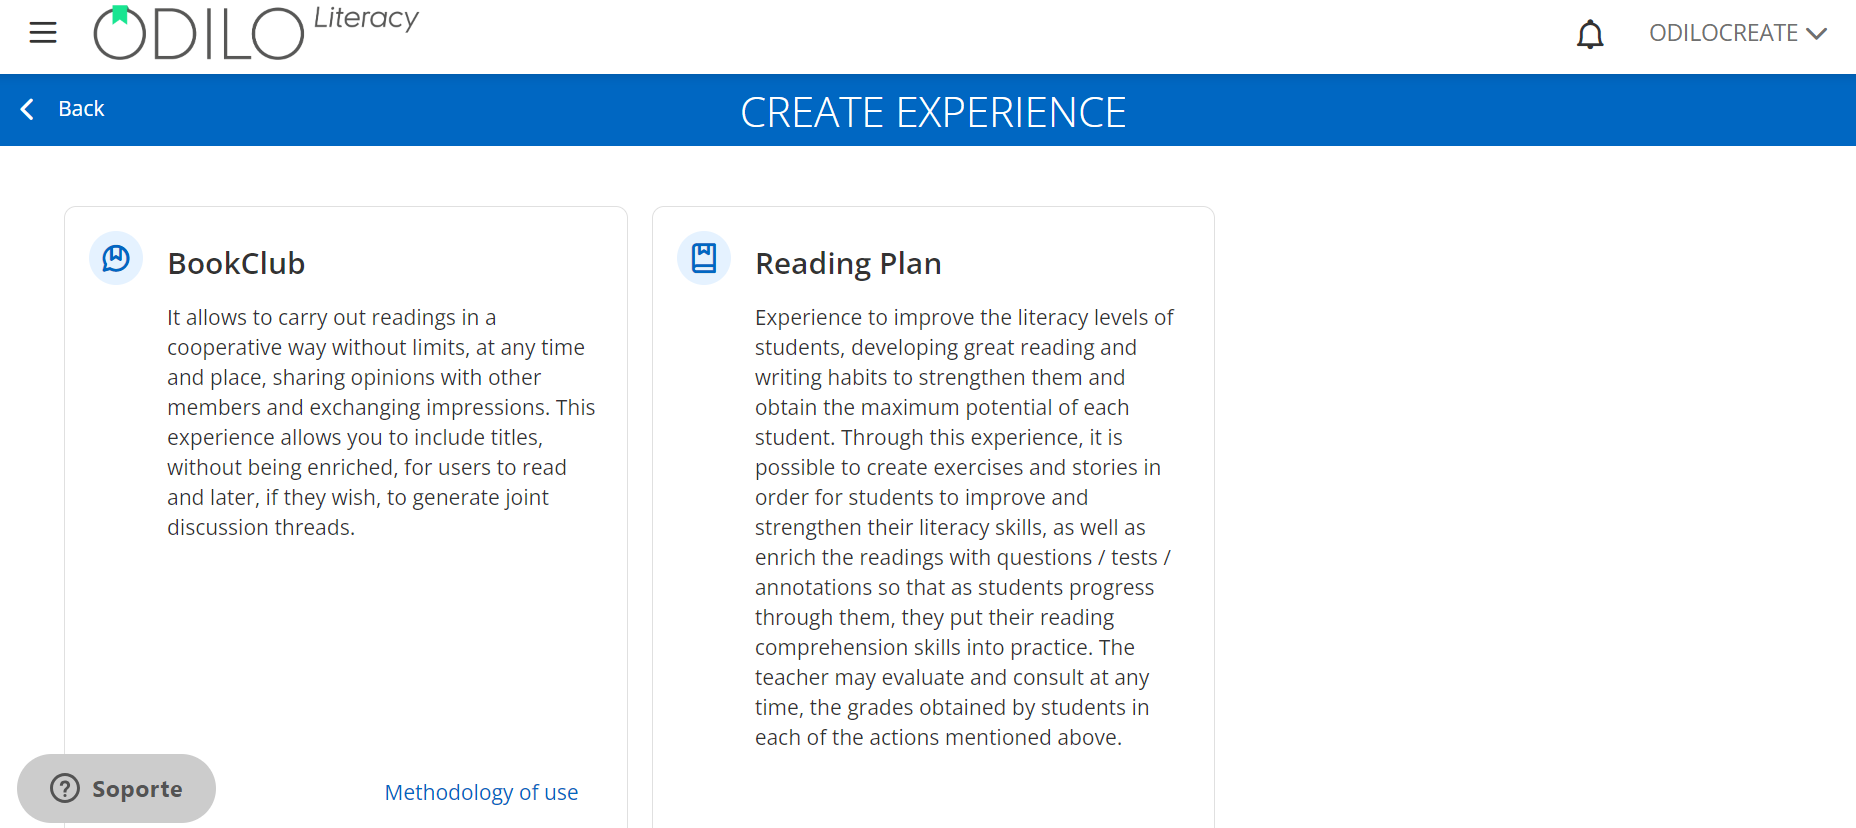
Select the option:“From scratch”.

Complete the information section as you would when cloning.
Information and settings
Name: It is recommended to name the experience precisely to be able to locate it quickly, for example Topic and/or subject, level and the name of the moderator/teacher, “Earth Day – Science 5th – Professor Mari Herrera”.
Cover: You can edit or add a cover image.
Description:You will be able to edit and add the information you want, as well as images, tables, videos or embedded gamification activities. In this section you can activate prior knowledge that helps participants in the process.
Duration: estimated time to carry out the experience.
Language: Select the language in which the experience is made.
Visibility: In private experiences, participants will need an invitation to access and statistics will be generated for only the group you want; In public ones, everyone will be able to follow and access it.
Mandatory: When designated mandatory, the student has to complete each section and its exercises in order.
Set end date: Enabling this option allows you to set start and end dates to limit access to participants before or after the date you set.
Chat: As a moderator you can activate or deactivate this tab whenever you want.
Share in repository: Activating this option will allow other moderators to clone your experience.
Experience Information Fields: optional extra data.
Short story (Exclusive Reading Plan): Activating this section allows all members of the experience, together, to create a short story according to the topic chosen by the teacher, following established participation turns.
Important: All fields are editable once the experience is cloned.
From this moment on, use the edit button to include content within each of the tabs that will appear under the title of the experience:
Add content
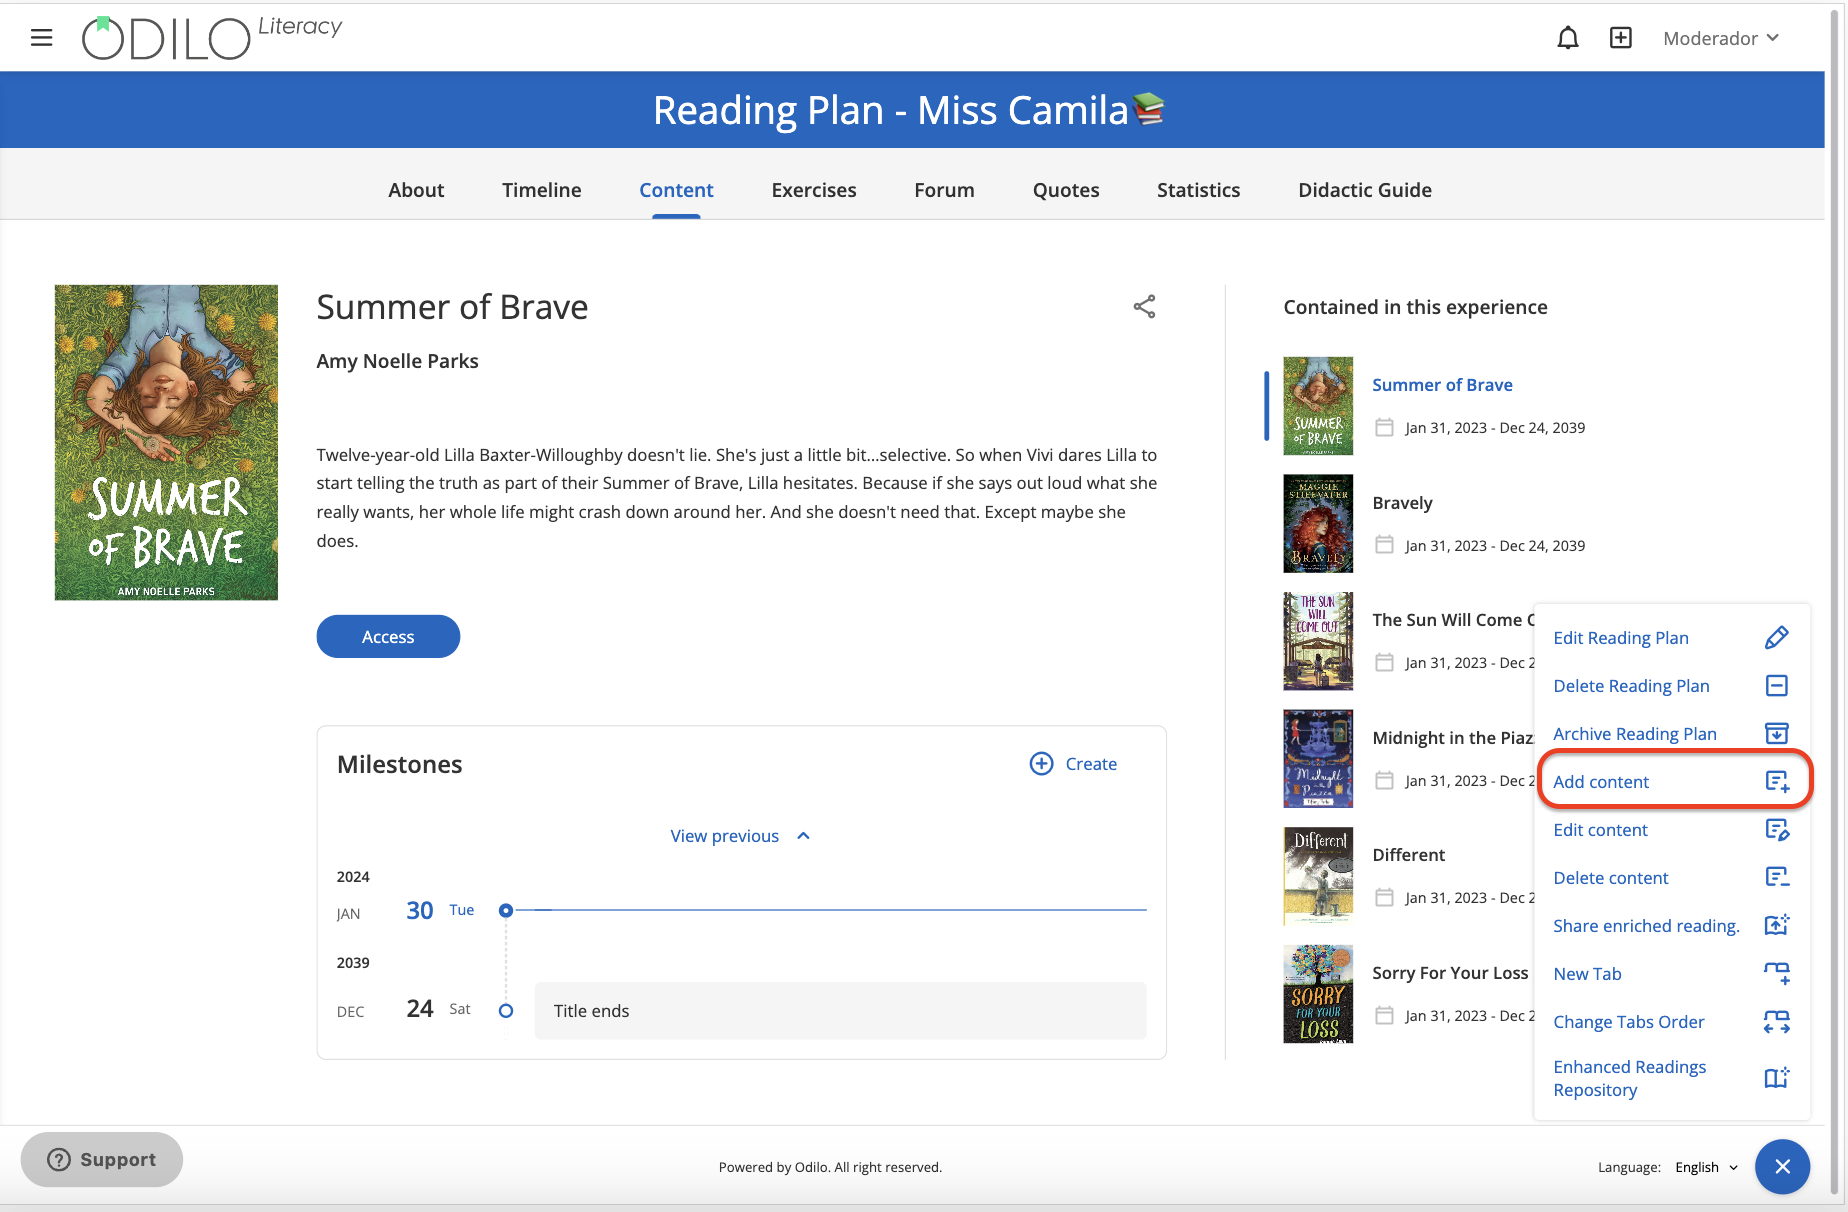
To include content, go to the content tab, and click on the “Add content” option located on the button in the lower right corner.
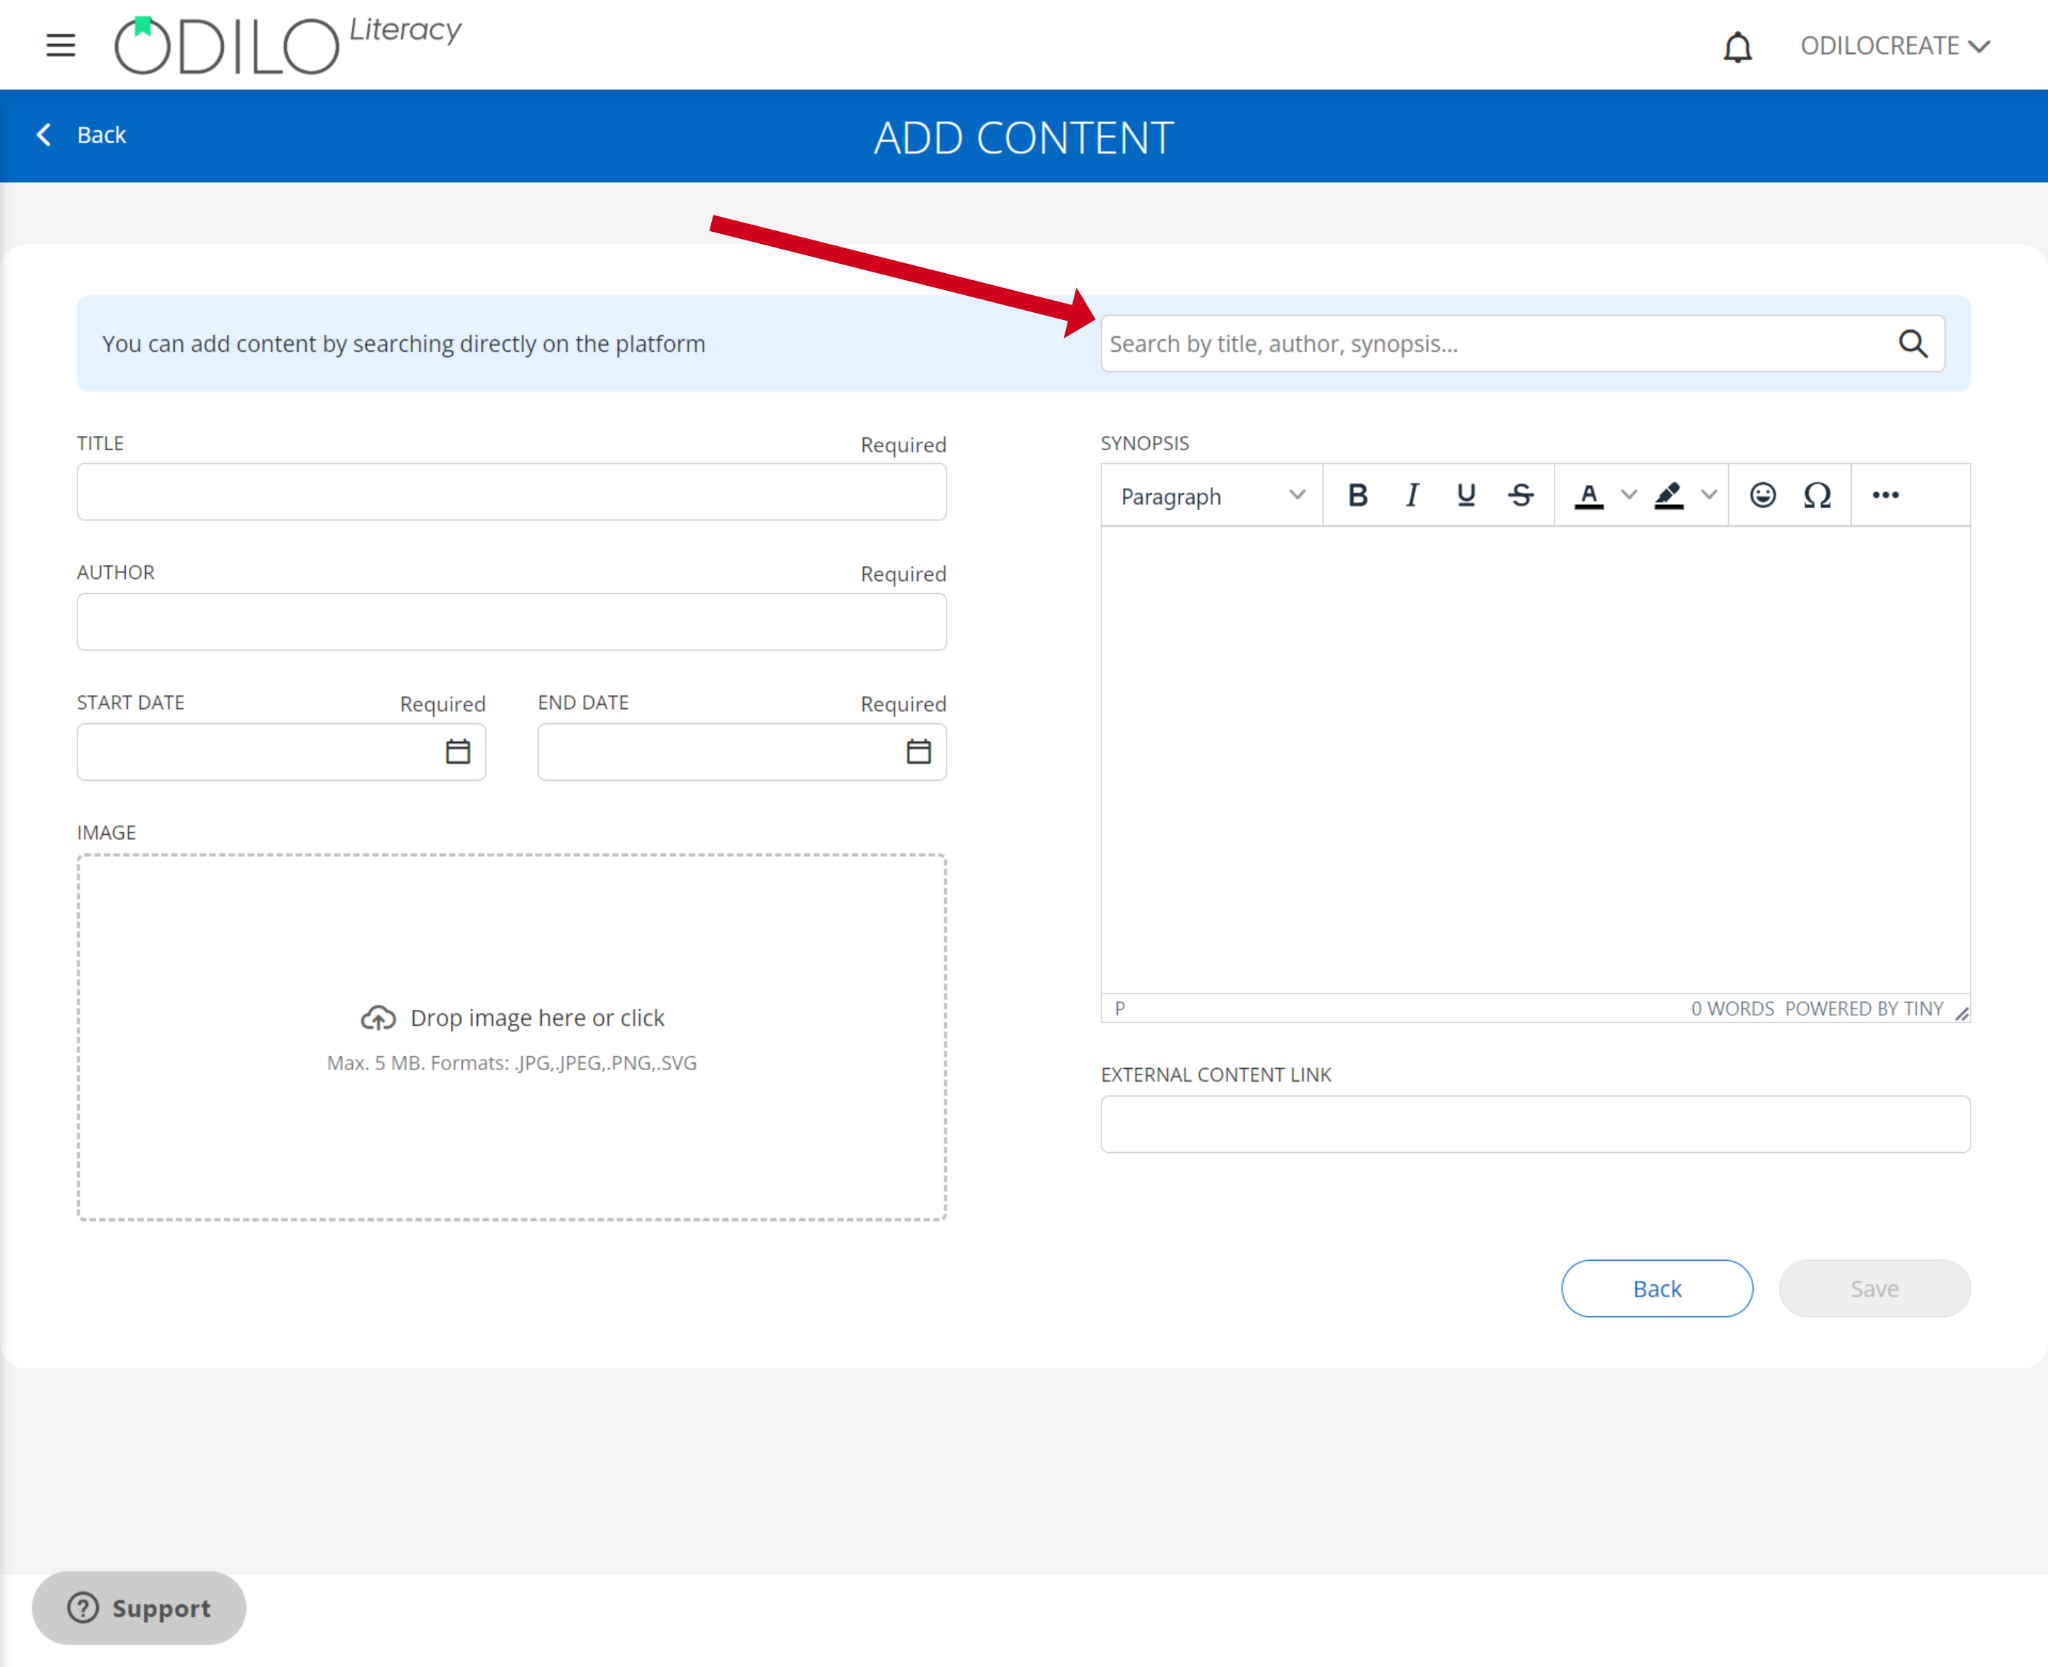
You can add content that is available in the learning ecosystem catalog or from an external link.
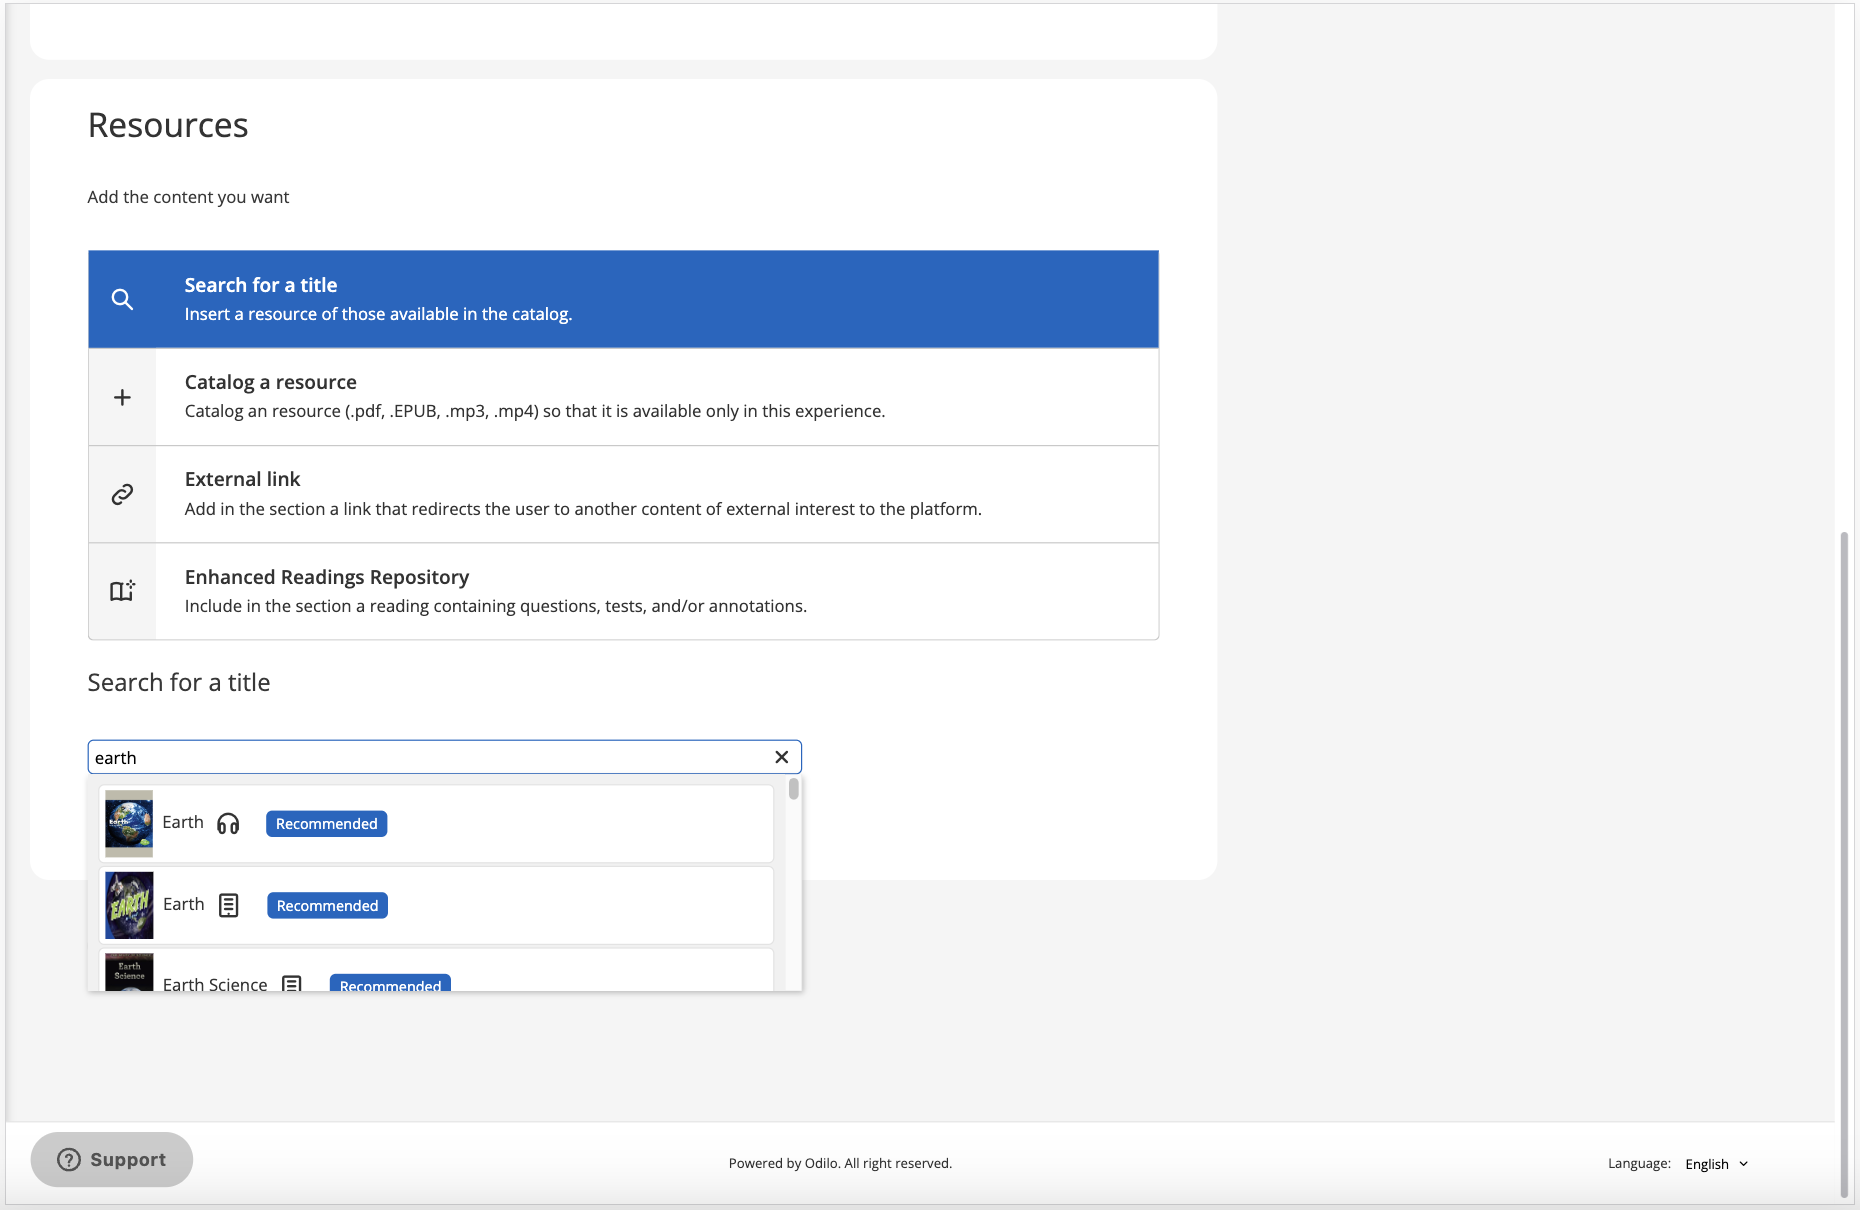
If you want to add content from the catalog, write the name of the content in the search bar and then choose from those that are marked as “Recommended”.
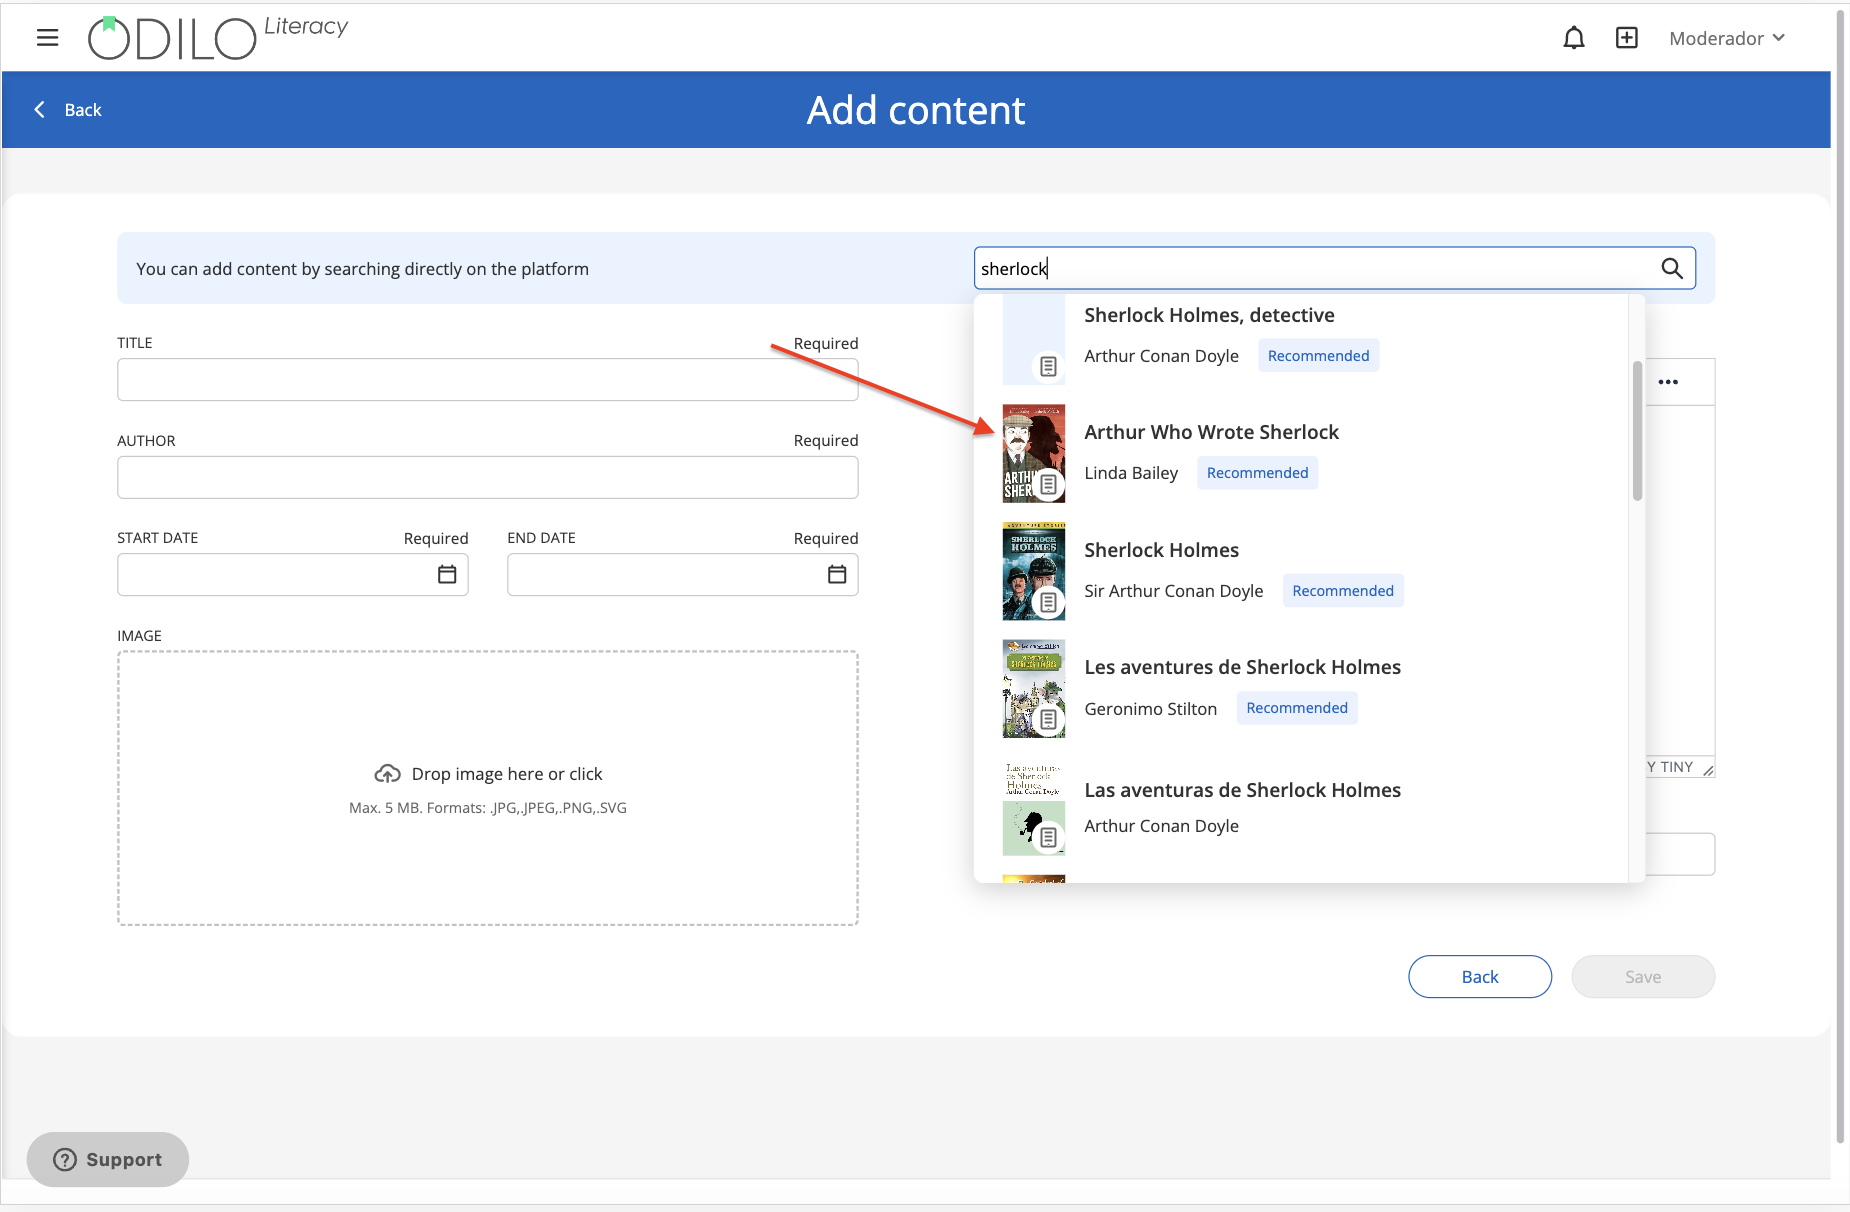
Once you have chosen it, the Learning Ecosystem will automatically fill in the fields: Title, Author, Description and Cover.
Select the start and end dates of this new content.

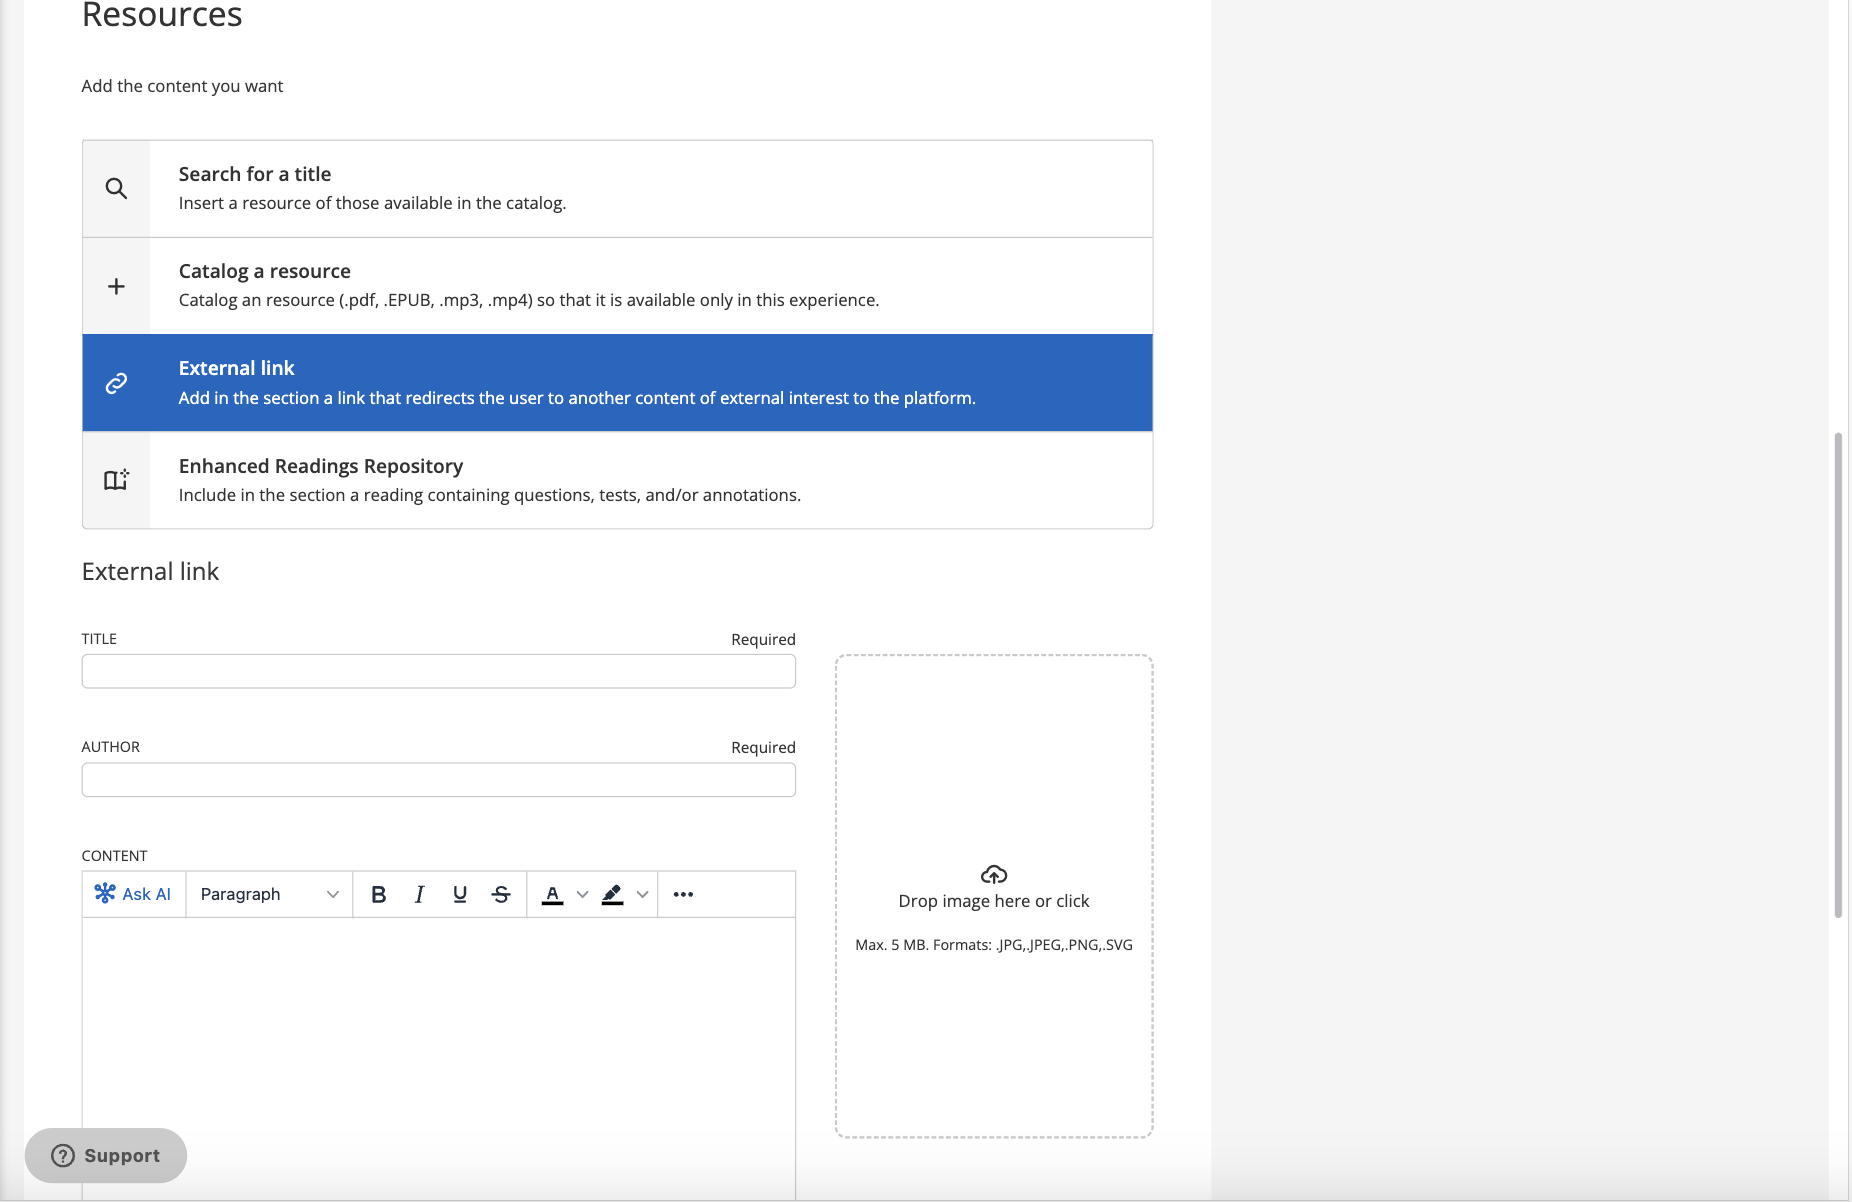
If you want to add your own content, share it through the URL from the “External content link”. For example:

As it is its own content, the sections: Title, Author, Description and Cover, will have to be completed manually.
Discover the complete route on the video below:
Create “Learning route” Experience quickly
You can see the complete route of this step in the following video:
Click the button “Create Learning Experience” which is located under the first carousel. Select the template you want (you will see a small description at the bottom). Then select the option “From repository”.

All the experiences available for cloning, from the selected format, will be shown below.

To perform a more precise search, you can filter by name, author, date or verified, by clicking on the filter button at the top right.

If you want to know the theme of the experience, you can click on its name to preview the content.
Select one of the options and click on the button “Clone”, which is located on the right.
From this moment on, you can start customizing it easily and quickly in just a few steps.
Complete the information tab with the required fields.
* When naming the experience, we suggest putting relevant information in the name so you can find it quickly if you want to clone, or review later. For example:
Topic, level and the name of the teacher “Accentuation – Unit 1 – Mari Herrera”.
The description will now be available. Edit anything you want from the text area.
Choose the range of dates in which this Experience will be active and click on “Save”.
Important: In these Learning Experiences you can enable the option of granting a certificate once the experience is completed and you can even configure the cut-off mark and the date it is issued.
Complete the details of your experience and click “Clone” . Remember that everything is editable once cloned.

Important: If you want to edit the content, click on the module you want to edit, access one of its sections and then click on the edit button ![]() located at the bottom right of your screen.
located at the bottom right of your screen.
Create a “Learning route” Experience from scratch
Before you start
When choosing the content that you will use with the participants, keep 2 important aspects in mind:
1. Review the contents through the option “Preview” and avoid borrowing the content. This will help you not use your maximum loans in a short time.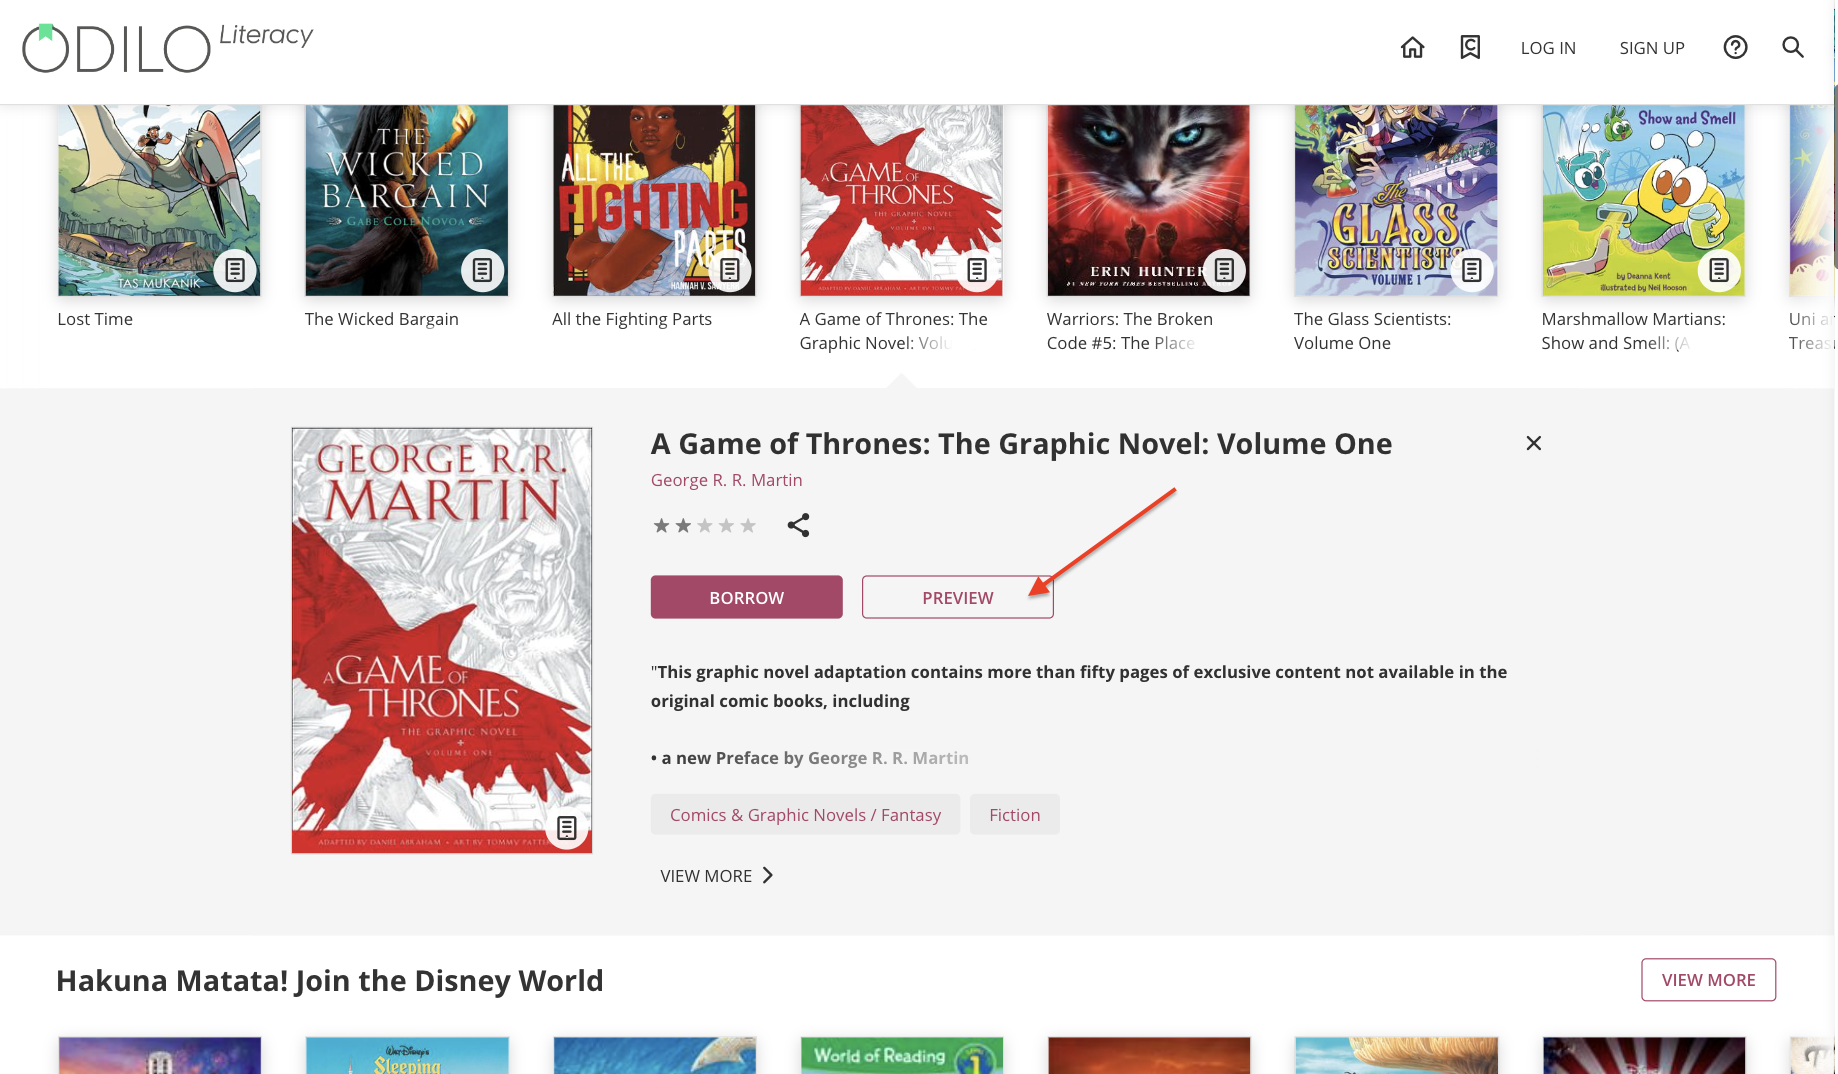
2. Consider using resources that contain the tag “Simultaneous use”. This will allow this resource to be accessed by multiple users at the same time and will make the work of the participants easier.
_____________________________________________________________________________________________________
To create a learning route, click “Create learning experience” under your first carousel.

Click on the template of your choice and then choose the option “From scratch”.

Set up your experience by filling out the information and then click “Save”.
Name: It is recommended to name the experience precisely to be able to locate it quickly, for example Topic and/or subject, level and the name of the moderator/teacher, “Earth Day – Science 5th – Professor Mari Herrera”.
Cover: You can add a cover image.
Description: You will be able to add the information you want, as well as images, tables, videos or embedded gamification activities.
Duration: Estimated time to carry out the experience.
Language: Select the language in which the experience is made.
Visibility: In private experiences, participants will need an invitation to access and statistics will be generated for only the group you want; In public ones, everyone will be able to follow and access it.
Mandatory: When designated mandatory, the student has to complete each section and its exercises in order.
Set end date: Enabling this option allows you to set start and end dates to limit access to participants before or after the date you set.
Chat: As a moderator you can activate or deactivate this tab whenever you want.
Share in repository: Activating this option will allow other moderators to clone your experience.
Certificate (Only for Standard Unit): Allows a certificate of completion to be granted to participants according to the criteria established in this section.
Experience Information Fields: optional extra data.
Important: All fields are editable once the experience is cloned.
Add lessons
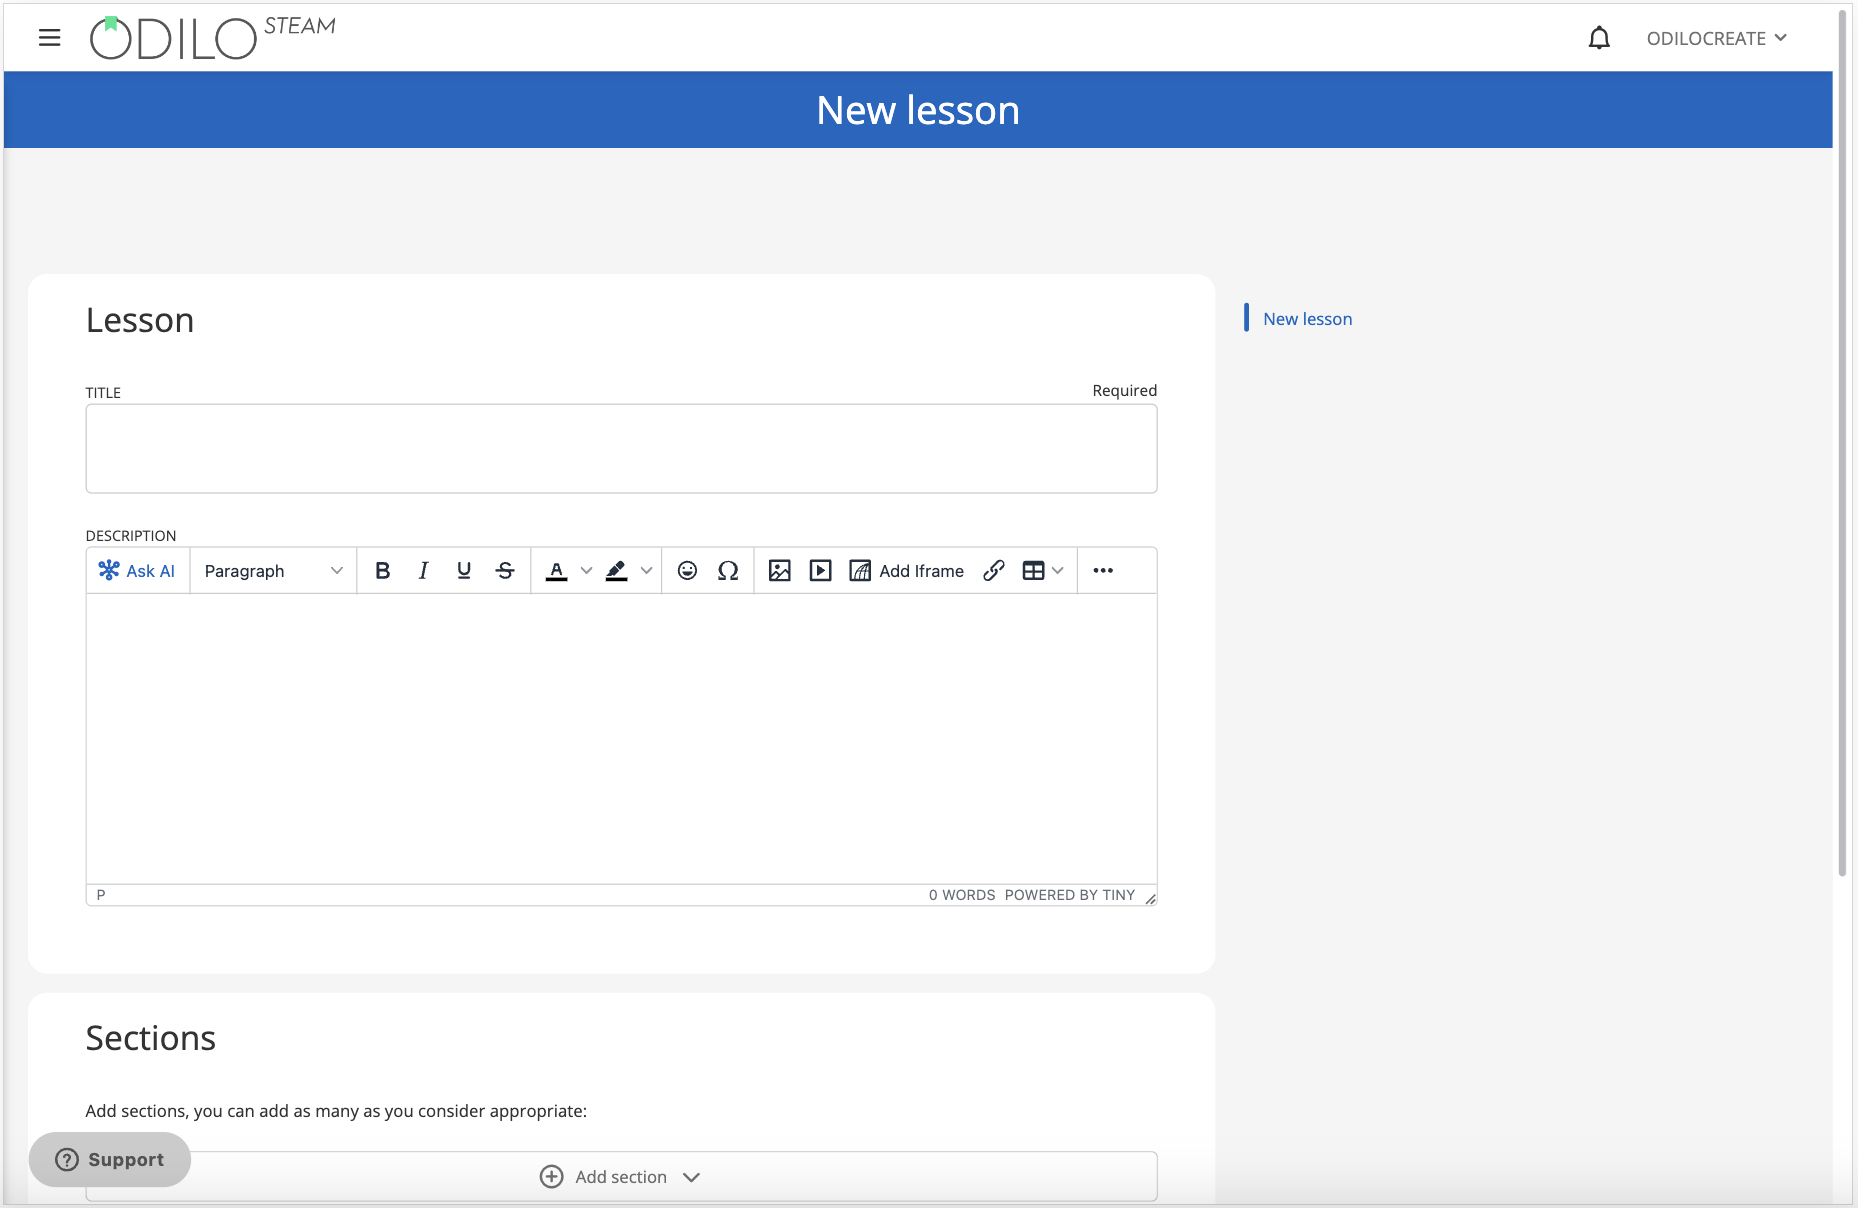
To add the first lesson, click the “New lesson” button, which you will find at the beginning of your Experience.
Add the name and description of your lesson and then configure the sections you want to add to your lesson.
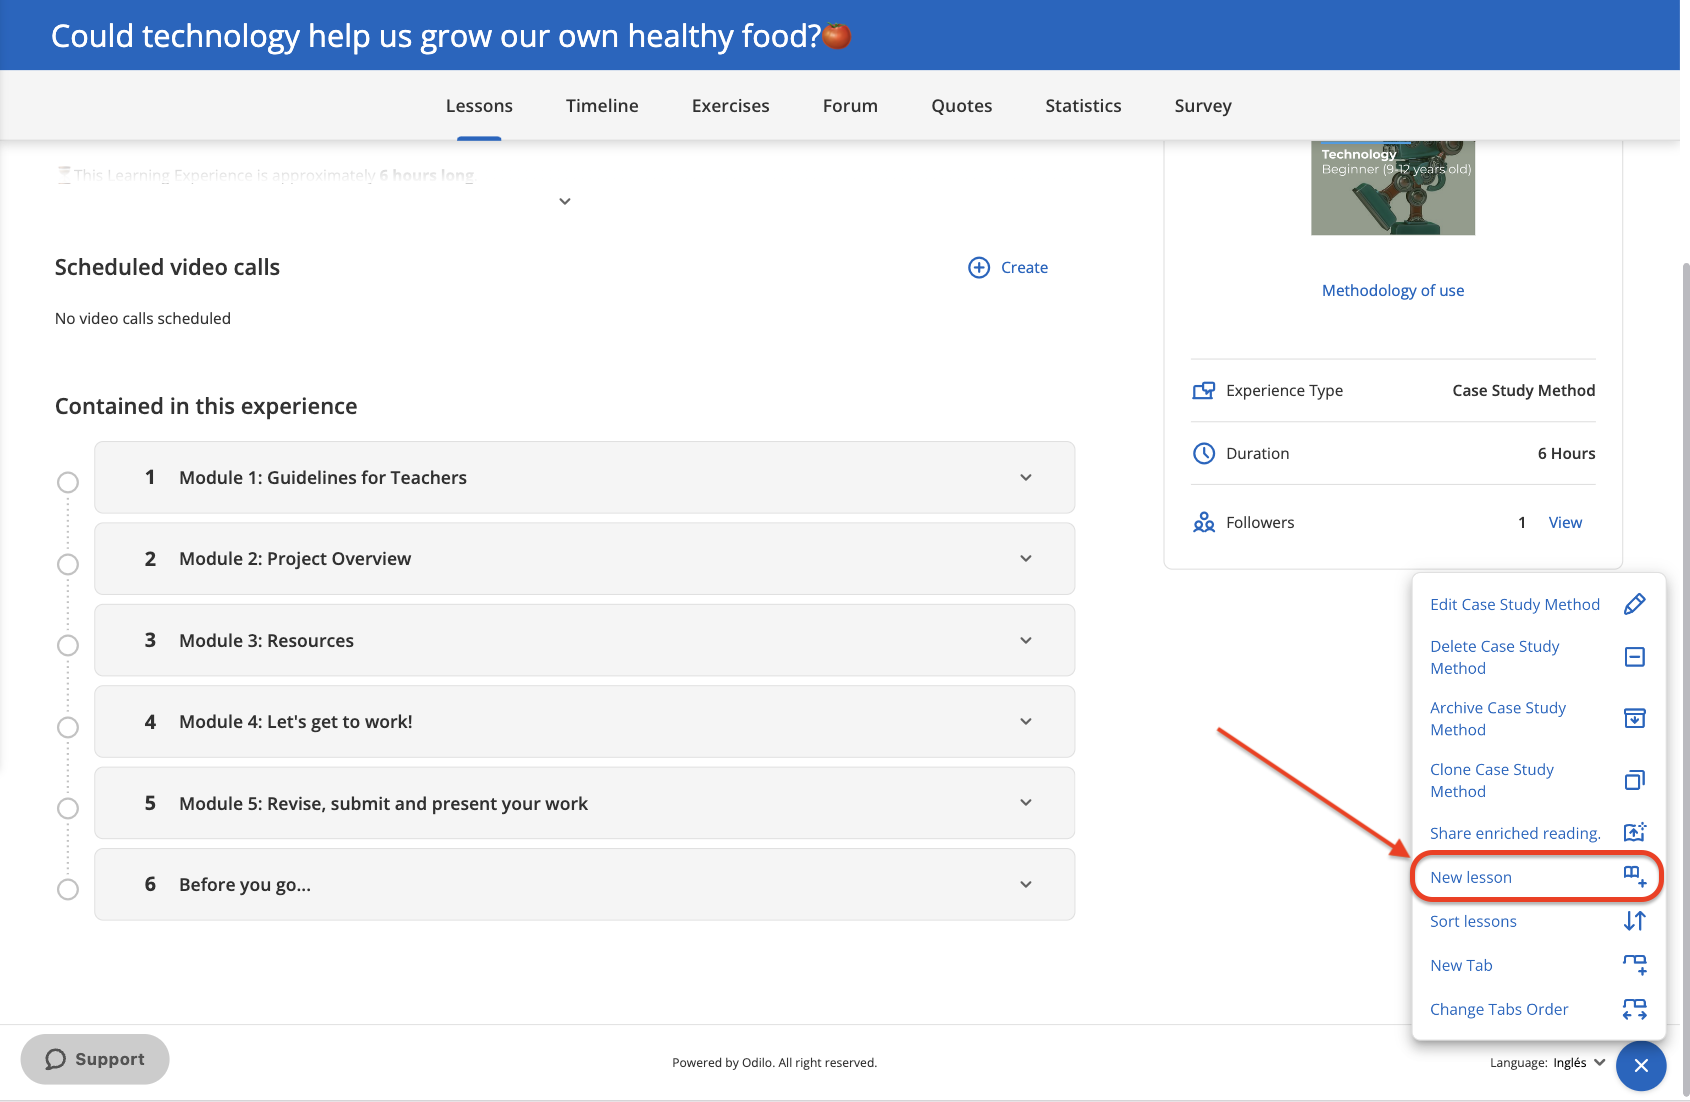
To continue adding lessons to your Learning Experience, click the edit button in the lower right corner and select the option “New lesson”.
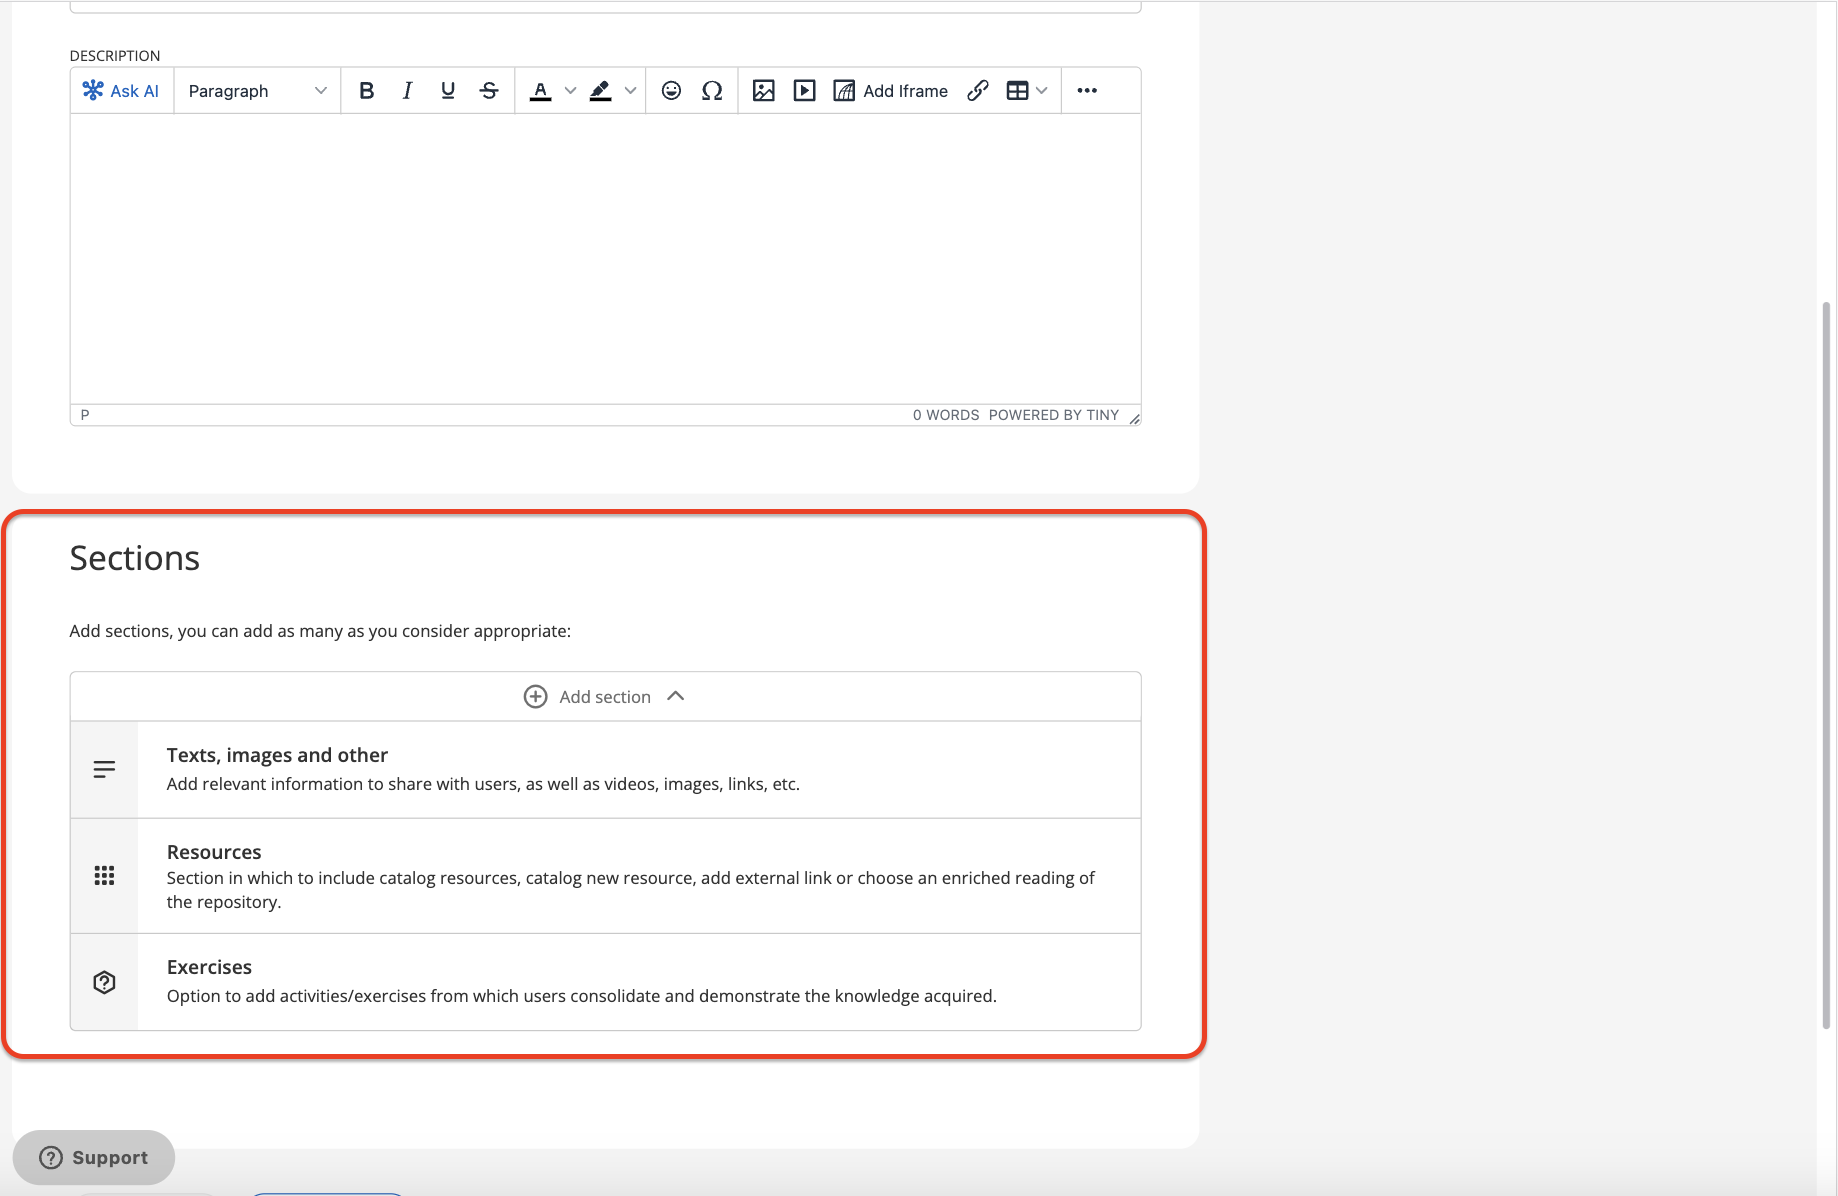
Type of sections
Within your lessons you can add different types of sections.
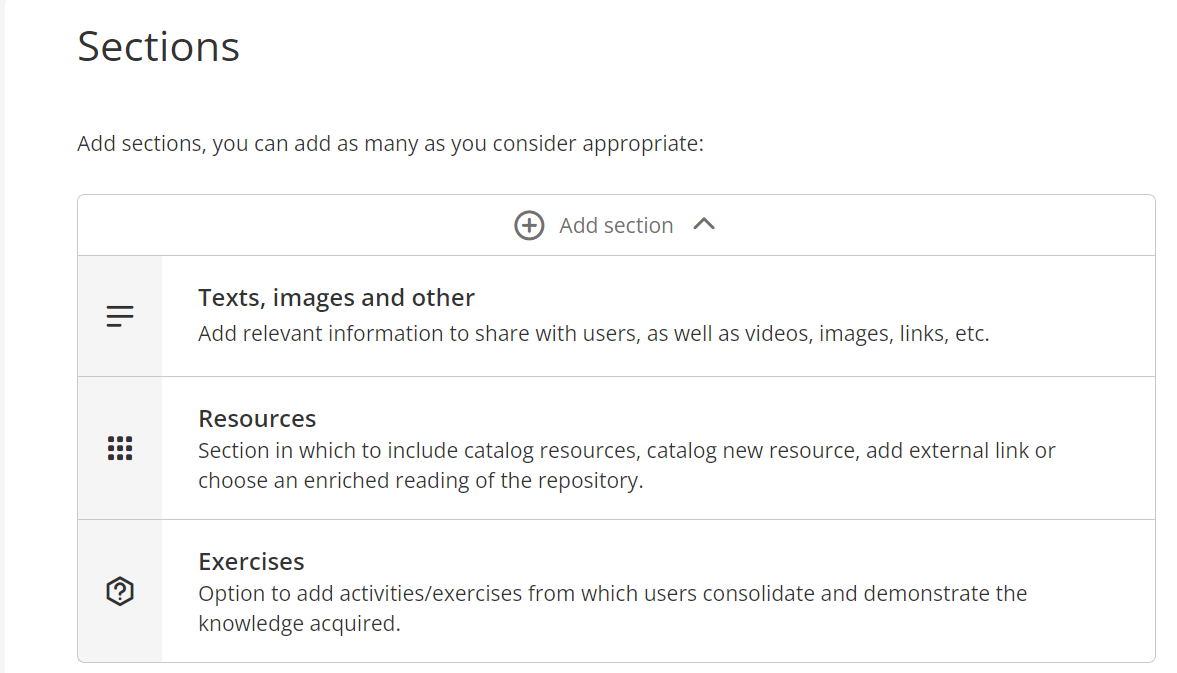
Text section
With this option, you can copy texts from other sources and paste them in this section. In addition to being able to add videos, gifs, images and encrypted links from external gamification pages such as Kahoot or Genially from the toolbar. (See section “Gamify your Learning Experiences”)
Select the option “Add text”. Add a title for this section and then include text within the description section.
When adding videos, participants will be able to play it directly from this section and will not be redirected to another platform.
To add the video to the text box, head to the tools menu at the top and click the video button ![]() . Then, simply enter the web address in the “Source” and save the changes.
. Then, simply enter the web address in the “Source” and save the changes.
Resources Section
Add a title and description to the resource section. Next, add the content you want by choosing from the following options:
- Search for a title: You can search for content from the ecosystem catalog by typing the name of the resource in the search bar. Next, choose the dates when that content will be available to participants.
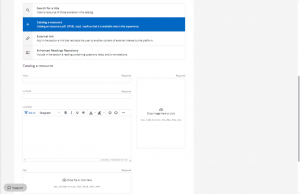
- Catalog a resource: You can upload your own content to the sections through this option. To do this, complete the information fields, title, author, synopsis and then search for the desired resource from your computer (supports pdf, mp3, mp4 formats). To save a cataloged resource, it is necessary to complete the required fields, such as name, author, cover and thus be able to save.
- External link: You can link to another website within your lessons. When you click on that option, complete the required information and then paste the desired link in the URL section. Through this action you can include any content such as an external web page, a blog, videos, etc. to enhance the lessons with your own content.
- Enhanced readings repository: With this option you can add already enhanced readings from the repository to your lesson. To do this, you can write the title of the content you want in the search bar and to be able to review these enhancements, you will have to click on the name of the resource, a pop-up window will show you the information related to said content.
In order to include this material, click “Add” and include the dates it will be available in the lesson.
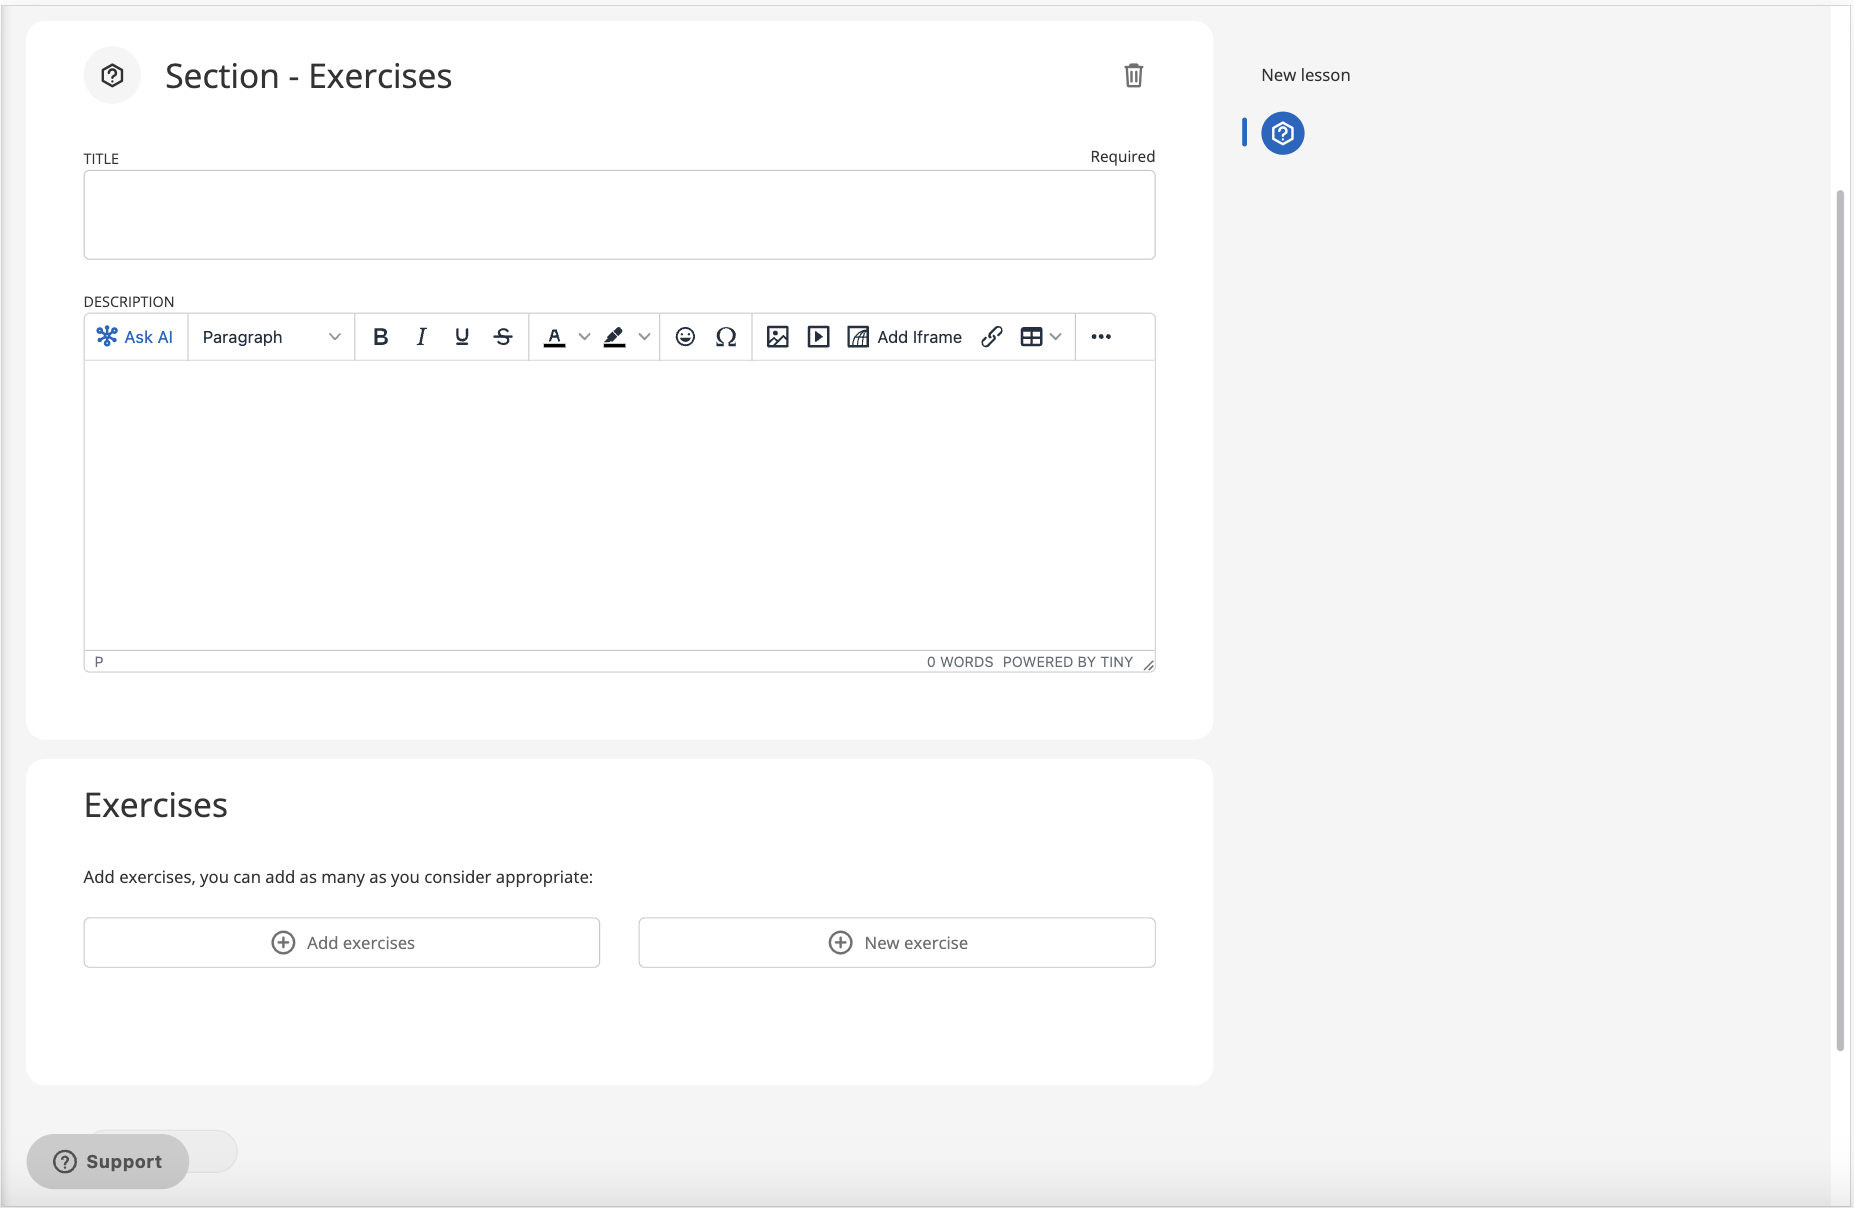
Exercise section
To add exercises to your lesson you will need to create an exercise section, add a brief description and title, and then click the plus sign to include an exercise.
You can add exercises from 2 different areas:
“Add exercises”: This section will allow you to add exercises that have been previously created by you in the exercise bank in its corresponding tab.
“New exercise”: This section will allow you to create an exercise from scratch that will be added directly to your repository.
By adding exercises within the lesson you can choose between different types of questions with both automatic and manual correction.
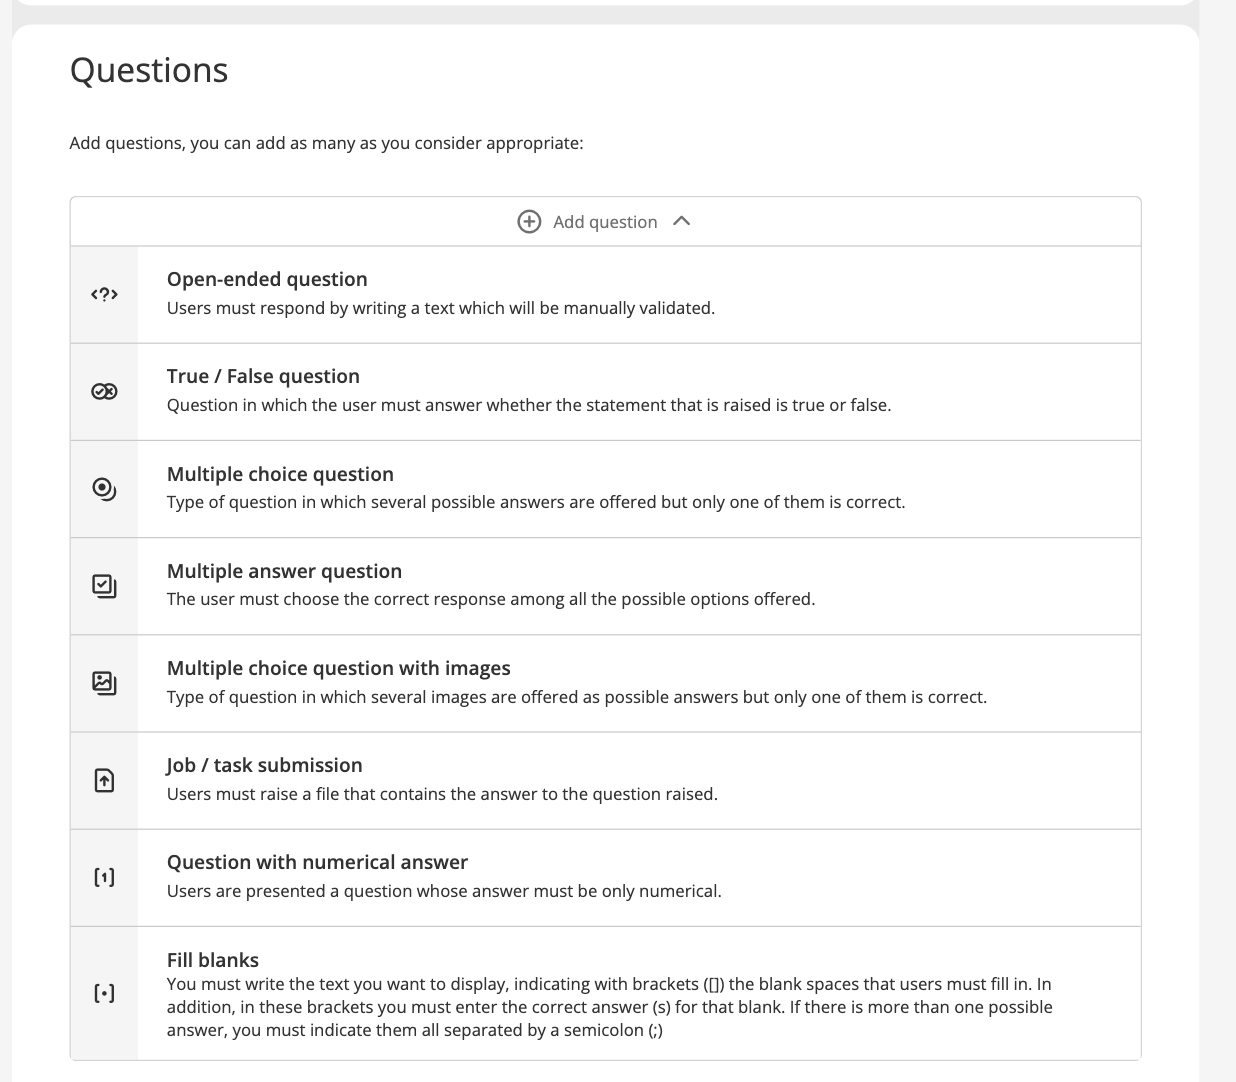
As a moderator, you will have access to manual correction, only, of questions classified as “Job/Task submission”, “Open-ended question” and “Question with numerical answer”, later, you can review the responses of the participants and enter their grade from the “Grades”. The rest of the exercises will be graded automatically according to the answers you have established.
Important: If the exercise has been structured with more than 1 attempt, participants need to make the final submission by pressing the button “Submit” found within the exercise, otherwise, your answer will not be reflected in grades.
